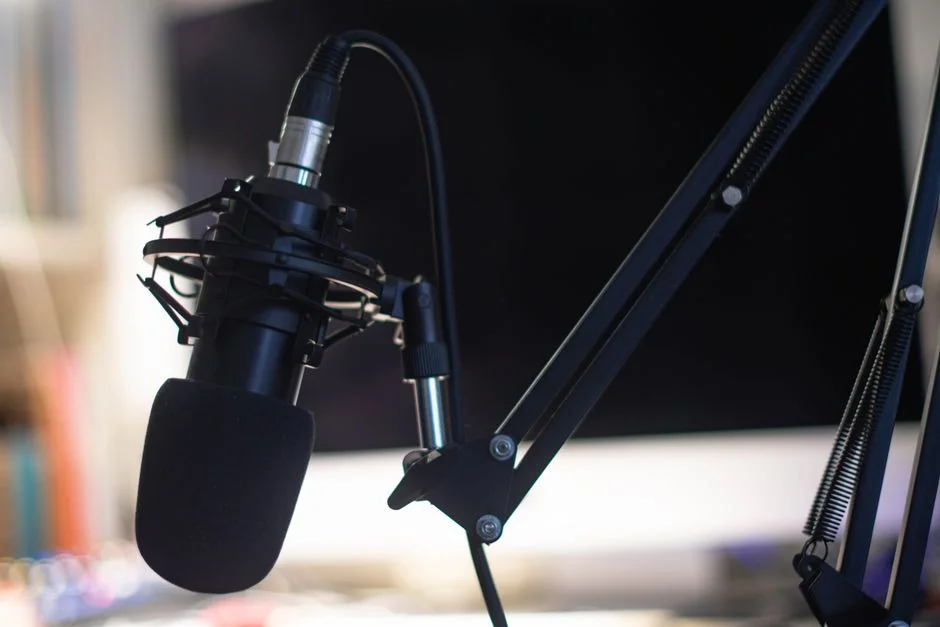
A well-chosen microphone and boom arm combination can be the difference between audio that feels distant and audio that feels present, controlled, and professional. The main advantage comes from positioning: a mic sounds best when it is placed at an optimal distance and angle from your mouth, and a boom arm makes that placement repeatable every time you sit down. Without a boom, many people rely on desk stands or improvised stacks of books, which often push the microphone too low, too far, or directly in line with keyboard noise. With a boom mount, you can float the mic at mouth level, slightly off-axis to reduce plosives, and keep it out of the way of your screen and hands. That freedom is not only about convenience; it is about maintaining consistent tone. When you drift closer to the mic, bass increases; when you lean away, the voice thins. A stable arm helps you stay in the “sweet spot,” which improves clarity and reduces the need for heavy processing.
Table of Contents
- My Personal Experience
- Why a Microphone and Boom Arm Setup Changes the Way You Sound
- Choosing the Right Microphone Type for a Boom Arm
- Boom Arm Styles: Desk Clamp, Grommet, Low-Profile, and Studio Arms
- Load Capacity, Tension, and Stability: Avoiding Sag and Drift
- Placement Techniques: Distance, Angle, and Consistency for Clean Speech
- Desk Noise, Vibration, and Shock Mounts: Making the Arm Work for You
- Cable Management and Clean Aesthetics Without Sacrificing Function
- Expert Insight
- USB vs XLR Workflows with a Boom Arm: Practical Differences
- Streaming, Podcasting, and Remote Work: Tailoring the Setup to Your Use Case
- Common Mistakes: Over-tightening, Bad Angles, and No Room Treatment
- Maintenance, Upgrades, and Long-Term Value of a Boom-Mounted Microphone
- Putting It All Together: A Practical Checklist for Daily Use
- Watch the demonstration video
- Frequently Asked Questions
- Trusted External Sources
My Personal Experience
I finally stopped balancing my microphone on a stack of books and bought a boom arm, and it made a bigger difference than I expected. The first night I set it up, I realized how much desk noise I’d been accidentally recording—every keyboard tap and little bump traveled straight into the mic before. With the boom arm, I could float the microphone right in front of my mouth, keep it off the desk, and push it out of the way when I wasn’t using it. It took a bit of trial and error to get the tension right so it wouldn’t slowly droop mid-call, but once I tightened the joints and routed the cable along the arm, my audio sounded cleaner and my setup felt way less cluttered. If you’re looking for microphone and boom arm, this is your best choice.
Why a Microphone and Boom Arm Setup Changes the Way You Sound
A well-chosen microphone and boom arm combination can be the difference between audio that feels distant and audio that feels present, controlled, and professional. The main advantage comes from positioning: a mic sounds best when it is placed at an optimal distance and angle from your mouth, and a boom arm makes that placement repeatable every time you sit down. Without a boom, many people rely on desk stands or improvised stacks of books, which often push the microphone too low, too far, or directly in line with keyboard noise. With a boom mount, you can float the mic at mouth level, slightly off-axis to reduce plosives, and keep it out of the way of your screen and hands. That freedom is not only about convenience; it is about maintaining consistent tone. When you drift closer to the mic, bass increases; when you lean away, the voice thins. A stable arm helps you stay in the “sweet spot,” which improves clarity and reduces the need for heavy processing.

Another reason a microphone and boom arm pairing matters is isolation from vibrations and clutter. Desks transmit energy: keystrokes, mouse clicks, and even the subtle thump of someone walking nearby can travel into the stand and up into the mic. A boom arm that clamps to the desk edge and suspends the microphone can reduce how much of that energy reaches your capsule, especially when combined with a shock mount. It also frees valuable desk space, letting you place your keyboard and mouse more comfortably and maintain better posture. For streamers, podcasters, remote workers, and voiceover talent, comfort translates to consistency: sessions are longer, fatigue is lower, and performance improves. Over time, a reliable mic arm becomes part of your workflow, like a good chair or monitor, because it solves a practical problem while subtly improving the sound your audience hears.
Choosing the Right Microphone Type for a Boom Arm
The first decision in a microphone and boom arm system is the microphone itself, because the mic’s weight, pickup pattern, and connectivity influence which arm and accessories will work best. Dynamic microphones are popular for streaming and spoken voice in untreated rooms because they tend to reject more background noise and room reflections. Many dynamic models also handle loud voices without harshness, which can be helpful if you get animated on calls or during live sessions. Condenser microphones, by contrast, are typically more sensitive and can capture more detail, air, and nuance, but they also reveal room echo, computer fan noise, and distant sounds. That sensitivity can be a strength in a treated environment, where the added detail makes speech sound polished and intimate. If your space is not acoustically controlled, a condenser may require more careful placement and gain staging on your boom arm to avoid pulling in unwanted ambience.
Connectivity also matters when selecting a microphone and boom arm solution. USB microphones are simple and convenient, with built-in converters and often built-in monitoring. They are excellent for video calls, beginner podcasting, and quick content creation. XLR microphones require an audio interface or mixer, but they offer more flexibility, better upgrade paths, and often better control over gain and noise. The choice affects how you route cables along the boom: USB cables can be thicker and less flexible, while XLR cables are designed for stage and studio use and typically manage movement well. Weight is another practical concern. Some broadcast-style dynamic microphones are heavy, especially with a shock mount and pop filter attached. Not every arm can hold that load without drooping. Before you buy, check the mic’s weight and the arm’s rated capacity. A stable boom arm should hold position without constant tightening, and it should not sag when you adjust it. When the microphone matches the arm’s capacity, you get smooth movement and reliable placement, which is the entire point of investing in a boom-mounted setup.
Boom Arm Styles: Desk Clamp, Grommet, Low-Profile, and Studio Arms
Not every microphone and boom arm arrangement fits every desk, and the arm style you choose affects both usability and aesthetics. The most common option is a desk clamp boom arm, which attaches to the edge of a desk with a C-clamp. This is versatile and easy to install, but it requires a desk edge that is accessible and sturdy. If your desk has a thick lip, a beveled edge, or a fragile veneer, you may need to add a small reinforcement plate to distribute pressure and avoid damage. A grommet mount is another approach, using a drilled hole in the desk to anchor the boom. It looks clean and can be more stable, but it is not ideal for renters or anyone who wants a non-permanent setup. Some creators prefer a low-profile arm that stays below the monitor line and swings in from the side, keeping the camera view unobstructed while maintaining close mic placement.
Studio-style boom arms, including larger articulated arms and overhead booms, are designed for more complex spaces where multiple mics or instruments are involved. For a typical home office, the priorities are smooth articulation, quiet joints, and enough reach to place the microphone at your mouth without forcing you to lean forward. Low-profile arms are excellent for minimal visual clutter, but they can limit vertical adjustment, which matters if you switch between sitting and standing. Traditional “broadcast” arms offer a wider range of motion and can be positioned above, below, or to the side, but they may appear in frame if you shoot video. When planning your microphone and boom arm layout, consider where your monitor sits, how far you are from the desk, and whether you need to move the mic out of the way frequently. If you often push your mic aside to eat, type, or draw, choose an arm with a long reach and consistent tension. If you rarely move it, a shorter, stiffer arm can feel more solid. The best style is the one that supports your daily routine without becoming a distraction.
Load Capacity, Tension, and Stability: Avoiding Sag and Drift
One of the biggest frustrations with a microphone and boom arm setup is sagging: the arm slowly droops under the microphone’s weight, forcing you to retighten knobs or re-balance springs. Load capacity is the spec that prevents this, but it is often misunderstood. The quoted capacity typically assumes the mic is mounted near the end of the arm, which creates maximum leverage, and it may not account for the added weight of a shock mount, pop filter, or inline preamp. A heavy dynamic mic with a metal shock mount can push the system beyond what a budget arm can hold. When the arm is overloaded, you may hear creaks during movement, and the mic can drift during a take. That drift changes your distance to the capsule, altering tone and level mid-sentence, which is difficult to fix in post without artifacts.

Tension systems vary. Some arms use external springs, which are easy to adjust and often handle heavier loads, but they can look busier and may resonate if poorly built. Others use internal springs for a cleaner appearance and quieter operation. High-quality arms allow fine tension adjustment so the microphone stays exactly where you put it, whether you angle it upward from below or bring it down from above. Stability also depends on the base: a clamp that slips or a grommet that wiggles will transfer movement into the mic. If you want a dependable microphone and boom arm pairing, choose an arm with solid metal construction, smooth bearings, and a clamp that grips securely without requiring excessive force. Adding a shock mount can further reduce vibration, but it should not be used to compensate for a weak arm. The goal is a system that feels effortless: you reposition the microphone with one hand, it stays put, and it remains quiet while you work.
Placement Techniques: Distance, Angle, and Consistency for Clean Speech
Even the best microphone and boom arm gear will sound mediocre if placement is random. For spoken voice, a common starting point is 4 to 8 inches from the mouth, depending on the mic type and how much proximity effect you want. Dynamic microphones often benefit from being a bit closer, while condensers can work well slightly farther back. The boom arm makes it easy to set a repeatable distance: you can align the mic with your upper lip or the corner of your mouth and keep it there. Angle matters as much as distance. Pointing the microphone directly at your mouth can increase plosives and harsh bursts of air. A slight off-axis angle—aiming at the corner of your mouth or positioning the mic just below lip level—can reduce popping while preserving clarity. If you use a pop filter or foam windscreen, you can get closer without explosive consonants, but you still want to avoid breathing directly onto the capsule.
Consistency is the hidden advantage of a microphone and boom arm arrangement. When your mic stays stable, you can set your input gain once and trust it. If you regularly lean back in your chair, consider bringing the mic slightly to the side so your head movement does not change the distance as dramatically. If you turn your head to a second monitor while speaking, you might prefer a mic position that follows that motion, or you might train yourself to keep your mouth oriented toward the capsule. The boom arm helps because it can be placed where your body naturally sits, rather than forcing you to adopt an awkward posture. If you record long sessions, small ergonomic improvements add up. A comfortable, repeatable position reduces mouth noise, helps you maintain steady volume, and makes your voice sound more “finished” even before any EQ or compression. When placement is right, editing becomes easier because levels are more even and background noise is lower.
Desk Noise, Vibration, and Shock Mounts: Making the Arm Work for You
Desk noise is one of the most common problems people try to solve with a microphone and boom arm. While suspending the mic can help, vibration can still travel through the clamp into the arm, especially if you have a hollow desk or a desk that flexes. That is where shock mounts and thoughtful routing become important. A shock mount uses elastic suspension to decouple the microphone from mechanical vibrations. It is particularly helpful if you type while talking, tap your desk, or adjust your keyboard frequently. If you use a dynamic broadcast mic that is already somewhat resistant to handling noise, a shock mount can still provide extra insurance. However, not all mics have readily available shock mounts, and some OEM mounts are expensive. When choosing, make sure the mount matches the microphone’s diameter and weight and that it does not block controls or ports.
Another part of making a microphone and boom arm system quieter is managing contact points. If your clamp is overtightened against a delicate surface, it can creak. A thin rubber or cork pad between the clamp and desk can improve grip and reduce noise. Cable management also matters: a cable that is pulled tight can transmit vibrations and can even tug the mic out of position. Leave a gentle service loop near the mic, then route the cable along the arm using Velcro straps or built-in channels. Keep the cable away from power bricks and monitor adapters to reduce interference, especially with USB setups. If you still hear thumps, consider where your boom is mounted. Clamping to a side surface that receives fewer impacts can help. Ultimately, the goal is to isolate the microphone from the physical world as much as practical, so the only thing it “hears” clearly is your voice.
Cable Management and Clean Aesthetics Without Sacrificing Function
A tidy microphone and boom arm installation is not only visually appealing; it also improves reliability. Loose cables can snag when you reposition the arm, causing sudden jerks, connector wear, or even USB dropouts. A clean route keeps movement smooth and prevents strain on the mic’s port. Many arms include clip-on cable guides, but simple Velcro ties work well and allow easy adjustments. The best approach is to secure the cable at several points along the arm while leaving enough slack at each joint so the arm can articulate freely. For XLR, use a quality cable with good strain relief, and avoid sharply bending it near connectors. For USB, consider a cable with ferrite beads or good shielding, especially if you run it near monitors, hubs, or wireless chargers.
| Option | Best for | Pros | Cons |
|---|---|---|---|
| USB Microphone (desktop stand) | Quick plug-and-play voice calls, casual streaming | Easy setup; no audio interface needed; good value | Picks up desk vibrations; limited upgrade path; positioning is less flexible |
| USB/XLR Dynamic Mic + Boom Arm | Streaming/podcasting in untreated rooms | Better background-noise rejection; consistent mic placement; frees desk space | Costs more; may need more gain (or interface); boom arm takes mounting space |
| XLR Condenser Mic + Boom Arm + Audio Interface | Highest-detail vocal recording in a controlled space | Most clarity and detail; pro expandability; strong monitoring/control | Most expensive; captures more room noise; more gear and setup complexity |

Expert Insight
Mount the boom arm so the microphone sits 6–10 inches from your mouth and slightly off-axis (about 20–45°) to reduce plosives and harsh breath noise; then set gain so normal speech peaks around -12 dB to avoid clipping while keeping the signal clean. If you’re looking for microphone and boom arm, this is your best choice.
Stabilize the arm by tightening all joints just enough to prevent drift, route the cable along the arm with Velcro ties to stop tugging and vibration, and add a shock mount or small foam pad under the clamp if desk bumps are transferring into the mic. If you’re looking for microphone and boom arm, this is your best choice.
Visual layout matters for video calls and streaming. A microphone and boom arm can either look professional and intentional or cluttered and distracting. If you want the mic out of frame, a low-profile arm can keep the silhouette minimal, but it must still allow proper placement. If you like the “broadcast” look, you can position the mic slightly to the side and let the arm appear on camera as part of the set. In either case, avoid placing the arm where it blocks your monitor or forces you to crane your neck. A clean aesthetic should never compromise your speaking posture. If you frequently switch between work and recording, consider a position where the mic can swing away and return to the exact spot you need. Some people mark the boom’s pivot points with subtle tape so the mic returns to a repeatable location. Small habits like that keep your setup consistent, which translates to consistent sound and fewer technical distractions during important calls or recording sessions.
USB vs XLR Workflows with a Boom Arm: Practical Differences
Both USB and XLR can work beautifully in a microphone and boom arm configuration, but the daily experience is different. USB microphones are often chosen for simplicity: plug in, select the device, and record. Many USB models include a headphone jack for zero-latency monitoring and onboard controls for gain or mute. On a boom arm, a USB mic can be positioned exactly like an XLR mic, but you should pay attention to the connector. Some USB ports are more fragile than XLR jacks, and repeated movement can stress them if the cable is heavy or routed poorly. A short, flexible USB cable and careful strain relief can extend the life of the port. USB also ties you to the mic’s internal preamp and converter quality, which can be excellent on higher-end models but varies widely across the market.
XLR microphones require an interface or mixer, which adds cost but provides control. With an interface, you can choose preamps with cleaner gain, add hardware monitoring, and expand to multiple microphones later. On a boom arm, XLR cables tend to handle movement well, and the locking connector is secure. If you use a gain-hungry dynamic mic, you might add an inline preamp, which adds weight and length to the chain; that affects how your microphone and boom arm balance. Many people place the inline preamp near the interface rather than at the mic to keep the arm lighter, though that depends on the device. The XLR route also makes it easier to integrate external processors if you want hardware compression or EQ. The practical takeaway is that USB favors speed and convenience, while XLR favors modularity and long-term growth. Either way, a stable boom arm helps you get close enough to the mic for a strong signal, which reduces noise and improves intelligibility.
Streaming, Podcasting, and Remote Work: Tailoring the Setup to Your Use Case
A microphone and boom arm setup should match how you actually communicate. For remote work, the priority is reliability and comfort. You may be speaking for hours in meetings, so the mic must be positioned comfortably, and the arm must move smoothly without squeaks that distract coworkers. A simple dynamic mic on a stable arm can reduce room noise and keep your voice clear even when your environment is not perfect. A physical mute button—either on the microphone or via an inline switch—can be useful, but it should not encourage bad habits like tapping the mic body. If you frequently share a desk with others or need to pack the mic away, choose an arm that folds compactly and returns to position easily.
For podcasting, the microphone and boom arm combination becomes part of a repeatable recording chain. Consistent placement helps match tone across episodes, and a comfortable arm reduces fatigue during long conversations. If you record with guests in the same room, you may need multiple arms or stands, and you should plan how they fit around a table without bumping into each other. For streaming, the visual element matters more. Many streamers like the mic visible, but they still want it out of the way of gameplay and chat monitoring. A side-address microphone might look best angled from the side, while an end-address mic is often positioned horizontally, pointing toward the mouth. The boom arm should support whichever orientation your microphone uses. If you switch between talking and reacting loudly, a compressor in software can help, but the foundation is still placement and gain. When your setup is tailored to your use case, you spend less time fixing problems and more time focusing on content and communication.
Common Mistakes: Over-tightening, Bad Angles, and No Room Treatment
Many issues blamed on a microphone and boom arm are really setup mistakes. Over-tightening is a frequent problem: people crank down the clamp or joint knobs, which can damage the desk, strip threads, or create creaks and pops when the arm moves. A good arm should hold position with firm but reasonable tension. If you must over-tighten to prevent sag, the arm is likely under-rated for your microphone’s weight, or the springs are not adjusted correctly. Another common mistake is placing the mic in the wrong orientation. Some microphones are side-address, meaning you speak into the side of the grille; others are end-address, meaning you speak into the tip. If you aim at the wrong part of the mic, your voice can sound thin, quiet, or overly roomy. Always confirm where the capsule is designed to be addressed, then use the boom arm to keep that face aligned with your mouth.
Room acoustics are another overlooked factor. A boom arm can put the microphone close to your mouth, which helps reduce room sound, but it cannot remove echo entirely. Hard surfaces like bare walls, windows, and desks reflect sound back into the mic. If your recordings sound hollow, consider adding soft materials: curtains, rugs, or acoustic panels placed near your speaking position. Even a bookshelf with uneven surfaces can help break up reflections. Also pay attention to noise sources: computer fans, air conditioners, and street noise. A microphone and boom arm setup works best when the mic is close, the gain is not excessive, and the environment is reasonably quiet. Finally, avoid placing the boom arm where it encourages poor posture, such as forcing you to lean forward to reach the mic. If you find yourself moving your head toward the microphone, move the microphone toward you instead. That is the advantage of having an adjustable arm in the first place.
Maintenance, Upgrades, and Long-Term Value of a Boom-Mounted Microphone
A microphone and boom arm setup is a small mechanical system, and like any system, it benefits from occasional maintenance. Check screws and joints every few months, especially if you reposition the arm frequently. If your arm uses springs, inspect them for wear and ensure tension is balanced so the mic does not snap upward or drift downward. Keep pivot points clean; dust can make movement gritty and noisy. If you hear squeaks, consult the manufacturer’s guidance before applying lubricants, since some products can attract dust or degrade certain plastics. Cable wear is another maintenance item. If the cable rubs against sharp edges or gets pinched in joints, it can develop intermittent issues that sound like crackles or dropouts. Reroute and secure cables so movement is smooth and strain is minimized.

Upgrades can be planned in stages. Many people start with an affordable microphone and boom arm, then improve the arm first because stability affects everything else. A better arm can make your existing mic easier to position, which can improve sound immediately. Next upgrades often include a shock mount, pop filter, or a better interface if you use XLR. If you upgrade the microphone, confirm that the new mic’s weight and mounting thread match your current arm. Thread adapters are common, but a heavy mic might require a stronger boom. Over time, a well-built arm becomes a long-term asset that outlasts multiple microphones. The value is not just in convenience; it is in the reliability of your audio chain. When your mic stays where you place it, you can focus on speaking naturally, and the technical side fades into the background. That is the real payoff of investing in a durable, thoughtfully configured boom-mounted system.
Putting It All Together: A Practical Checklist for Daily Use
To get the most from a microphone and boom arm, it helps to adopt a simple routine that keeps sound consistent. Start by confirming the arm is mounted securely and that the desk surface can handle the clamp pressure without flexing. Next, set the mic position: mouth level, slightly off-axis, and close enough to keep gain moderate. If you use a pop filter, place it a couple of inches from the mic and keep your mouth a few inches from the filter, which creates a buffer for plosives. Then check your monitoring: listen for hum, hiss, or room echo, and adjust placement before touching EQ. Many problems are solved by moving the mic an inch or two, or by angling it differently. If you type while speaking, test for keyboard noise and consider lowering the mic gain by moving the mic closer rather than turning the knob down and leaning forward.
Finally, treat the microphone and boom arm as a repeatable system, not a one-time purchase. Keep cables secured, leave enough slack for movement, and avoid grabbing the microphone body to reposition it; move the arm instead to reduce handling noise. If you share your space, swing the boom away when not in use and bring it back to the same spot when you return. Small consistency habits keep your voice sounding familiar and stable across calls, streams, and recordings. When you find a position that works, take note of the distance and angle so you can recreate it quickly. With a little care, the microphone and boom arm become a dependable tool that supports clear communication every day, whether you are presenting to a team, recording narration, or building an audience that expects clean, intelligible audio.
Watch the demonstration video
In this video, you’ll learn how to choose the right microphone and boom arm for clear, professional-sounding audio. It covers key features to look for, how to position your mic for the best sound, and simple setup tips to reduce noise, vibrations, and clutter—so your recordings and calls sound better right away.
Summary
In summary, “microphone and boom arm” is a crucial topic that deserves thoughtful consideration. We hope this article has provided you with a comprehensive understanding to help you make better decisions.
Frequently Asked Questions
What is a boom arm used for with a microphone?
Using a **microphone and boom arm** keeps your mic off the desk and lets you place it right where you need it—closer to your mouth for cleaner, clearer sound with far less keyboard and desk noise.
How do I choose a boom arm that fits my microphone?
Before you buy, verify the arm’s maximum load rating and compare it to your microphone’s full setup weight—including the shock mount and any other accessories. Also make sure the mounting threads match (usually 5/8″-27, or 3/8″ with an adapter) so your **microphone and boom arm** fit together securely.
Do I need a shock mount when using a boom arm?
It’s recommended because it helps reduce vibrations from the desk and arm movement, improving recording quality.
How should I position the microphone on a boom arm for best sound?
Place the mic 10–20 cm (4–8 in) from your mouth, aim it at your mouth, and keep it slightly off-axis to reduce plosives; use a pop filter or foam windscreen. If you’re looking for microphone and boom arm, this is your best choice.
Why does my boom arm sag or drift during use?
Common issues include not enough tension, going over the arm’s weight limit, or joints that have worked themselves loose. To fix it, tighten the adjustment points, check every connection, and make sure your **microphone and boom arm** setup isn’t too heavy for the arm to support.
What desk requirements matter for mounting a boom arm?
Before you mount your **microphone and boom arm**, double-check that the clamp matches your desk’s thickness, the surface is solid and stable, and there’s enough clearance for a clamp or grommet setup. Steer clear of flimsy particleboard edges unless you reinforce them first.
? Looking for more info about microphone and boom arm? Follow Our Site for updates and tips!

Trusted External Sources
- Microphone Boom Arm – Amazon.com
Versatile mic stand for podcasts, gaming.
- Recommendations for a mic and boom arm : r/youtubegaming – Reddit
Nov 20, 2026 … I use a FiFine mic with a shock mount and pop filter. Works great, never had any complaints. Audio sounds crisp, doesn’t pick up the clacking of … If you’re looking for microphone and boom arm, this is your best choice.
- MBA28 – Samson
The MBA28 Microphone Boom Arm is a must-have upgrade for any radio station, podcast, or home studio. Built with a smooth, fully articulating design, it lets you position your **microphone and boom arm** exactly where you need them for comfortable recording and consistent sound—then swing them out of the way when you’re done. Durable, stable, and easy to adjust, it’s designed to keep your setup clean, professional, and ready for every session.
- PL 2T Professional-Quality Microphone Boom Arm – Heil Sound
The Heil PL‑2T is an internal‑tension boom arm designed for smooth, silent repositioning while you’re recording, so you can adjust your setup without distracting noise. It also includes a covered cable channel to keep your microphone and boom arm setup clean, organized, and free of clutter.
- Boom arms – Microphone Stands – Products – König & Meyer US
K&M’s product lineup covers everything musicians and performers need on stage or in the studio—from music and instrument stands to seats, benches, standing aids, keyboard stands, and reliable microphone and boom arm setups, plus speaker stands and more.