The Anycubic Kobra sits in a sweet spot where everyday usability meets enthusiast-level features, which is why it has become a familiar name in home workshops, classrooms, and small studios. At its core, it’s a Cartesian-style FDM 3D printer designed to turn filament into functional parts, prototypes, and decorative prints with minimal friction. The headline feature set tends to focus on auto bed leveling, solid out-of-the-box speed, and a build volume that can handle most household projects without taking over your desk. What makes the Anycubic Kobra notable is how it prioritizes the things that actually determine day-to-day success: consistent first layers, straightforward loading and unloading of filament, and a frame that resists wobble when the machine is moving quickly. For a lot of buyers, the appeal is that you can get reliable prints without spending the first week replacing half the machine or learning obscure tuning rituals. That doesn’t mean it’s “hands-off” forever, but it’s engineered to reduce the number of variables that derail early results.
Table of Contents
- My Personal Experience
- Overview of the Anycubic Kobra: what it is and who it fits
- Design and build quality: frame stability, motion system, and ergonomics
- Auto bed leveling and first-layer reliability
- Print speed, acceleration, and real-world output quality
- Extrusion system, hotend behavior, and filament handling
- Build plate surface, adhesion strategies, and part removal
- Slicer profiles, calibration workflow, and repeatability
- Expert Insight
- Maintenance, wear items, and long-term reliability
- Upgrades and modifications: what helps and what to avoid
- Troubleshooting common print issues: practical diagnosis
- Use cases: functional parts, prototyping, and creative projects
- Buying considerations: value, expectations, and setup habits
- Final thoughts on living with the Anycubic Kobra
- Watch the demonstration video
- Frequently Asked Questions
- Trusted External Sources
My Personal Experience
I picked up an Anycubic Kobra as my first “serious” 3D printer after getting tired of constantly re-leveling my old machine, and the auto-leveling on the Kobra was honestly the main reason. Setup was straightforward, but I still spent the first evening tweaking the Z-offset because my first layer was either too squished or not sticking at all. Once I dialed that in, it became pretty reliable for everyday PLA prints—phone stands, small brackets, and a few replacement parts around the house. The biggest improvement for me was consistency: I could start a print and not hover over it for the first 20 minutes. It’s not perfect though; I’ve had a couple of clogs and the stock fan is louder than I expected, but overall it’s been a solid workhorse that made the hobby feel a lot less frustrating.
Overview of the Anycubic Kobra: what it is and who it fits
The Anycubic Kobra sits in a sweet spot where everyday usability meets enthusiast-level features, which is why it has become a familiar name in home workshops, classrooms, and small studios. At its core, it’s a Cartesian-style FDM 3D printer designed to turn filament into functional parts, prototypes, and decorative prints with minimal friction. The headline feature set tends to focus on auto bed leveling, solid out-of-the-box speed, and a build volume that can handle most household projects without taking over your desk. What makes the Anycubic Kobra notable is how it prioritizes the things that actually determine day-to-day success: consistent first layers, straightforward loading and unloading of filament, and a frame that resists wobble when the machine is moving quickly. For a lot of buyers, the appeal is that you can get reliable prints without spending the first week replacing half the machine or learning obscure tuning rituals. That doesn’t mean it’s “hands-off” forever, but it’s engineered to reduce the number of variables that derail early results.
Choosing the Anycubic Kobra makes the most sense when you want a printer that can handle common materials like PLA, PETG, and TPU while still leaving room to learn. Beginners tend to appreciate the guided setup, the practical sensor-based leveling approach, and the overall predictability. More experienced makers often view it as a dependable workhorse: something that can run repeat jobs, print brackets and enclosures, or produce larger models without constant babysitting. It also fits well in environments where multiple users share a machine, because fewer manual steps means fewer chances for inconsistent settings between users. The Anycubic Kobra isn’t the only option in its class, but its popularity comes from a combination of approachable operation and features that reduce rework. If your priority is a stable, repeatable printing experience at a reasonable price point, the Anycubic Kobra is designed to meet that expectation.
Design and build quality: frame stability, motion system, and ergonomics
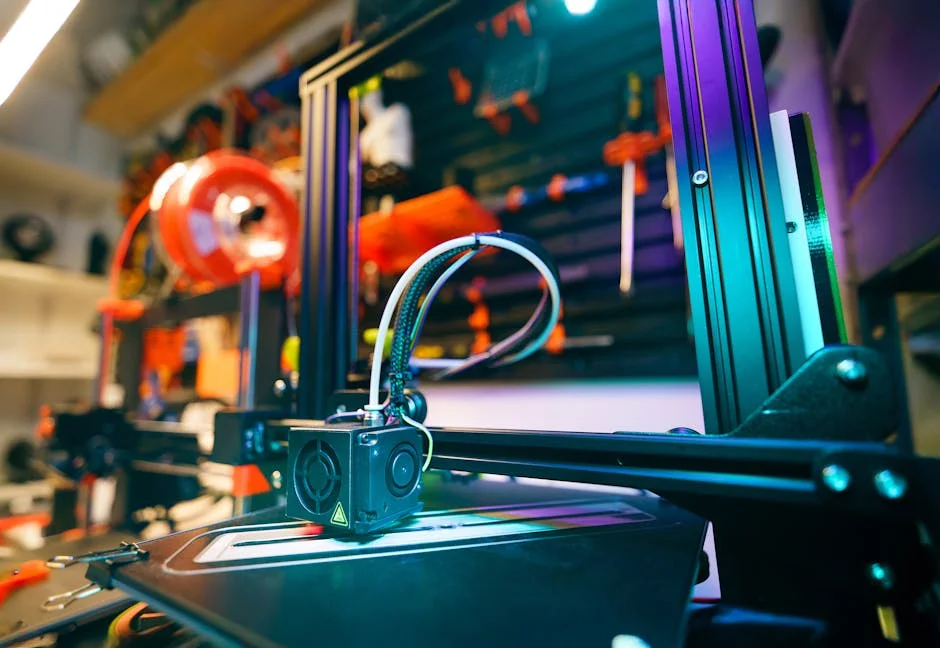
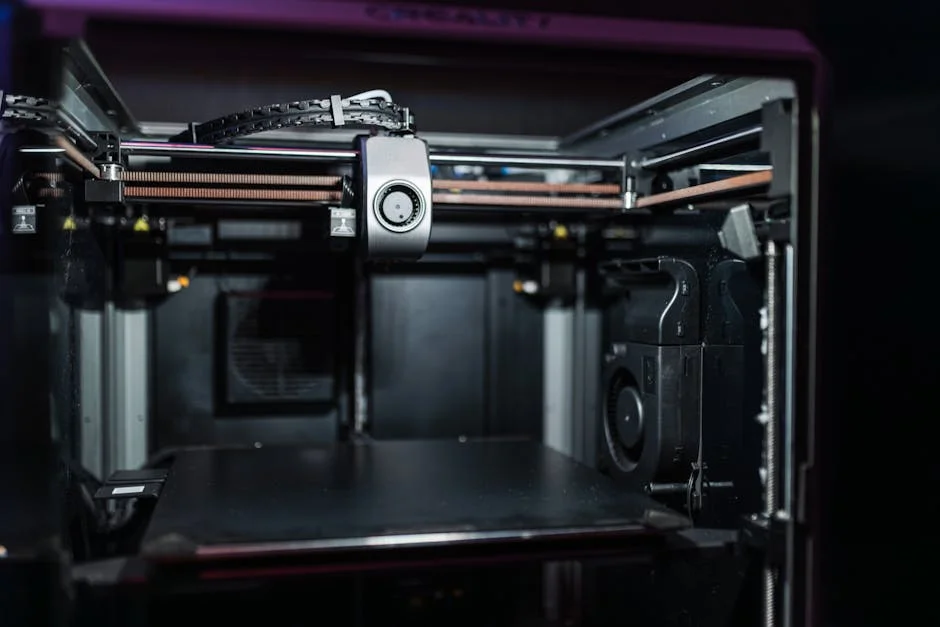
When evaluating a 3D printer for real use, the structure matters as much as the electronics. The Anycubic Kobra uses a rigid frame that aims to keep axes square and reduce vibration artifacts that show up as ripples or “ghosting” on finished surfaces. Frame stiffness is especially important at higher accelerations, where a machine that feels fine at slow speeds can suddenly produce ringing or shifted layers if the structure flexes. With the Anycubic Kobra, the general experience is that it can move briskly while keeping results respectable, provided belts are properly tensioned and the printer sits on a stable surface. The motion system’s smoothness also plays a role in sound and print quality. A well-aligned gantry and properly adjusted wheels or linear elements reduce binding, which helps the extruder feed consistently and keeps the hotend from dragging across tall features.
Ergonomics often get overlooked, yet they determine whether you enjoy using a printer or dread it. The Anycubic Kobra is arranged so that common tasks—cleaning the bed, swapping filament, checking a nozzle, or tightening a belt—can be performed without awkward disassembly. Cable routing and strain relief are part of the real-world durability story, since repeated motion can fatigue connectors if wires are pulled tight. A thoughtfully placed spool holder and a clear filament path help reduce under-extrusion caused by drag or tangles. Even small things like visibility of the first layer and access to the extruder lever can influence your success rate. Over time, printers that feel “easy” encourage more experimentation, which is often the difference between a device that gathers dust and one that becomes a daily tool. For many owners, the Anycubic Kobra feels built around regular use rather than occasional tinkering.
Auto bed leveling and first-layer reliability
First-layer consistency is the foundation of everything that follows, and the Anycubic Kobra is widely associated with a more forgiving first-layer experience thanks to its automatic bed leveling system. Auto leveling doesn’t eliminate the need for a reasonably trammed machine, but it does compensate for minor variations across the build surface. That matters because even a small difference in nozzle-to-bed distance can cause parts of a print to be too squished (leading to elephant’s foot and poor surface finish) while other areas fail to stick at all. With the Anycubic Kobra, the leveling routine maps the bed and adjusts Z height as the print progresses, helping the nozzle maintain a consistent gap. This is particularly valuable for larger prints that span much of the bed, where manual leveling can feel like chasing an invisible problem that changes from corner to corner.
In practical terms, a strong first layer is a blend of mechanical setup, software settings, and material behavior. The Anycubic Kobra’s leveling system is only one piece, but it reduces the number of failed prints caused by uneven beds or slight warping. To get the most out of it, it helps to keep the build surface clean, confirm the nozzle is not partially clogged, and set the initial layer speed and temperature appropriately. PLA often benefits from a slightly warmer first layer and slower initial speed, while PETG may require careful tuning to avoid excessive squish and stringing. The big advantage is that once you dial in a baseline profile, you can run multiple jobs without repeating a long manual leveling ritual. For busy users, that predictability is the difference between printing as a hobby and printing as a dependable process. The Anycubic Kobra’s focus on first-layer stability is a primary reason it earns recommendations for both new and returning makers.
Print speed, acceleration, and real-world output quality
Speed claims can be misleading, because “fast” printing only matters if the part is dimensionally accurate and visually acceptable when it finishes. The Anycubic Kobra is often chosen because it can run quicker than older entry-level machines while still producing clean results for typical layer heights. Real-world speed depends on the model’s geometry, the cooling capacity, the filament type, and the slicer’s acceleration limits. Thin towers, sharp corners, and small details force the printer to slow down, while broad walls and gentle curves allow higher throughput. With the Anycubic Kobra, many users find a comfortable balance by using moderate acceleration values, keeping jerk or cornering settings conservative, and relying on good part cooling for overhangs and bridges. The result is a printer that feels responsive without demanding that you accept rough surfaces.
Output quality is shaped by both hardware and profile tuning. If you push the Anycubic Kobra too hard, you may see ringing, slight corner bulges, or inconsistent extrusion during rapid changes in direction. If you keep it too slow, you may lose the benefit of its capable motion system and spend unnecessary hours on prints that could finish sooner. The practical approach is to tune in stages: first ensure extrusion is consistent and the first layer is solid, then increase speed while observing where artifacts start to appear. Layer height choice matters as well. A 0.2 mm layer height is a common default for PLA, while 0.12–0.16 mm can deliver a smoother finish at the cost of longer print times. For functional parts, slightly thicker layers can increase strength and reduce time. The Anycubic Kobra tends to reward users who make small, deliberate adjustments rather than chasing extreme numbers. When tuned sensibly, it can produce parts that look clean enough for display and strong enough for everyday use.
Extrusion system, hotend behavior, and filament handling
The extrusion system is where the printer’s promises meet reality. The Anycubic Kobra is designed to feed filament smoothly and maintain stable temperatures so that extrusion remains consistent across long prints. Consistency matters because minor fluctuations can show up as banding, weak layer adhesion, or surface texture changes. A stable hotend helps maintain predictable melt flow, while a reliable extruder grip prevents grinding and slipping. Filament handling is not just about the motor pushing plastic; it’s also about keeping the filament path low-friction and aligned so the extruder doesn’t fight unnecessary resistance. When the filament spool unwinds smoothly and the filament enters the extruder at a clean angle, the printer is less likely to under-extrude during rapid infill or when printing multiple perimeters.
Material choice influences how you should set up and run the Anycubic Kobra. PLA is typically the easiest, offering strong visual results with minimal warping. PETG can be excellent for functional parts but requires attention to retraction and temperature to avoid stringing and blobs. TPU introduces flexibility, and flexible filaments can be sensitive to feed path constraints; slower speeds and careful retraction settings are often needed. The hotend’s temperature control is also central to bridging and overhang performance, because too hot can cause sagging while too cool can reduce layer adhesion. If you aim for repeatable results, it helps to store filament properly to reduce moisture, which can cause popping, rough surfaces, and brittle extrusion. Many owners find that once they settle on a few trusted brands and keep spools dry, the Anycubic Kobra becomes remarkably predictable. Filament handling may sound mundane, but it is one of the strongest determinants of whether a printer feels professional or temperamental.
Build plate surface, adhesion strategies, and part removal
Adhesion is a balancing act: you want prints to stick reliably during the job, but you also want them to release without damage afterward. The Anycubic Kobra’s build plate system is designed to support dependable adhesion for common materials, especially PLA. In practice, success comes from combining a clean surface with appropriate first-layer settings. Dust, skin oils, and residue from previous prints can reduce adhesion dramatically, so routine cleaning with the right method makes a noticeable difference. Another factor is bed temperature. Too low and corners lift; too high and you may get excessive squish or difficult removal. The Anycubic Kobra typically performs best when you treat the build plate like a precision surface rather than a general-purpose workbench. Keeping it free of gouges from a metal scraper and avoiding unnecessary abrasives extends its usable life and keeps adhesion consistent.
Part removal and post-print handling also affect your overall experience. A print that bonds too strongly can lead to bent tools, damaged surfaces, or snapped parts. If adhesion feels excessive, adjusting Z-offset slightly, reducing first-layer temperature, or using a release aid can help depending on the material. For PETG in particular, many users prefer a thin barrier layer to prevent overly aggressive bonding. On the other hand, if you struggle with corners lifting, increasing brim width, cleaning the surface more thoroughly, and lowering the first-layer speed can be more effective than simply increasing bed temperature. Environmental factors matter as well. Drafts and cold rooms can cause uneven cooling and warping, especially on larger parts. A simple enclosure or draft shield can improve consistency without changing the printer itself. With a sensible adhesion routine, the Anycubic Kobra becomes easier to run repeatedly, because you spend less time rescuing failed prints and more time producing usable parts.
Slicer profiles, calibration workflow, and repeatability
A capable printer still needs a solid slicer profile to deliver consistent results. The Anycubic Kobra benefits from a thoughtful starting profile that matches nozzle size, filament type, and desired finish. Key settings include layer height, wall count, top and bottom thickness, infill type, and cooling behavior. For example, a functional bracket may need more perimeters and higher infill overlap, while a decorative model may prioritize surface finish with slower outer walls and finer layers. Retraction and travel settings influence stringing and surface scars, and these should be tuned with the specific filament you use most often. Temperature is another critical variable: too hot can cause oozing and glossy surfaces, while too cool can weaken layer bonding and cause under-extrusion. The goal is not to chase perfection for every print, but to establish a “house profile” that works reliably for the majority of jobs.
Expert Insight
Run the Anycubic Kobra’s auto-leveling on a fully warmed bed and nozzle, then fine-tune Z-offset with a first-layer test until lines are slightly squished and continuous. Recheck after changing nozzles, moving the printer, or swapping build surfaces to keep adhesion consistent.
Improve reliability by drying filament and dialing in temperature and retraction with a quick calibration print before long jobs. Keep the motion system smooth by cleaning the build plate regularly, checking belt tension, and lightly lubricating the Z lead screw to prevent layer artifacts. If you’re looking for anycubic kobra, this is your best choice.
Calibration is most effective when approached as a repeatable workflow rather than random tweaks. With the Anycubic Kobra, a practical sequence is to verify mechanical basics (belt tension, frame tightness, smooth motion), then set Z-offset for a clean first layer, then tune temperature and retraction with small test prints. After that, flow calibration can help improve dimensional accuracy and surface uniformity. It also helps to keep notes for each filament brand, because two PLA spools can behave differently even if they share the same nominal temperature range. Repeatability improves when you change one variable at a time and compare results under similar conditions. Once you have stable profiles, you can focus on design and production rather than constant troubleshooting. This is where the Anycubic Kobra’s strengths show: when paired with a disciplined slicer setup, it can run like a tool rather than an experiment. Over the long term, consistent profiles reduce waste, shorten iteration cycles, and make multi-part projects far less stressful.
Maintenance, wear items, and long-term reliability
Every FDM printer requires maintenance, and the Anycubic Kobra is no exception. The good news is that most upkeep tasks are simple and become routine once you’ve done them a few times. Regular maintenance includes cleaning the nozzle area of burnt residue, checking that the hotend is free of filament leaks, and ensuring the cooling fans spin freely without dust buildup. Mechanical checks matter too: belts can stretch slightly over time, wheels can loosen, and fasteners can work themselves out with vibration. A quick periodic inspection can prevent the kind of gradual quality decline that’s hard to diagnose later. Lubrication of moving components should be done carefully and sparingly, using suitable products and avoiding contamination of the build surface. A clean machine is not just nicer to look at; it’s more predictable, and predictability is the real measure of reliability.
| Model | Best for | Key features |
|---|---|---|
| Anycubic Kobra | Budget-friendly everyday printing | Auto bed leveling, direct-drive extruder, solid value for beginners |
| Anycubic Kobra Plus | Larger prints without a big price jump | Bigger build volume, auto leveling, good for cosplay/props and bigger functional parts |
| Anycubic Kobra Max | Very large-format printing | Extra-large build volume, auto leveling, ideal for oversized prototypes and large single-piece models |
Wear items are part of the cost of ownership, and planning for them helps avoid downtime. Nozzles wear faster when printing abrasive filaments, and even standard materials can slowly erode a nozzle over many hours, changing line width and surface finish. PTFE components, if present in the filament path, can degrade with heat and time, especially if exposed to temperatures near their limits. Fans, belts, and build surfaces also have finite lifespans. The Anycubic Kobra is generally easy to service compared to more enclosed or proprietary machines, which means you can replace common parts without special tools or hard-to-find components. Long-term reliability also depends on environment: dust, humidity, and temperature swings can affect both filament quality and electronics. If you treat the printer like a piece of workshop equipment—kept clean, inspected periodically, and used with dry filament—the Anycubic Kobra can remain stable over long stretches of printing. That stability is what enables bigger projects, longer prints, and confident overnight runs.
Upgrades and modifications: what helps and what to avoid
One of the attractions of printers in this category is the ability to customize, but upgrades are most valuable when they solve a real problem. The Anycubic Kobra can benefit from practical improvements such as better filament storage, a more controlled printing environment, or a higher-quality nozzle suited to specific materials. If you print abrasive composites, a hardened nozzle can preserve quality and reduce frequent replacements. If your workspace is drafty, a simple enclosure can improve temperature stability and reduce warping on larger parts. Cable management improvements and vibration-damping feet can reduce noise and help keep the machine feeling solid. However, it’s worth remembering that every change introduces new variables. A printer that’s working well can become unreliable if you modify too many systems at once without a baseline to compare against.
Some modifications are best approached cautiously. Changing firmware settings without understanding their interactions can lead to confusing results, and aggressive speed tuning can expose mechanical limits. Cooling modifications can improve overhang performance, but they can also cause warping or poor layer adhesion if airflow becomes excessive for certain materials. Extruder or hotend swaps can expand capability, but they may require different profiles, mounting solutions, and careful thermal management. Before upgrading the Anycubic Kobra, it helps to define the goal: quieter operation, faster printing, better high-temperature materials, or improved surface finish. Then validate with small tests after each change. Many users find that the most impactful “upgrade” is simply refining slicer profiles and adopting consistent maintenance habits. When upgrades are chosen deliberately, the Anycubic Kobra can evolve with your needs without turning into an endless troubleshooting project.
Troubleshooting common print issues: practical diagnosis
Even a well-tuned printer will occasionally produce defects, and the key is diagnosing them efficiently. With the Anycubic Kobra, a failed print often points to a small set of common causes: first-layer problems, partial clogs, retraction settings, or mechanical looseness. If a print detaches mid-job, start by checking bed cleanliness, Z-offset, and first-layer speed. If you see under-extrusion, check for a nozzle clog, filament tangles, or an extruder gear that’s slipping. Stringing typically indicates that retraction, temperature, or filament moisture needs attention. Layer shifts can be caused by loose belts, collisions with curled edges, or snagged cables. Approaching troubleshooting as a checklist helps you avoid random setting changes that make the problem harder to isolate. The goal is to restore a known-good baseline quickly, then iterate carefully.
Visual symptoms can be mapped to likely causes. Ripples near corners often indicate ringing from vibration, which can be reduced by lowering acceleration, tightening belts, and ensuring the printer sits on a stable surface. Blobs and zits can come from over-extrusion, too high a temperature, or insufficient retraction. Gaps in top layers may indicate inadequate top thickness, insufficient infill, or under-extrusion. Warping suggests uneven cooling, drafts, or insufficient adhesion strategy. The Anycubic Kobra’s auto leveling can reduce certain first-layer failures, but it can’t compensate for a dirty bed, incorrect Z-offset, or wet filament. It’s also worth remembering that some issues are model-specific: thin walls, tiny features, and steep overhangs may require targeted slicer adjustments. With a disciplined troubleshooting approach, the Anycubic Kobra becomes easier to trust, because you learn how it “talks” through its print surfaces and how to correct problems without overreacting.
Use cases: functional parts, prototyping, and creative projects
The most satisfying measure of a 3D printer is what it enables you to make. The Anycubic Kobra is commonly used for functional parts like brackets, tool holders, cable guides, and enclosures. For these projects, dimensional accuracy and layer adhesion matter more than perfect surface gloss. You can tune profiles for strength by increasing wall count, using appropriate infill patterns, and selecting materials that match the environment the part will face. PETG is popular for parts that need heat resistance beyond PLA, while TPU is useful for grips, bumpers, and flexible mounts. When you treat the Anycubic Kobra as a fabrication tool, it can reduce the friction of getting from idea to installed solution. That can be as simple as printing a replacement knob or as involved as building modular storage for a workshop.
Prototyping and creative projects are another strong fit. For designers, the ability to iterate quickly matters, and a printer that starts reliably reduces the time between revisions. The Anycubic Kobra can produce display models, cosplay components, terrain pieces, and custom organizers with a balance of detail and speed. For visual pieces, you can prioritize fine layers and slower outer walls, then finish with sanding, priming, or painting. For multi-part assemblies, consistent tolerances help parts fit as intended, and calibration can be tailored to your preferred clearance. The printer’s build volume supports a wide range of project sizes without forcing everything into tiny segments. Whether you’re printing practical household solutions or artistic models, the Anycubic Kobra tends to reward a methodical workflow: dry filament, clean bed, stable profiles, and thoughtful orientation. That combination turns a general-purpose printer into a dependable creative machine.
Buying considerations: value, expectations, and setup habits
Value is more than the sticker price; it’s the relationship between cost, time, and results. The Anycubic Kobra is often priced to compete with other feature-rich entry and mid-level printers, and its value proposition centers on convenience features that reduce setup friction. When considering it, it helps to think about your printing goals over the next year. If you want occasional prints and minimal learning, a machine with strong first-layer reliability and consistent profiles can be worth more than a cheaper option that demands constant adjustments. If you plan to print frequently, consider the ongoing costs: filament, replacement nozzles, build surface upkeep, and the time spent tuning. The Anycubic Kobra tends to deliver good value when you want a stable platform that can be improved through skill rather than mandatory hardware changes.
Expectations and habits determine satisfaction. A common mistake is expecting any FDM printer to behave like a paper printer: click print and forget forever. In reality, successful printing comes from repeatable setup habits. Keep filament dry, avoid drafts, clean the build plate routinely, and store profiles that you know work. Learn how to set Z-offset correctly and how to recognize early signs of trouble during the first few layers. If you adopt those habits, the Anycubic Kobra can feel remarkably consistent. If you ignore them, even the best features won’t prevent failures. Also consider your space: noise, ventilation, and where you’ll place the printer. A stable table matters, and so does having room to access the machine for maintenance. When you align your expectations with the realities of FDM printing, the Anycubic Kobra becomes a practical investment rather than a frustrating gadget.
Final thoughts on living with the Anycubic Kobra
Long-term enjoyment of a 3D printer comes from trust: trust that the first layer will stick, trust that the machine will finish a multi-hour job, and trust that your settings will produce the outcome you expect. The Anycubic Kobra earns that trust when it’s treated as a repeatable process rather than a one-time setup. Keep the machine clean, use consistent filament, and maintain a small library of slicer profiles tuned for your most-used materials. If you print functional parts, prioritize strength settings and dimensional checks. If you print visual models, prioritize cooling, outer-wall speed, and surface finish. Over time, you’ll learn how the printer behaves in your specific environment, which is often more important than any single specification.
The Anycubic Kobra also works best when you resist the urge to constantly change multiple variables at once. If a print fails, diagnose systematically. If you want better results, tune one parameter, test, and keep notes. That approach turns printing into a reliable capability rather than a cycle of surprises. With sensible expectations, the Anycubic Kobra can serve as a dependable tool for repairs, prototypes, gifts, and creative builds, offering a strong balance of features and usability that keeps it relevant even as your skills grow. For many makers, the best compliment is simple: the Anycubic Kobra gets used often because it feels predictable, and that predictability is what makes 3D printing genuinely useful.
Watch the demonstration video
In this video, you’ll learn what to expect from the Anycubic Kobra 3D printer, including its key features, setup process, and overall print quality. It covers how easy it is to assemble and calibrate, what materials it handles best, and practical tips for getting cleaner, more reliable prints from your first run onward.
Summary
In summary, “anycubic kobra” is a crucial topic that deserves thoughtful consideration. We hope this article has provided you with a comprehensive understanding to help you make better decisions.
Frequently Asked Questions
What is the Anycubic Kobra?
The Anycubic Kobra is a consumer FDM (filament) 3D printer known for automatic bed leveling and straightforward setup for PLA/PETG printing.
How do I level the bed on an Anycubic Kobra?
Start by running the auto-leveling option from the printer’s menu, then fine-tune the Z-offset so the first layer on your **anycubic kobra** goes down with a gentle squish—firm enough to stick, but not so low that the nozzle scrapes the bed.
What slicer settings are a good starting point for the Anycubic Kobra?
Begin with a 0.2 mm layer height, 2–3 perimeters, and 15–20% infill, printing PLA at around 200°C on the nozzle and 60°C on the bed. From there, fine-tune your **anycubic kobra** settings based on how the first layer adheres and whether you notice any stringing.
What filament types can the Anycubic Kobra print?
The **anycubic kobra** typically handles PLA and PETG with ease, and it can print TPU too as long as you slow things down. ABS and ASA are also doable, but you’ll get much better results with an enclosure and proper ventilation.
Why is my Anycubic Kobra not sticking to the bed?
If your first layer isn’t sticking on the **anycubic kobra**, the usual culprits are an incorrect Z-offset, a dusty or greasy build plate, bed temperatures that are too low, or printing the first layer too fast. Try cleaning the build surface, re-running the leveling process, and slowing down the first layer to help it adhere properly.
How do I fix stringing or oozing on the Anycubic Kobra?
To cut down on stringing, try lowering the nozzle temperature, slightly increasing retraction, and enabling travel moves that avoid crossing perimeters. Also, if your filament has absorbed moisture, dry it thoroughly—these simple tweaks can make a noticeable difference on an **anycubic kobra**.
📢 Looking for more info about anycubic kobra? Follow Our Site for updates and tips!

Trusted External Sources
- Anycubic Kobra – Affordable Auto Levelling Entry-level FDM 3D Printer
Fully assembled for easy to set up and use for beginners, Anycubic Kobra textured flexible spring steel sheet design can make 3D printed models more …
- Is the anycubic kobra 3 a good printer to purchase? – Reddit
Sep 24, 2026 … I love mine but it definitely has its flaws.If you are prepared to do some quantities of debugging and research it is a great printer, especially for the price … If you’re looking for anycubic kobra, this is your best choice.
- Kobra Series FDM 3D Printers – anycubic-store
Designed for maximum versatility, the **anycubic kobra** combines vibrant multi-color printing with a generous build volume in one powerful FDM 3D printer—making it easy to bring bigger, bolder ideas to life.
- My Experience with the Anycubic Kobra S1 – 230+ Hours, 0 Failures
May 11, 2026 … I’ve logged over 230 hours of printing and gone through more than 5 kg of filament without a single failed print. Most of my prints are in PLA, and I’ve also … If you’re looking for anycubic kobra, this is your best choice.
- Anycubic 3D Printer | For Freedom to Make
Quality models, made for your inspiration · Anycubic Prime Mega Sale · UP TO $450 OFF · Exclusive Member Discounts · Anycubic Kobra X · LIMIT. LESS. · 2X the Speed, …