The Ultimaker 3D printer has earned a reputation as a dependable, professional-grade machine that bridges the gap between hobby-level devices and industrial additive manufacturing systems. Many brands compete on raw speed, extreme build volumes, or bargain pricing, yet the appeal of an Ultimaker 3D printer often comes from something more practical: predictable printing, careful engineering, and an ecosystem designed for repeatable results. For designers, engineers, educators, and small manufacturing teams, reliability can matter more than headline features, because a printer that behaves consistently helps reduce wasted material, wasted labor, and missed deadlines. That is the lens through which this platform is best understood. Instead of being a single feature breakthrough, it’s a set of integrated choices—motion control, extrusion design, firmware behavior, material handling, and slicing profiles—that together create a printing experience that many teams can standardize around.
Table of Contents
- My Personal Experience
- Understanding the Ultimaker 3D Printer and Why It Still Matters
- Core Hardware Design: Motion System, Frame, and Print Head Architecture
- Dual Extrusion Capabilities and Practical Benefits for Real-World Parts
- Materials and Filament Ecosystem: From PLA to Engineering Polymers
- Slicing and Software Workflow: Cura Profiles, Settings Discipline, and Repeatability
- Print Quality, Dimensional Accuracy, and Surface Finish Considerations
- Speed, Throughput, and Planning for Realistic Production Timelines
- Expert Insight
- Maintenance, Calibration Habits, and Keeping the Printer Reliable
- Applications: Prototyping, Tooling, Education, and Small-Batch Production
- Cost of Ownership: Beyond Purchase Price to Materials, Labor, and Downtime
- Choosing the Right Ultimaker Setup: Nozzles, Build Plates, and Material Strategy
- Best Practices for Consistent Results: From First Layer to Final Inspection
- Conclusion: Making the Ultimaker 3D Printer a Reliable Part of Your Workflow
- Watch the demonstration video
- Frequently Asked Questions
- Trusted External Sources
My Personal Experience
I’ve been using an Ultimaker 3 at our small workshop for about a year, mostly for quick jigs and prototype enclosures, and it’s been one of the more dependable machines I’ve worked with. The first week was a little bumpy—dialing in bed leveling and getting used to Cura profiles took some trial and error—but once I settled on a couple of go-to settings for PLA and PETG, prints became pretty predictable. I really like the dual extrusion for soluble supports; it saved me on a few parts with tricky internal channels, even though cleaning the nozzles and keeping the cores from clogging is definitely part of the routine. The only real frustration has been how sensitive it can be to filament quality and humidity—one damp spool gave me stringing for days until I dried it out. Overall, it’s the printer I trust when I need something to finish overnight without babysitting. If you’re looking for ultimaker 3d printer, this is your best choice.
Understanding the Ultimaker 3D Printer and Why It Still Matters
The Ultimaker 3D printer has earned a reputation as a dependable, professional-grade machine that bridges the gap between hobby-level devices and industrial additive manufacturing systems. Many brands compete on raw speed, extreme build volumes, or bargain pricing, yet the appeal of an Ultimaker 3D printer often comes from something more practical: predictable printing, careful engineering, and an ecosystem designed for repeatable results. For designers, engineers, educators, and small manufacturing teams, reliability can matter more than headline features, because a printer that behaves consistently helps reduce wasted material, wasted labor, and missed deadlines. That is the lens through which this platform is best understood. Instead of being a single feature breakthrough, it’s a set of integrated choices—motion control, extrusion design, firmware behavior, material handling, and slicing profiles—that together create a printing experience that many teams can standardize around.
It also helps to frame the Ultimaker 3D printer as part of a larger workflow rather than a stand-alone gadget. When additive manufacturing is used for prototypes, jigs, fixtures, and production-adjacent tooling, the printer must function like an appliance: you load material, choose a validated profile, and expect the part to match the last one. That expectation is difficult to meet if the machine requires constant tuning or if its profiles are inconsistent across materials. The Ultimaker approach has historically emphasized calibrated print cores, controlled material pathways, and slicing integration that aims to reduce guesswork. Even if the broader 3D printing market has evolved rapidly, these fundamentals remain relevant for organizations that care about part quality, dimensional stability, and predictable lead times.
Core Hardware Design: Motion System, Frame, and Print Head Architecture
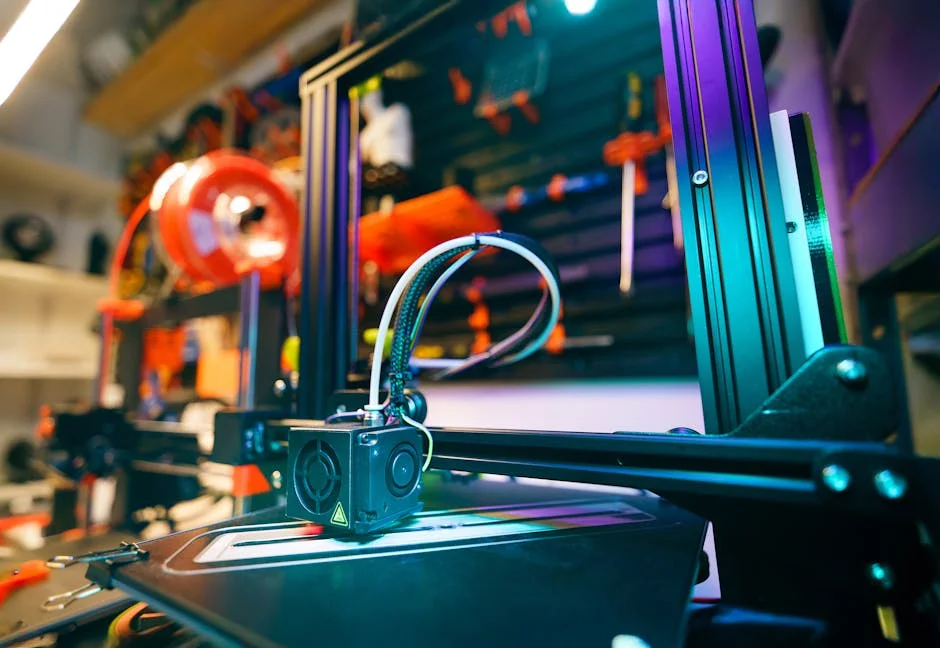
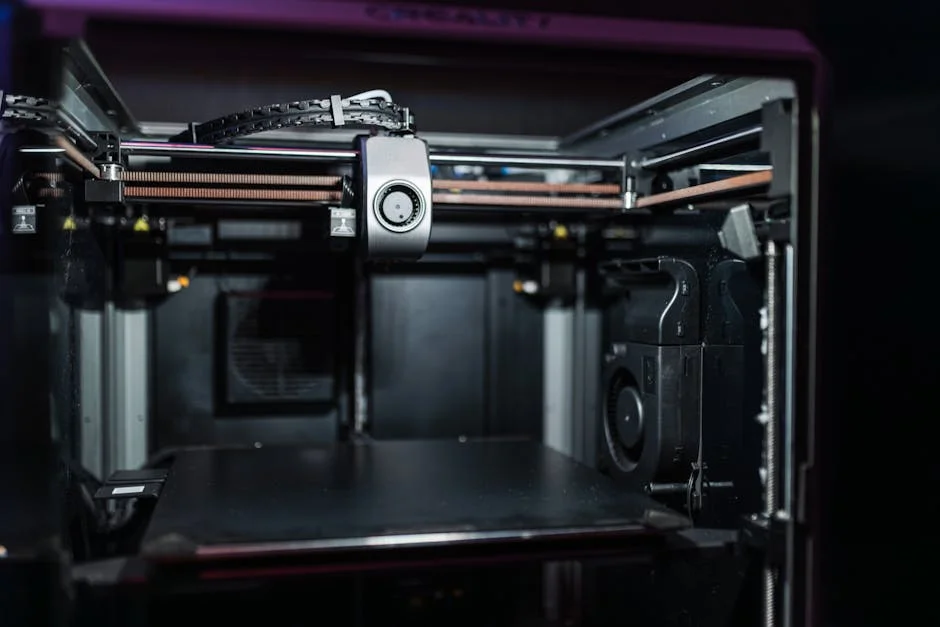
A major reason the Ultimaker 3D printer is frequently associated with consistent results is its underlying mechanical design. Many models in the Ultimaker family use a rigid frame and a motion system that emphasizes accuracy and repeatability. The way the gantry is built, how the axes are constrained, and how the print head moves across the build plane all affect ringing, layer alignment, and surface finish. A stable frame reduces vibration, and a well-tuned motion system can maintain better dimensional fidelity, especially on parts with sharp corners or long straight walls. In professional environments, those details matter because the part needs to fit into assemblies, accept fasteners, or align with other components without repeated reprints.
Print head architecture is another defining characteristic. Many Ultimaker setups rely on modular print core concepts that separate the nozzle and thermal pathway into a swappable unit. That design can simplify maintenance and reduce downtime because a clogged or worn nozzle does not necessarily require a complex teardown. From an operational standpoint, that’s valuable: technicians can keep spare cores available and restore the Ultimaker 3D printer to service quickly. The print head’s cooling arrangement and airflow management also influence bridging, overhang performance, and the look of fine details. When airflow is stable and predictable, slicing profiles can be conservative without being overly slow, which helps balance throughput and quality. Over time, the practical benefit is fewer surprises between prototype iterations and a more stable baseline for process improvement.
Dual Extrusion Capabilities and Practical Benefits for Real-World Parts
Dual extrusion is often marketed as a way to print in two colors, but on an Ultimaker 3D printer it is commonly used for functional reasons such as soluble supports or combining rigid and flexible materials. When printing complex geometries—internal channels, undercuts, or parts with delicate features—support strategy becomes the difference between a usable component and a failed print. Soluble support materials can protect cosmetic surfaces and reduce the risk of breaking thin walls during removal. In a product development setting, that can make the difference between evaluating a design the same day versus spending hours cleaning and repairing a prototype. For many teams, the real value of dual extrusion is not visual flair; it is the ability to consistently produce complex shapes with less manual post-processing.
Material pairing also expands the range of applications. A designer might print a rigid housing in one material and integrate soft gaskets, grips, or vibration-damping elements in another, depending on the extruder and material compatibility. Even when not printing two functional materials, a second extruder can be used for support with a breakaway formulation that is easier to remove cleanly than the model material. The Ultimaker 3D printer ecosystem tends to support these workflows through validated profiles that define temperatures, retraction behavior, and cooling settings, which is critical because dual extrusion introduces more variables: ooze control, prime towers, wipe strategies, and alignment between nozzles. When those variables are handled with proven defaults, users spend less time tuning and more time iterating on the design itself.
Materials and Filament Ecosystem: From PLA to Engineering Polymers
Material choice defines what a printed part can do, and the Ultimaker 3D printer platform is often selected because it supports a broad range of filaments with a strong emphasis on profile reliability. For basic conceptual models, PLA remains popular due to ease of printing and good surface finish. For functional prototypes, PETG-like materials and tougher copolymers can provide improved impact resistance and better temperature tolerance. When moving toward end-use tooling, users often consider nylon, polycarbonate blends, or reinforced composites, assuming the printer configuration and nozzle type are appropriate. The important point is not just that these materials can be extruded, but that the workflow around them—dry storage, temperature control, bed adhesion strategy, and cooling—has clear guidance and repeatable profiles.
In practice, organizations often standardize a small set of materials that cover most needs. A typical lineup might include PLA for quick checks, a tougher material for snap fits and enclosures, and a heat-resistant option for fixtures near warm equipment. The Ultimaker 3D printer experience is frequently shaped by how easy it is to switch between those materials without losing days to trial-and-error. Material management also matters because hygroscopic filaments like nylon can absorb moisture and degrade print quality; consistent storage and handling routines reduce stringing, popping, and weak layers. Some teams build internal print standards—approved spools, predefined profiles, and documented post-processing steps—so that parts printed by different operators still match. That kind of process discipline is where a stable ecosystem can pay off, especially when prototypes become semi-production parts.
Slicing and Software Workflow: Cura Profiles, Settings Discipline, and Repeatability
Software is where many printing outcomes are decided long before the first layer begins. The Ultimaker 3D printer is closely associated with Cura, a slicer that offers both approachable defaults and deep control for advanced users. The value of a mature slicer is not just feature count; it is the predictability of how settings interact. Layer height, wall count, infill pattern, top/bottom thickness, and support density each affect strength and print time, but they also affect heat accumulation and warping. Cura’s material profiles and printer definitions are designed to provide a stable starting point, which helps reduce the learning curve for teams that need results without dedicating weeks to calibration. When a workflow depends on hitting deadlines, a well-tuned default profile can be more valuable than a theoretical maximum speed profile that fails frequently.
Repeatability improves when settings discipline is treated as part of quality control. Many organizations create a small set of locked profiles for specific use cases: “draft prototype,” “fit check,” “presentation quality,” and “fixture strength,” each with known tradeoffs. The Ultimaker 3D printer benefits from this approach because it minimizes operator variability. Instead of each user making ad-hoc changes, the team relies on validated profiles that have been tested on their geometry types and materials. Over time, that reduces scrap prints and prevents subtle drift in part dimensions that can happen when parameters like horizontal expansion or flow rate are adjusted inconsistently. A controlled slicing workflow also makes troubleshooting easier: when a failure occurs, there is a known baseline, and changes can be introduced methodically rather than guessing. That is how a 3D printer becomes a production tool rather than a novelty.
Print Quality, Dimensional Accuracy, and Surface Finish Considerations
Print quality is often described in terms of smooth walls and crisp details, but for many professional users of an Ultimaker 3D printer, quality also means dimensional accuracy and functional consistency. A bracket that looks good but is off by half a millimeter may not fit its mating part, and an enclosure that warps slightly may rattle or fail in use. Achieving dependable dimensions involves multiple factors: stable extrusion, accurate motion, correct filament diameter assumptions, and a slicing strategy that accounts for shrinkage and corner behavior. Wall ordering, seam placement, and acceleration settings can all influence how close the printed part matches the CAD model. Even small improvements in consistency can translate into fewer iterations, which is one of the main reasons teams invest in a platform that behaves predictably.
Surface finish is also tied to practical decisions. Layer height is the obvious lever, but it is not the only one. Wall line count, outer wall speed, temperature, and cooling can change gloss, texture, and the visibility of layer lines. For presentation models, slower outer walls and thinner layers can yield a more refined look, while for fixtures and jigs, thicker layers and higher line widths can provide strength with shorter print times. The Ultimaker 3D printer workflow often supports these choices with profiles that keep extrusion stable across a range of speeds. Post-processing options—sanding, priming, painting, or vapor smoothing for compatible materials—can further improve aesthetics, but the best results usually start with a clean print: consistent extrusion, minimal stringing, and good first-layer adhesion. When those fundamentals are reliable, post-processing becomes optional rather than mandatory.
Speed, Throughput, and Planning for Realistic Production Timelines
Speed in 3D printing is frequently misunderstood. A faster top speed setting does not guarantee faster parts, because acceleration limits, minimum layer times, cooling requirements, and extrusion capacity all constrain real throughput. Users of an Ultimaker 3D printer often find that the best productivity gains come from smart planning rather than aggressive speed settings. For example, printing multiple parts in a single job may reduce setup time, but it can also increase risk if one part fails and affects the others. Alternatively, sequential printing can isolate risk but may require careful clearance planning. Choosing a slightly thicker layer height can cut print time dramatically while still meeting functional needs, and increasing line width can improve strength per unit time for many geometries.
Expert Insight
Calibrate the Ultimaker’s build plate and verify first-layer settings before every long print: clean the glass with isopropyl alcohol, run active leveling, then print a small first-layer test and adjust Z-offset or initial layer flow until lines fuse smoothly without ridges. If you’re looking for ultimaker 3d printer, this is your best choice.
Improve reliability and surface quality by tuning material profiles to your filament: dry moisture-sensitive spools, use the correct nozzle temperature and fan settings, and reduce print speed for detailed parts; for dual extrusion, add a prime tower and dial in retraction to minimize oozing and color contamination. If you’re looking for ultimaker 3d printer, this is your best choice.
Throughput becomes especially important when the printer is used for continuous prototyping or small-batch tooling. A good practice is to estimate lead time not just by slicer-reported duration, but by the entire cycle: preparing the build plate, loading material, starting the print, monitoring early layers, removing parts, and performing any required post-processing. The Ultimaker 3D printer can be integrated into a disciplined workflow where prints are queued, plates are swapped efficiently, and profiles are selected based on the minimum acceptable quality for the task. That approach reduces bottlenecks without pushing the machine into unstable territory. In many organizations, “fast enough and reliable” beats “fastest possible but unpredictable,” because the cost of a failed overnight print is not only wasted filament; it is lost time and delayed decisions. Consistency is a form of speed when it prevents rework.
Maintenance, Calibration Habits, and Keeping the Printer Reliable
Any FDM machine requires routine care, and an Ultimaker 3D printer is no exception. The difference between a smooth operating experience and a frustrating one often comes down to maintenance habits: keeping the build plate clean, ensuring the feeder path is free of debris, checking belts for proper tension, and replacing consumables before they cause failures. Nozzles and print cores wear over time, especially when printing abrasive composites. A worn nozzle can cause inconsistent extrusion width, poor bridging, and rough surfaces. Regular inspection helps catch these issues early. It’s also important to keep firmware and slicer profiles aligned with the printer’s capabilities so that temperature control, retraction behavior, and material flow remain stable.
| Model | Best for | Key strengths |
|---|---|---|
| Ultimaker S3 | Small-to-mid professional teams needing reliable dual-material printing | Dual extrusion, strong print quality, compact footprint, good material support |
| Ultimaker S5 | Larger parts and higher throughput in engineering or lab environments | Bigger build volume, robust workflow, dual extrusion, consistent repeatability |
| Ultimaker 2+ Connect | Single-material prototyping with a simpler, cost-conscious setup | Reliable PLA/PETG printing, straightforward operation, solid ecosystem compatibility |
Calibration is often less about constant tweaking and more about verifying that the system remains within expected tolerances. Bed leveling—whether assisted or manual—directly affects first-layer adhesion, which is the foundation of every print. A first layer that is too high can lead to warping and detachment, while one that is too low can cause over-squish, poor surface finish, and nozzle buildup. Filament handling matters too: dust on filament can accumulate in the nozzle, and moisture can create bubbles and weak layers. Many users adopt simple routines: wipe the build plate with the appropriate cleaner, store spools in dry containers, and run a nozzle cleaning or cold pull procedure when extrusion becomes inconsistent. When these routines are treated as part of normal operation, the Ultimaker 3D printer stays predictable, and predictable is what makes it valuable in professional settings.
Applications: Prototyping, Tooling, Education, and Small-Batch Production
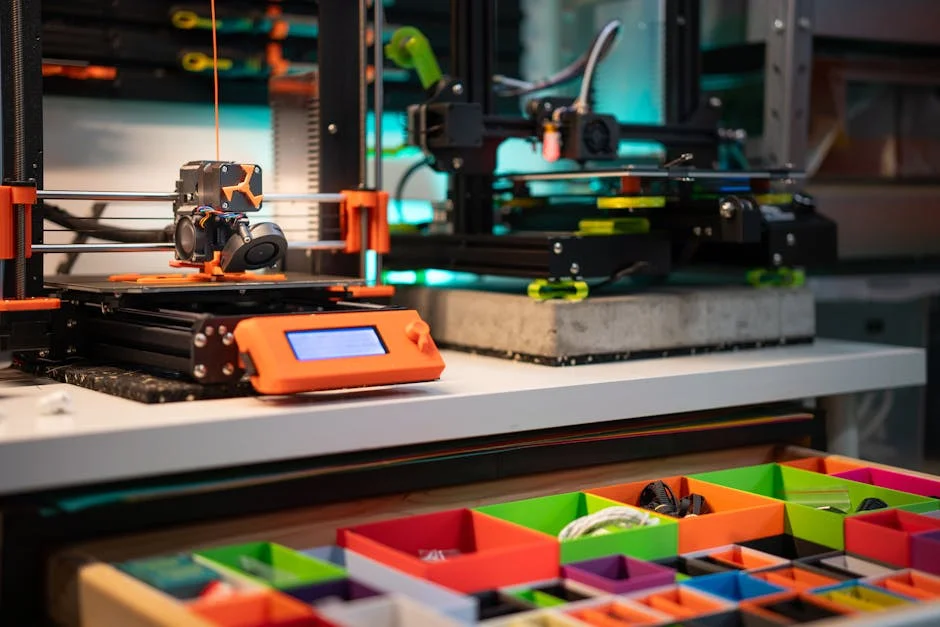
The most compelling argument for an Ultimaker 3D printer is often found in how it is used day to day. In product development, rapid prototypes allow teams to test ergonomics, fit, and assembly sequences before committing to expensive tooling. A printed part can reveal issues that are hard to see on a screen: interference between components, awkward cable routing, or insufficient clearance for a screwdriver. When iteration cycles are short, design decisions improve. In manufacturing environments, printed jigs and fixtures can reduce operator fatigue, improve repeatability, and speed up assembly or inspection. These tools do not always need to look perfect; they need to work reliably, and they need to be easy to replace or revise when the process changes.
Education is another strong use case because a reliable printer supports learning without turning every class into a troubleshooting session. Students can focus on design constraints, material behavior, and engineering tradeoffs, rather than spending all their time leveling beds or clearing jams. In small-batch production, the Ultimaker 3D printer can be used for custom brackets, enclosures, replacement parts, and low-volume accessories, particularly when lead time matters more than per-unit cost. The key is to understand where FDM shines: customization, fast iteration, and low upfront investment. With the right material and profile, printed parts can be surprisingly durable, and when a part design changes, there is no tooling to scrap. That flexibility is often worth more than raw output volume for teams that live in a world of changing requirements.
Cost of Ownership: Beyond Purchase Price to Materials, Labor, and Downtime
Evaluating a 3D printer strictly by its purchase price can be misleading. The true cost of ownership includes materials, replacement parts, failed prints, operator time, and downtime. An Ultimaker 3D printer is often positioned as a professional tool, and that positioning typically implies a higher upfront investment than entry-level machines. However, for organizations that rely on printed parts to make decisions or support operations, the economics can favor a platform that reduces failures and minimizes time spent troubleshooting. If a printer produces consistent results with validated profiles, the team spends more time designing and less time recalibrating. Labor is often the most expensive component in the system, and anything that reduces hands-on intervention can have a meaningful impact.
Materials also influence cost in nuanced ways. Cheaper filament can be attractive, but if it has inconsistent diameter, poor winding, or high moisture content, it can increase the failure rate and degrade surface quality. A stable material supply—whether branded or carefully vetted third-party spools—helps ensure that a profile that worked last month still works today. Replacement components like nozzles, build surfaces, and feeder parts should be treated as consumables with a planned budget rather than emergency expenses. When cost is viewed holistically, the Ultimaker 3D printer can be justified not because it is the least expensive device, but because it can be a dependable part of a workflow. In many professional contexts, predictability is a financial advantage: fewer missed deadlines, fewer reprints, and fewer hours spent chasing intermittent issues.
Choosing the Right Ultimaker Setup: Nozzles, Build Plates, and Material Strategy
Getting the best results from an Ultimaker 3D printer often depends on matching the configuration to the job. Nozzle size is a major lever: smaller nozzles can produce finer details and smoother surfaces, while larger nozzles can dramatically reduce print times and improve strength for functional parts. Many teams keep multiple nozzle sizes available and select them based on the requirements of the part rather than leaving one nozzle installed for everything. Similarly, the build plate surface and adhesion strategy should match the material. Some materials prefer specific adhesion aids, while others release cleanly once cooled. A consistent approach to bed preparation reduces warping and improves first-layer reliability, which is especially important for long prints.
Material strategy is equally important. Instead of trying every filament on the market, it is often smarter to standardize a small catalog with known properties and validated print profiles. That catalog can be aligned to common use cases: a fast prototype material, a tough functional material, a heat-resistant material, and a support material for complex geometry. When the same materials are used repeatedly, teams learn how parts behave over time—how they creep under load, how they handle heat, and how they respond to screws or press fits. The Ultimaker 3D printer fits well into this disciplined approach because it supports repeatable configuration changes and profile management. The result is a system that behaves like a toolchain rather than a one-off device: predictable inputs, predictable outputs, and fewer surprises when a deadline is tight.
Best Practices for Consistent Results: From First Layer to Final Inspection
Consistency is rarely achieved by a single trick; it comes from a set of habits that reduce variability. For an Ultimaker 3D printer, the first layer remains the most critical checkpoint. Taking time to confirm that the build plate is clean, the correct material profile is selected, and the nozzle is priming smoothly can prevent a large percentage of failures. Monitoring the early layers is also a practical discipline. If adhesion is weak or the first layer shows gaps, stopping early saves hours of wasted time. Orientation and support strategy should be chosen with both strength and surface finish in mind. For example, layers are typically weaker in the Z direction, so load-bearing parts should be oriented to place stress along stronger axes when possible. Support contact points should be placed on non-critical surfaces to reduce cleanup and preserve appearance.
Final inspection is where a printed part becomes a reliable component rather than a “close enough” prototype. Checking critical dimensions with calipers, testing fit with mating parts, and verifying that holes and slots are within tolerance can reveal whether a profile needs adjustment. For functional parts, it can be useful to apply simple tests: flexing a clip to see if it whitens or cracks, tightening a screw to check layer bonding, or exposing a fixture to the expected temperature range. When these checks are documented, the team builds a knowledge base that turns printing into a repeatable process. Over time, the Ultimaker 3D printer becomes more valuable because it is supported by a workflow that treats printing as manufacturing: controlled settings, controlled materials, and controlled verification. That discipline is what enables dependable output, especially when the printer is used by multiple operators.
Conclusion: Making the Ultimaker 3D Printer a Reliable Part of Your Workflow
The Ultimaker 3D printer remains a strong choice for users who prioritize repeatable results, a stable software ecosystem, and practical features that support real production workflows. Its strengths are most visible when it is treated as part of a system: validated slicing profiles, consistent materials, routine maintenance, and disciplined print standards. When those pieces come together, the printer can deliver prototypes that match design intent, tools that improve shop-floor processes, and educational outcomes that focus on engineering rather than constant troubleshooting. The best results are rarely accidental; they come from aligning hardware configuration, material selection, and process habits to the requirements of the part.
For teams and individuals who want dependable printing without turning every job into a calibration project, an Ultimaker 3D printer can be a practical long-term investment. The combination of thoughtful mechanical design, dual-extrusion options, and a mature slicing workflow helps reduce failure rates and improves consistency, which is often the real measure of productivity. When you build a small library of proven profiles, standardize materials, and maintain the machine proactively, the Ultimaker 3D printer becomes less of an experiment and more of a reliable tool you can plan around.
Watch the demonstration video
In this video, you’ll learn how the Ultimaker 3D printer works and what makes it a reliable choice for high-quality prints. It covers key features like dual extrusion, material compatibility, and print settings, along with practical tips for setup, calibration, and troubleshooting to help you get better results faster.
Summary
In summary, “ultimaker 3d printer” is a crucial topic that deserves thoughtful consideration. We hope this article has provided you with a comprehensive understanding to help you make better decisions.
Frequently Asked Questions
What materials can an Ultimaker 3D printer print?
Popular filament choices for an **ultimaker 3d printer** include easy-to-print PLA and Tough PLA, durable PETG, ABS (best used with an enclosure), flexible TPU, strong Nylon, and PVA when you need soluble support material—availability can vary depending on your specific model and print core.
Does the Ultimaker support dual extrusion?
Many Ultimaker machines—including the **ultimaker 3d printer** lineup—offer dual extrusion, letting you print with two materials or colors in a single job. This is especially useful for pairing your main filament with soluble PVA support material, so complex overhangs and internal structures come out clean and easy to finish.
What software do I use with an Ultimaker printer?
Ultimaker Cura is the standard slicer; it includes printer profiles, material settings, and support options tailored for Ultimaker machines.
How do I level the build plate on an Ultimaker?
Run the **ultimaker 3d printer**’s built-in bed-leveling routine—whether it’s manual or active leveling, depending on your model—and follow the on-screen prompts to dial in the ideal nozzle-to-bed distance for a clean first layer.
Why is my Ultimaker print not sticking to the bed?
For reliable first-layer adhesion on your **ultimaker 3d printer**, start by making sure the build plate is clean and free of dust or grease. Confirm you’re using the correct build plate type and the right adhesion method, then fine-tune your first-layer height. Finally, double-check that both the bed and nozzle temperatures are set appropriately and that the bed is properly leveled for a consistent, smooth start to every print.
How do I fix under-extrusion or inconsistent filament flow on an Ultimaker?
Start by checking the filament path and adjusting the feeder tension as needed, then inspect the nozzle or print core for any clogs. On your **ultimaker 3d printer**, make sure you’ve selected the correct material profile and temperature settings, and confirm the print core is clean and in good working condition.
📢 Looking for more info about ultimaker 3d printer? Follow Our Site for updates and tips!

Trusted External Sources
- UltiMaker: Professional 3D Printers that Empower Innovation
UltiMaker Cura is the world’s most widely used 3D printing software, making it easy to get high-quality results in just a few clicks. It pairs seamlessly with an **ultimaker 3d printer** and integrates smoothly with CAD tools, so you can move from design to print with a faster, simpler workflow.
- Does anyone actually buy Ultimaker? How is it better? – Reddit
Jun 29, 2026 … I was given a several thousand dollars budget to buy a 3D printer for my lab and it had to be “professional looking”, so I picked the Ultimaker … If you’re looking for ultimaker 3d printer, this is your best choice.
- 3D Printers – UltiMaker
Explore how the UltiMaker S series and Method series deliver a reliable, scalable production solution for virtually any business or application—powered by the precision and performance you expect from an **ultimaker 3d printer**.
- UltiMaker & MakerBot: 3D Printers for Professional and Education …
Explore top 3D printers online from Makerbot and UltiMaker. Shop professional and educational 3D printers. Explore and buy now!
- UltiMaker 3D Printers – MatterHackers
UltiMaker 3D printers are high-quality desktop 3D printers that are perfect for any application and industry looking to create beautiful, functional parts time …