FDM printing sits at the center of modern desktop manufacturing because it turns a digital model into a physical object with a workflow that is approachable, repeatable, and surprisingly scalable. The term refers to fused deposition modeling, a process where a thermoplastic filament is heated to a semi-molten state and then extruded through a nozzle, laying down material in precisely controlled paths. As each line cools, it bonds to the previous layer, gradually building the part from the bottom up. That simple idea hides a lot of engineering: motion control, thermal management, polymer behavior, and slicing algorithms all have to align to produce consistent results. When people say FDM printing is “easy,” they usually mean the ecosystem has matured to the point that reliable machines, good materials, and intelligent software make success more attainable than it was a decade ago. Even so, truly dependable output requires understanding how the process behaves under different conditions and how to steer it using settings, maintenance, and design choices.
Table of Contents
- My Personal Experience
- Understanding FDM Printing and Why It Matters
- How the FDM Printing Process Works: From Filament to Part
- Choosing the Right Materials for FDM Printing
- Printer Hardware Essentials That Influence FDM Printing Quality
- Slicer Settings That Make or Break FDM Printing
- Designing Parts for Stronger and More Accurate FDM Printing
- Common FDM Printing Problems and Practical Fixes
- Expert Insight
- Post-Processing Options for Better Results in FDM Printing
- Applications Where FDM Printing Excels
- Cost, Speed, and Sustainability Considerations in FDM Printing
- Getting Consistent Results: Calibration, Maintenance, and Workflow
- Future Trends and What to Expect from FDM Printing
- Watch the demonstration video
- Frequently Asked Questions
- Trusted External Sources
My Personal Experience
My first real lesson in FDM printing came the week I tried to make a simple phone stand and assumed it would “just work.” I leveled the bed by eye, hit print, and watched the first layer curl at the corners until the whole part popped loose halfway through. After a few failed attempts, I slowed the first layer down, cleaned the build plate with isopropyl alcohol, and finally took the time to dial in the nozzle height with a sheet of paper. The next print wasn’t perfect—there were still faint layer lines and a bit of stringing—but it held together and actually fit my phone. Since then, I’ve learned that most of my “mystery problems” come down to basics like first-layer adhesion, temperature, and patience more than anything fancy.
Understanding FDM Printing and Why It Matters
FDM printing sits at the center of modern desktop manufacturing because it turns a digital model into a physical object with a workflow that is approachable, repeatable, and surprisingly scalable. The term refers to fused deposition modeling, a process where a thermoplastic filament is heated to a semi-molten state and then extruded through a nozzle, laying down material in precisely controlled paths. As each line cools, it bonds to the previous layer, gradually building the part from the bottom up. That simple idea hides a lot of engineering: motion control, thermal management, polymer behavior, and slicing algorithms all have to align to produce consistent results. When people say FDM printing is “easy,” they usually mean the ecosystem has matured to the point that reliable machines, good materials, and intelligent software make success more attainable than it was a decade ago. Even so, truly dependable output requires understanding how the process behaves under different conditions and how to steer it using settings, maintenance, and design choices.
One reason FDM printing matters is its versatility across prototyping, jigs and fixtures, low-volume end-use parts, education, and hobby making. A single printer can switch between rigid and flexible polymers, between rapid draft models and dimensionally controlled components, and between decorative and functional output. That flexibility is not just about materials; it’s also about geometry and iteration speed. With FDM printing, it is common to adjust a CAD model in the morning, slice it at lunch, and test a revised part by afternoon. That rapid loop helps teams validate fit, ergonomics, airflow, cable routing, and assembly sequence without waiting on external suppliers. It also changes how products are designed: engineers can test more variants, and makers can personalize objects without retooling costs. Understanding the fundamentals—how layers fuse, how heat moves through the part, and how the printer interprets toolpaths—turns the process from “sometimes works” into a reliable manufacturing method.
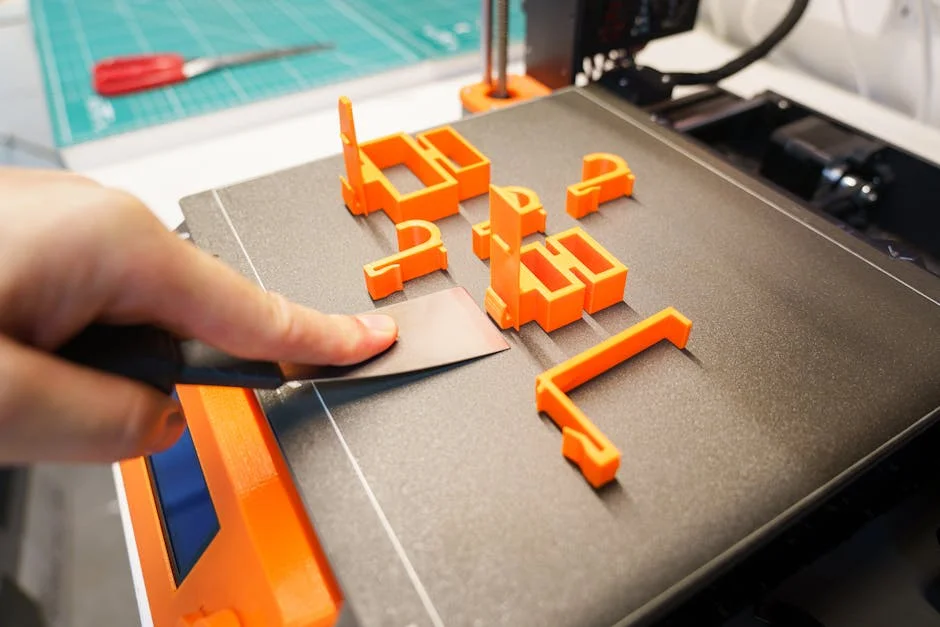
How the FDM Printing Process Works: From Filament to Part
The FDM printing workflow begins long before the first layer is laid down. A 3D model must be “sliced,” meaning software converts the geometry into layers and generates toolpaths for perimeters, infill, and supports. The slicer also decides speeds, accelerations, temperatures, cooling behavior, retractions, and seam placement. Those choices determine whether the extruded bead is deposited consistently and whether it adheres to the previous line and layer. The printer then executes the G-code instructions, moving the nozzle in X and Y while stepping upward in Z after each layer. Filament is driven into the hotend by gears, melted in the heat break and heater block, and pushed out through a nozzle whose diameter influences line width and detail. A heated bed helps the first layer stick and reduces warping by keeping the lower layers warm. Fans cool the plastic to lock in geometry, especially on overhangs and bridges.
At the material level, FDM printing depends on a narrow window of viscosity and bonding. Too cold, and the filament won’t fuse well, leading to weak interlayer adhesion and brittle parts. Too hot, and the polymer may degrade, string excessively, or lose dimensional accuracy. The nozzle must deliver a consistent volumetric flow rate, which is the product of line width, layer height, and print speed. If the printer asks for more flow than the hotend can melt, under-extrusion appears as gaps, weak walls, and rough top surfaces. Conversely, too much flow causes blobs, poor surface finish, and dimensional swelling. Motion also matters: sharp corners, sudden speed changes, and high acceleration can cause ringing, ghosting, or skipped steps. The process is therefore a choreography of thermal and mechanical systems, and understanding that choreography is the key to predictable FDM printing across different models and materials.
Choosing the Right Materials for FDM Printing
Material selection can make or break an FDM printing project because each polymer carries its own balance of stiffness, toughness, heat resistance, chemical resistance, and printability. PLA is popular for its low warping, crisp detail, and minimal odor, making it a go-to for visual prototypes, educational models, and many household items. PETG offers improved toughness and chemical resistance compared to PLA, often serving well for functional parts that need durability without the printing challenges of higher-temperature polymers. ABS and ASA bring better heat resistance and, in ASA’s case, improved UV stability, but they typically require an enclosure and careful control of drafts to prevent warping and layer separation. TPU and other flexible filaments enable gaskets, grips, vibration isolators, and wearable parts, but they demand slower print speeds and a well-tuned extrusion path to avoid buckling.
More specialized FDM printing materials broaden the use cases further. Nylon (polyamide) can provide excellent toughness and fatigue resistance, yet it is moisture-sensitive and often benefits from a hardened nozzle if filled with abrasive additives. Carbon fiber or glass fiber filled filaments improve stiffness and dimensional stability, but they trade away some layer adhesion and can wear brass nozzles quickly. Polycarbonate and high-temperature blends can handle demanding thermal environments, though they typically need high nozzle temperatures, a heated chamber or enclosure, and careful bed adhesion strategies. Even within a single polymer family, brand formulations vary in additives, pigments, and melt flow, so “same material” does not always behave the same. For reliable FDM printing, it helps to match material choice to the part’s real requirements—load direction, service temperature, exposure to sunlight, and contact with oils or solvents—rather than defaulting to what prints easiest.
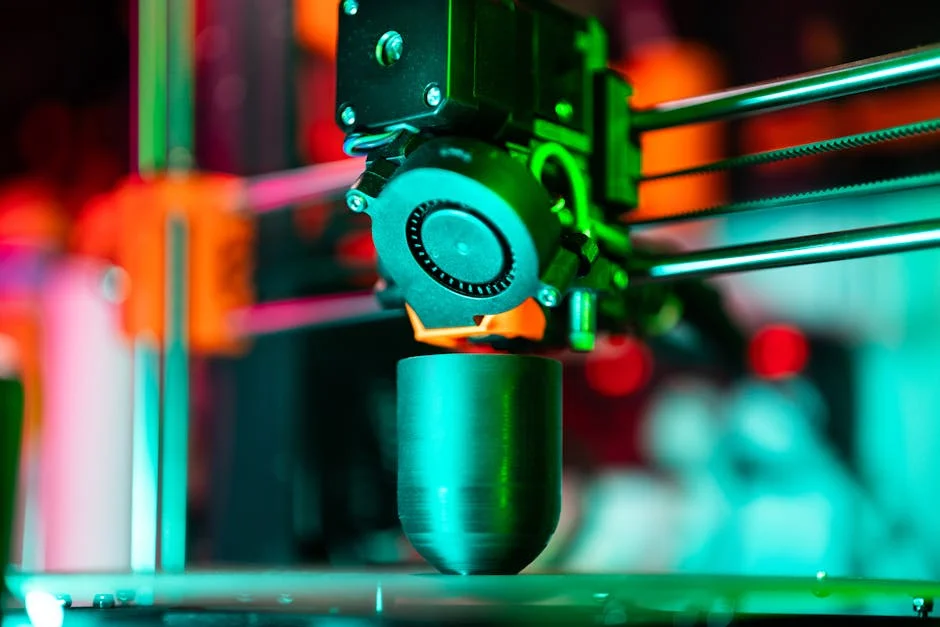
Printer Hardware Essentials That Influence FDM Printing Quality
Hardware choices shape what is realistically achievable with FDM printing, especially when aiming for repeatable accuracy and smooth surfaces. The motion system—whether Cartesian, CoreXY, or delta—affects speed potential and how vibration is managed. Stiff frames, quality linear rails or rods, and well-tensioned belts reduce resonance that shows up as ripples on vertical walls. The extruder type also matters: direct drive setups feed filament with a shorter path and generally handle flexible materials better, while Bowden setups can reduce moving mass on the toolhead and may allow faster travel with less ringing, at the cost of more challenging retraction tuning. Hotend design influences maximum temperature, melt capacity, and reliability; all-metal hotends handle higher temperatures and reduce risk of heat creep when configured correctly. Nozzle choice—diameter and material—affects detail, strength, and abrasive resistance.
Bed systems and build surfaces are another major factor in FDM printing success. A flat, stable bed with a reliable leveling method reduces first-layer issues that lead to failed prints. Manual leveling can work well, but automatic bed leveling probes help compensate for minor surface deviations, especially on larger printers. Heated beds expand material options by reducing warping and improving adhesion, and enclosures stabilize ambient temperature to prevent drafts and uneven cooling. Cooling hardware, including part cooling fans and ducts, must deliver airflow where it is needed without chilling the hotend or causing temperature swings. Electronics and firmware influence stepper current control, microstepping, input shaping, and pressure advance—features that can dramatically improve surface finish and dimensional accuracy. When FDM printing is treated as a system rather than a single device, hardware upgrades become easier to prioritize: focus first on reliability and consistency, then on speed and cosmetic refinement.
Slicer Settings That Make or Break FDM Printing
Slicer configuration is where FDM printing becomes either predictable or frustrating, because the slicer converts geometry into millions of tiny decisions. Layer height and line width control detail and strength; thinner layers improve surface finish and capture small features, but they increase print time and can expose issues in cooling and extrusion consistency. Wall count and top/bottom thickness define how “solid” the part feels and how well it resists bending and impact. Infill percentage and pattern influence weight, stiffness, and print time; gyroid and cubic patterns distribute forces well, while grid can be faster and simpler. Print speeds must match the hotend’s volumetric capacity, and the slicer’s acceleration and jerk settings must align with what the frame can handle without vibration artifacts. Retraction and travel settings reduce stringing and scars, but overly aggressive retraction can cause clogs or under-extrusion after travel moves.
Temperature and cooling settings are especially sensitive in FDM printing because they determine bonding and shape retention. Higher nozzle temperatures can improve layer adhesion and reduce under-extrusion, but they may increase stringing and cause overhangs to sag. Part cooling helps with bridging and sharp edges, yet excessive cooling can reduce interlayer bonding, especially in ABS-like materials that prefer a warmer environment. Support settings—type, density, interface layers, and Z-gap—control how easily supports remove and how clean the underside surfaces look. Seam placement and external perimeter order can hide or highlight the Z-seam and influence dimensional accuracy on holes and bosses. Calibrations like flow rate (extrusion multiplier), pressure advance, and linear advance help the printer maintain consistent extrusion during speed changes, reducing blobs at corners and thin spots after retractions. Mastery of slicer settings does not require memorizing every option; it requires understanding the cause-and-effect relationships that define successful FDM printing across different designs.
Designing Parts for Stronger and More Accurate FDM Printing
Design for additive manufacturing is especially important for FDM printing because the layer-by-layer nature creates directional behavior. Parts are typically strongest in the XY plane and weaker along the Z axis where interlayer adhesion dominates. That means load paths should be oriented to keep major stresses within layers when possible. For example, a hook printed flat may be stronger than the same hook printed upright, because the layer lines align with the forces. Fillets and generous radii reduce stress concentrations that can cause cracking at layer boundaries. Wall thickness should be chosen to align with line width; designing walls that are exact multiples of the extrusion width helps the slicer generate clean perimeters without gaps or excessive infill. Holes often print undersized due to extrusion and cooling behavior, so adding a small clearance or using teardrop shapes can improve fit without post-processing.
Overhangs, bridges, and support considerations are also central to FDM printing design. Many printers can handle overhangs around 45 degrees without supports, but that varies with cooling, material, and layer height. Designing chamfers instead of sharp overhangs can eliminate supports and improve surface quality. When supports are unavoidable, orienting the part so that supported surfaces are hidden or non-critical reduces finishing work. Tolerances should reflect the printer’s real capability; press fits and sliding fits often need different clearances depending on material and printer tuning. Features like snap fits can work well in FDM printing when designed with appropriate thickness, fillets, and print orientation, but brittle materials like PLA may fail under repeated flexing. Including alignment features, captive nut pockets, and assembly aids can turn printed components into practical hardware. When design choices respect the realities of FDM printing, the result is not only stronger parts but also fewer failed prints and less time spent sanding, drilling, or reprinting.
Common FDM Printing Problems and Practical Fixes
Even with good equipment, FDM printing can produce defects that have recognizable causes. Poor first-layer adhesion is among the most common problems, often caused by incorrect nozzle height, a dirty build surface, insufficient bed temperature, or the wrong first-layer speed. A first layer that is too high looks like round strings that barely touch; too low looks overly squished with ridges and can lead to elephant’s foot. Warping and corner lift typically come from uneven cooling and shrinkage, especially with ABS-like polymers; an enclosure, proper bed temperature, and brim or raft strategies help. Stringing occurs when molten filament oozes during travel moves; tuning retraction, travel speed, and temperature helps, but wet filament can also cause persistent stringing and bubbles. Under-extrusion may stem from partial nozzle clogs, worn drive gears, incorrect flow settings, or trying to print faster than the hotend can melt.
| Aspect | FDM Printing | Best For |
|---|---|---|
| Cost & Materials | Low equipment and filament cost; wide range of thermoplastics (PLA, PETG, ABS, TPU), including composites. | Budget-friendly prototyping, functional parts, and material experimentation. |
| Speed & Build Volume | Generally fast setup and scalable to large build volumes; print time varies with layer height and infill. | Large parts, quick iterations, and workshop/production jigs. |
| Surface Finish & Accuracy | Visible layer lines; moderate dimensional accuracy; may need supports and post-processing (sanding, vapor smoothing). | Rugged components where strength and cost matter more than cosmetic finish. |
Expert Insight
Calibrate first-layer performance before chasing other settings: level the bed, set Z-offset so the filament is slightly squished without ridges, and slow the first layer (15–25 mm/s) with a slightly higher nozzle temperature. A reliable first layer prevents warping, improves dimensional accuracy, and reduces failed prints. If you’re looking for fdm printing, this is your best choice.
Improve strength and surface quality by matching orientation and cooling to the part’s job: rotate the model so major loads run along continuous perimeters, then increase wall count (3–5) before raising infill. Use strong part cooling for bridges and overhangs, but reduce fan speed for materials like ABS/ASA to minimize layer splitting and corner lift. If you’re looking for fdm printing, this is your best choice.
Layer shifting and skipped steps in FDM printing usually indicate mechanical or electrical issues: belts too loose or too tight, pulleys not secured, excessive acceleration, or stepper drivers overheating. Ringing and ghosting show up as ripples near corners and are tied to vibration; reducing acceleration, improving frame stiffness, or enabling input shaping can help. Z-banding can come from lead screw wobble, inconsistent extrusion, or mechanical binding in the Z axis. Weak layer adhesion can result from low nozzle temperature, too much cooling, or contaminated filament, and it becomes more noticeable in tall parts where the printer’s airflow chills the build. Surface blobs and zits can be caused by pressure changes in the nozzle, insufficient pressure advance tuning, or filament diameter inconsistency. The most productive troubleshooting approach is systematic: change one variable at a time, document results, and prioritize fundamentals like filament dryness, clean nozzle, stable bed leveling, and realistic speeds. That discipline turns FDM printing from guesswork into a controlled process.
Post-Processing Options for Better Results in FDM Printing
Post-processing can elevate FDM printing from “prototype look” to professional presentation or improved functionality, depending on the goal. Support removal is often the first step, and the technique matters: using flush cutters for larger support structures, a deburring tool for edges, and careful scraping for interface layers can reduce gouges. Sanding is common for smoothing layer lines, especially on PLA and PETG, though PETG can gum up sandpaper if it heats. Wet sanding helps control heat and dust, and stepping through grits gradually yields more uniform results. For holes and critical dimensions, drilling or reaming can bring printed features into tolerance, but it’s best done with proper fixturing to avoid cracking the part along layer lines. Heat-set threaded inserts are widely used to add durable threads, especially in enclosures and fixtures, and they can significantly improve assembly reliability compared to tapping plastic directly.
Chemical smoothing is another post-processing path sometimes used in FDM printing, but it depends on material and safety constraints. ABS can be vapor-smoothed with acetone under controlled conditions, improving surface finish and sometimes sealing small gaps, though it can also soften sharp features and alter dimensions. ASA and some blends may respond to specific solvents, but experimentation should be cautious and ventilation is essential. Painting and priming can produce a high-end finish; filler primers help hide layer lines, while proper surface cleaning improves adhesion. For functional parts, annealing can increase heat resistance and sometimes strength, particularly with PLA variants designed for annealing, though it can also cause shrinkage and warping unless the part is supported and the process is controlled. Bonding printed parts using cyanoacrylate, epoxy, or plastic welding can create larger assemblies than the build volume allows, but joint design and surface preparation matter. With thoughtful post-processing, FDM printing can deliver both refined aesthetics and more durable mechanical performance.
Applications Where FDM Printing Excels
FDM printing is especially strong in rapid prototyping because it supports fast iteration with low per-part cost. Engineers use it to validate fit and function, test assembly sequences, and create ergonomic mockups. Designers rely on it for form studies, packaging checks, and communication models that make concepts tangible. In manufacturing environments, printed jigs and fixtures can reduce downtime and improve repeatability—examples include drill guides, alignment tools, soft jaws, sensor mounts, and end-of-arm tooling prototypes. Because the parts can be customized quickly, FDM printing often replaces improvised solutions like wood blocks or hand-bent sheet metal, offering better precision and safer, more consistent workflows. Educational settings benefit too: students can move from CAD to physical objects quickly, reinforcing engineering concepts through hands-on learning.
Beyond prototyping, FDM printing increasingly supports end-use parts when the design and material are matched to the application. Custom brackets, cable management components, protective covers, lab adapters, and replacement knobs are common examples. In robotics and RC hobbies, the ability to print lightweight structures, housings, and mounts encourages experimentation and modular design. For medical and assistive contexts, printed grips, tool adaptations, and orthotic prototypes can be personalized, though regulated medical uses require appropriate validation and material traceability. Small businesses use FDM printing for limited-run products, personalization, and on-demand spares, reducing inventory pressure. Even in art and architecture, the process enables complex forms and iterative refinements. The common thread is not just affordability; it is responsiveness. FDM printing allows solutions to be created when and where they are needed, with a feedback loop that encourages improvement rather than settling for “good enough” on the first attempt.
Cost, Speed, and Sustainability Considerations in FDM Printing
Cost planning for FDM printing includes more than just the printer and filament. Consumables such as nozzles, build surfaces, adhesives, and maintenance parts add up over time, and electricity usage can be significant for long prints with heated beds and enclosures. Print time is a major “hidden cost” because it ties up equipment and affects throughput; reducing time can be achieved by increasing layer height, using larger nozzles, optimizing infill, and printing multiple parts efficiently, but each strategy has trade-offs in strength and surface finish. Failed prints also carry a cost in time and material, which is why process stability—bed leveling, filament dryness, and conservative speeds—often saves more money than chasing maximum speed. For business use, tracking cost per part typically involves material weight, machine time, labor for setup and post-processing, and an allowance for maintenance and depreciation.
Sustainability in FDM printing is nuanced. On one hand, the process can reduce waste compared to subtractive methods, especially for prototypes and one-off parts, because material is deposited where needed. On the other hand, supports, failed prints, and iterative prototypes can generate significant plastic waste. Choosing designs that minimize supports, using soluble supports only when necessary, and tuning for reliability can reduce scrap. Some materials are marketed as biodegradable, but real-world biodegradation often requires industrial composting conditions; disposal practices should be considered realistically. Recycling filament is possible with specialized equipment, though consistent quality can be challenging due to moisture and contamination. Energy consumption can be lowered by printing at reasonable bed temperatures, insulating enclosures, and batching prints to reduce warm-up cycles. When FDM printing is used thoughtfully—printing only what is needed, optimizing designs for fewer failures, and selecting materials appropriate to the product lifecycle—it can support both economic and environmental goals without compromising part performance.
Getting Consistent Results: Calibration, Maintenance, and Workflow
Consistency is the hallmark of mature FDM printing, and it is achieved through calibration and routine maintenance rather than constant guesswork. Mechanical checks include belt tension, pulley set screws, frame fasteners, and smooth axis motion without binding. Extrusion calibration typically starts with verifying filament diameter assumptions, then tuning flow rate so walls measure correctly, and finally validating pressure advance to reduce corner bulging and seam artifacts. Temperature towers and retraction tests can identify a stable window for each filament, because different formulations behave differently even within the same polymer type. Bed leveling and first-layer calibration should be treated as foundational; a reliable first layer reduces failures and improves dimensional accuracy at the base. Keeping the build surface clean—using appropriate cleaners for PEI, glass, or textured plates—prevents adhesion problems that masquerade as slicer issues.
Maintenance habits also protect print quality over time in FDM printing. Nozzles wear, especially with abrasive filaments, and a worn nozzle can cause inconsistent extrusion and poor detail. Hotend inspections help catch heat creep issues, loose thermistors, or partially clogged heat breaks. Filament storage is often overlooked; many filaments absorb moisture, leading to popping sounds, rough surfaces, and weak layers, so sealed containers with desiccant or active dryers can make a noticeable difference. Fans and ducts should be kept free of dust and filament debris, and firmware settings should be backed up so tuning progress is not lost. A practical workflow includes documenting filament profiles, keeping notes on successful settings, and using standardized test prints when changing materials or hardware. With that approach, FDM printing becomes repeatable enough for production of fixtures, small-batch products, and dependable replacement parts, rather than an occasional success surrounded by avoidable failures.
Future Trends and What to Expect from FDM Printing
The trajectory of FDM printing points toward faster, more automated, and more material-capable systems. Input shaping, pressure advance, and better motion planning have already enabled higher speeds without sacrificing surface quality, and ongoing firmware improvements continue to close the gap between consumer and industrial performance. Automatic calibration features—such as nozzle probing, flow compensation, and first-layer inspection—are becoming more common, reducing the skill barrier while improving reliability. Tool-changing and multi-material systems are expanding what can be produced in a single job, combining rigid and flexible sections, soluble supports, or different colors and textures. As these capabilities mature, the practical focus shifts from “Can it print?” to “Can it print predictably, at scale, with minimal supervision?” That shift makes FDM printing more attractive for small manufacturing cells and engineering departments that need quick turnaround without dedicating staff to constant tuning.
Materials are also evolving in ways that broaden the value of FDM printing. New blends aim to improve layer adhesion, reduce warping, and increase temperature resistance while remaining easy to print. Reinforced filaments are becoming more consistent, and hardened components are more widely available, making abrasive materials less intimidating. There is also growing interest in process monitoring—using sensors and software to detect under-extrusion, spaghetti failures, or bed adhesion issues early. That kind of feedback can reduce waste and improve throughput, especially in print farms. At the same time, the fundamentals remain: clean extrusion, stable temperature control, and thoughtful design still determine outcomes more than any single feature. As the ecosystem continues to mature, FDM printing is likely to become less of a standalone hobby tool and more of a standard capability—like a laser printer for objects—used routinely for practical solutions across homes, schools, labs, and workshops.
Watch the demonstration video
In this video, you’ll learn the fundamentals of FDM (Fused Deposition Modeling) 3D printing—how filament is melted and deposited layer by layer, what key printer parts do, and which settings most affect print quality. It also covers common issues like warping and stringing, plus practical tips for better adhesion, strength, and surface finish. If you’re looking for fdm printing, this is your best choice.
Summary
In summary, “fdm printing” is a crucial topic that deserves thoughtful consideration. We hope this article has provided you with a comprehensive understanding to help you make better decisions.
Frequently Asked Questions
What is FDM printing?
FDM (Fused Deposition Modeling) is a 3D printing process that melts thermoplastic filament and deposits it layer-by-layer to build a part.
Which materials are commonly used in FDM?
Popular options for **fdm printing** include PLA, PETG, ABS/ASA, TPU, and nylon—each offering its own mix of strength, heat resistance, flexibility, and overall printability, so you can choose the best fit for your project.
How do I choose nozzle and bed temperatures?
Start with the filament maker’s recommended ranges, then fine-tune: raise nozzle temp for better layer bonding, lower it to reduce stringing; adjust bed temp to improve first-layer adhesion and reduce warping. If you’re looking for fdm printing, this is your best choice.
Why is first-layer adhesion important and how can I improve it?
A solid first layer prevents warping and failed prints; level the bed, set correct Z-offset, clean the build surface, slow the first layer, and use appropriate bed temperature or adhesion aids (glue stick, PEI, brim). If you’re looking for fdm printing, this is your best choice.
What causes stringing and how do I reduce it?
Stringing typically happens when a bit of molten filament oozes from the nozzle during travel moves. To minimize it in **fdm printing**, dial in your retraction settings, slightly lower the nozzle temperature, boost travel speed, and make sure moisture-sensitive filaments are properly dried before printing.
How can I improve strength and surface quality in FDM prints?
For strength, increase wall/perimeter count, optimize infill and orientation, and ensure good layer adhesion; for surface quality, use smaller layer heights, calibrate flow, reduce vibration, and consider post-processing (sanding, smoothing). If you’re looking for fdm printing, this is your best choice.
📢 Looking for more info about fdm printing? Follow Our Site for updates and tips!

Trusted External Sources
- What is the difference between stl and fdm printers? – Reddit
Jan 30, 2026 … FDM takes a plastic rod in a spool (usually 1.75mm in diameter) and fuses it on the print bed, layer by layer, to create the desired object . If you’re looking for fdm printing, this is your best choice.
- FDM vs. SLA vs. SLS: 3D Printing Technology Comparison – Formlabs
Explore the three most established 3D printing technologies—FDM, SLA, and SLS—and see how they stack up in real-world use. From everyday **fdm printing** to resin-based detail and powder-powered strength, you’ll discover which type of 3D printer best fits your project and performance needs.
- An FDM Guide to Model Printing : r/PrintedWarhammer – Reddit
Sep 10, 2026 … An average miniature using the most detailed settings we can aim for, can take up to 6 hours to print. This number only goes up with the size of a model. If you’re looking for fdm printing, this is your best choice.
- Fused filament fabrication – Wikipedia
Fused filament fabrication (FFF)—often called **fdm printing** or fused deposition modeling (FDM)—is a popular 3D printing method where a thermoplastic filament is heated and extruded through a nozzle, then laid down layer by layer to build a part. Sometimes referred to as filament freeform fabrication, this process is widely used because it’s affordable, versatile, and well-suited for everything from quick prototypes to functional prints.
- FDM Nylon 12 – FDM 3D Printing Material by Stratasys
FDM Nylon 12 is a tough, durable material for **fdm printing**, offering excellent impact and fatigue resistance—ideal for parts like snap-fit closures that need to flex repeatedly without breaking.