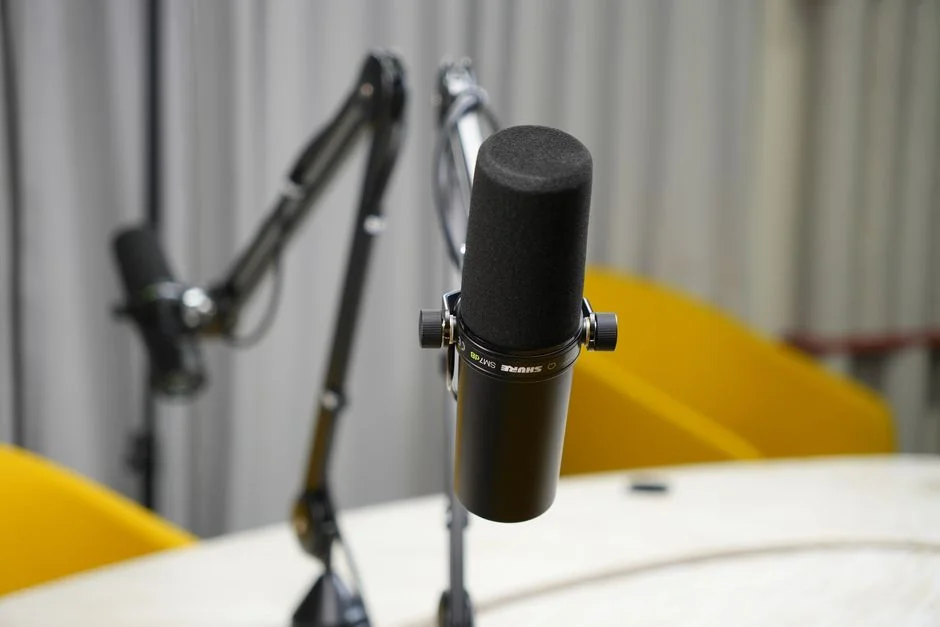
A mic and boom arm combination is one of the quickest upgrades for anyone who records voice: streamers, podcasters, remote workers, musicians, educators, and content creators. The reason is simple: sound quality is heavily influenced by microphone placement, and a boom arm makes consistent placement easy. When a microphone sits on a desk stand, it often ends up too far away, pointed at the wrong angle, or blocked by a monitor. The result is thin tone, more room echo, and a higher need for processing that can introduce artifacts. A boom arm lets the microphone hover exactly where your voice is strongest—typically a few inches from your mouth, slightly off-axis to reduce plosives—without taking up valuable desk space. That alone can make your voice sound clearer, more present, and more “broadcast” without changing the microphone itself.
Table of Contents
- My Personal Experience
- Why a Mic and Boom Arm Setup Changes Your Audio Results
- Understanding Boom Arm Types and When Each Makes Sense
- Desk Clamp, Grommet Mount, and Stand Base: Choosing the Right Foundation
- Matching Microphone Type to the Boom Arm: Dynamic vs Condenser
- Placement Techniques: Distance, Angle, and Consistency
- Reducing Vibration, Handling Noise, and Desk Rumble
- Cable Management and Clean Desk Aesthetics
- Expert Insight
- Ergonomics for Streaming, Podcasting, and Remote Work
- Accessories That Improve a Mic and Boom Arm Rig
- Common Mistakes That Hurt Sound Quality and How to Avoid Them
- Care, Maintenance, and Long-Term Reliability
- Buying Considerations: Budget, Build Quality, and Real-World Fit
- Putting It All Together for a Professional Sounding Workspace
- Watch the demonstration video
- Frequently Asked Questions
- Trusted External Sources
My Personal Experience
I finally bought a decent mic and a boom arm after getting tired of my voice sounding hollow on calls. At first I thought the mic was the problem, but most of the noise was actually my desk—every time I typed or bumped my water bottle, it came through loud and clear. Mounting the mic on a boom arm helped immediately because I could pull it closer to my mouth and keep it off the tabletop, and it also freed up a surprising amount of space. The only annoying part was dialing in the tension so it wouldn’t slowly droop mid-meeting, but once I tightened the joints and routed the cable along the arm, it stopped getting in the way. Now I just swing it out when I’m done and my setup feels a lot cleaner. If you’re looking for mic and boom arm, this is your best choice.
Why a Mic and Boom Arm Setup Changes Your Audio Results
A mic and boom arm combination is one of the quickest upgrades for anyone who records voice: streamers, podcasters, remote workers, musicians, educators, and content creators. The reason is simple: sound quality is heavily influenced by microphone placement, and a boom arm makes consistent placement easy. When a microphone sits on a desk stand, it often ends up too far away, pointed at the wrong angle, or blocked by a monitor. The result is thin tone, more room echo, and a higher need for processing that can introduce artifacts. A boom arm lets the microphone hover exactly where your voice is strongest—typically a few inches from your mouth, slightly off-axis to reduce plosives—without taking up valuable desk space. That alone can make your voice sound clearer, more present, and more “broadcast” without changing the microphone itself.

Another reason the mic and boom arm pairing matters is noise control. Desks transmit vibration: typing, mouse clicks, tapping, even footsteps can travel through a desk stand into the microphone. A properly chosen boom arm reduces those mechanical pathways, especially when combined with a shock mount, and it can be positioned to minimize cable rub or stand resonance. Beyond audio, a boom arm improves workflow. You can push the mic away when not recording, swing it into position instantly for meetings, and maintain a consistent posture instead of leaning toward a static stand. Over long sessions, that comfort helps your voice remain steady and reduces fatigue. The net effect is a setup that’s easier to use daily, which leads to more consistent recordings and fewer “why does this sound different today?” moments.
Understanding Boom Arm Types and When Each Makes Sense
Choosing the right boom arm begins with understanding the common designs. The most popular is the articulating scissor-style arm, which uses spring tension to hold position and folds in multiple joints. This style is versatile and typically cost-effective, making it common in home studios and streaming setups. Another option is a low-profile arm, often designed with internal springs or tension mechanisms that keep the arm below monitor height. Low-profile arms can look cleaner on camera, reduce visual clutter, and are less likely to bump lights or webcams. There are also broadcast-style arms with robust construction and smoother movement, often used in radio environments where the microphone is repositioned frequently. Each design can work well, but the “best” choice depends on your desk layout, how often you move the microphone, and whether you care about camera aesthetics. If you’re looking for mic and boom arm, this is your best choice.
Load capacity is the detail that most people underestimate. A mic and boom arm must be matched by weight, especially if you use a dynamic microphone, a shock mount, and sometimes a pop filter. Many popular dynamic mics become surprisingly heavy once accessories are added, and if the arm is under-rated you’ll see sagging, drifting, or joint slippage. That can create inconsistent distance and tone, and it can also lead to squeaks and handling noise as you keep re-tightening. Consider the reach, too: an arm with a long horizontal extension helps place the mic close to you while clamping farther away, but longer reach increases leverage, which again demands stronger joints. If your desk is shallow, a shorter arm may be easier to position without forcing extreme angles. A good decision here saves time and frustration, and it protects your microphone from accidental drops caused by unstable tension.
Desk Clamp, Grommet Mount, and Stand Base: Choosing the Right Foundation
The mounting method determines how stable and convenient your mic and boom arm will feel. Desk clamps are the most common because they’re easy to install and remove without drilling holes. A clamp can hold firmly if your desk edge is sturdy and thick enough for the clamp’s range. For lightweight to midweight microphones, a clamp is often all you need. However, not all desks are equal. Some modern desks use hollow-core construction or have thin surfaces that flex under pressure. If the clamp compresses the edge, you may see the arm wobble or slowly shift. Adding a small hardwood block or metal plate between clamp and desk can distribute pressure and improve stability. Clamp placement also matters: mounting near a corner can reduce wobble because the desk is structurally stronger there.
Grommet mounts are more permanent but can be exceptionally stable. If your desk has a cable grommet hole, you can often use it to mount the arm without additional drilling. If not, drilling a clean hole and installing a grommet can create a professional, tidy look with strong support. This approach is especially helpful for heavier microphone setups because it reduces the chance of the clamp slipping. A stand base is another option when clamping is impossible, such as on glass desks or tables with thick lips that prevent clamping. Bases can work well, but they consume desk space and can transmit more vibration. If you frequently type while recording, a clamp or grommet is usually better. The ideal foundation keeps the mic and boom arm steady, quiet, and easy to reposition without thinking about it every time you sit down.
Matching Microphone Type to the Boom Arm: Dynamic vs Condenser
Microphone type influences both sound and hardware needs. Dynamic microphones are popular for untreated rooms because they tend to reject background noise and room reflections better than many condensers. They usually require close placement for a full, rich sound, which makes a mic and boom arm especially valuable. Because dynamics often need more gain, users may add an inline preamp or a high-gain audio interface, but the physical setup still matters: close placement with stable positioning typically yields the best signal-to-noise ratio. Many broadcast-style dynamic mics are also heavier, so the boom arm’s weight rating becomes critical. If the arm can’t hold position, you’ll constantly fight sagging, and your voice level will vary as the mic drifts away from your mouth.
Condenser microphones can sound detailed and airy, but they are more sensitive to room noise and reflections. A boom arm helps you place a condenser at the right distance and angle to avoid harshness and plosives while keeping it away from keyboard noise. Many condensers are lighter than large dynamics, yet they often benefit from a shock mount to reduce vibration. That added hardware can still push a light-duty arm to its limit. Another consideration is power and cabling: condensers typically need phantom power from an interface or mixer, which means you’ll manage an XLR cable along the arm. If you use a USB condenser, cable routing becomes even more important because USB cables can tug and cause the mic to rotate slightly. Whether dynamic or condenser, the goal is the same: a stable, repeatable position that lets your voice sound consistent across sessions. If you’re looking for mic and boom arm, this is your best choice.
Placement Techniques: Distance, Angle, and Consistency
Placement is where a mic and boom arm delivers its biggest payoff. For most voice recording, a common starting point is 4 to 8 inches from your mouth, with the microphone slightly off to the side rather than directly in front. This off-axis approach helps reduce plosive bursts from “P” and “B” sounds and can soften harsh sibilance. The boom arm lets you lock in that position and return to it every time. If you record long sessions, consider where your head naturally sits when you are relaxed. Set the microphone so you can speak forward without craning your neck or leaning. When you’re comfortable, your breathing sounds calmer and your vocal tone stays more even. That comfort also reduces chair squeaks and posture shifts that can create level changes.

Angle matters as much as distance. Pointing the mic at the corner of your mouth rather than directly at your lips can preserve clarity while avoiding bursts of air. If your mic has a cardioid pattern, keep the “front” of the capsule aimed toward your voice and the rear aimed toward the noisiest part of the room, such as a computer fan. The boom arm helps you exploit the polar pattern by making micro-adjustments easy. Consistency is the hidden advantage: when the microphone stays in the same place, you can set gain once and get predictable levels. Editing becomes faster because you’re not fixing volume swings from session to session. If you share your space with others, a boom arm also makes it simple to move the mic away without changing the settings, then swing it back to the exact spot when you’re ready. If you’re looking for mic and boom arm, this is your best choice.
Reducing Vibration, Handling Noise, and Desk Rumble
Mechanical noise is a common reason recordings sound “cheap” even when the microphone itself is good. A mic and boom arm reduces some of this by decoupling the microphone from the desk surface, but the system is only as quiet as its weakest link. If the arm joints squeak, that squeak can travel through the mount and into the mic, especially with sensitive condensers. Tightening the joints properly, using small amounts of appropriate lubricant when recommended by the manufacturer, and avoiding extreme tension settings can help. The clamp itself can also creak if it’s not seated evenly. A thin rubber pad or a small piece of cork between clamp and desk can reduce micro-movement. The goal is to create a stable, damped path so that your voice is the main thing the mic hears.
A shock mount is often the best companion accessory. It suspends the microphone in elastic bands, isolating it from vibrations that travel through the arm. This is particularly valuable if you type while speaking or if your desk picks up low-frequency thumps. Another practical step is managing cable contact. If the cable is pulled tight or rubs against the arm, it can transmit noise when you move. Secure the cable with soft ties and leave a gentle service loop near the microphone so movement doesn’t tug the connector. If you frequently reposition the mic, practice moving the arm smoothly rather than grabbing the microphone body. That habit reduces handling noise and protects the mic’s internal components. With careful setup, the mic and boom arm becomes a quiet, professional platform that keeps mechanical distractions out of your recordings.
Cable Management and Clean Desk Aesthetics
Cable routing is both a performance issue and a visual one. A mic and boom arm looks best and works best when cables are secured, not dangling. Loose cables can brush against the arm, hit the desk, or snag on keyboard corners, creating noise and frustration. Many boom arms include cable channels or clip-on guides; if yours doesn’t, reusable hook-and-loop ties are an easy solution. Run the cable along the underside or rear of the arm to keep it out of camera view and away from your hands. Leave enough slack near each joint so the arm can move freely without pulling. When the cable is too tight, it can slowly rotate the microphone or shift the arm’s position over time, which changes your tone and level.
Expert Insight
Position the mic 6–10 inches from your mouth and slightly off-axis (about 20–45°) to reduce plosives and harsh sibilance; then set your gain so normal speech peaks around -12 dB to avoid clipping while keeping noise low. If you’re looking for mic and boom arm, this is your best choice.
Mount the boom arm so the mic “floats” in from the side rather than directly in front of you, and tighten the joints just enough to prevent drift; add a shock mount and route the cable along the arm to minimize desk bumps and handling noise. If you’re looking for mic and boom arm, this is your best choice.
USB microphones need special attention because USB cables can be stiffer than XLR, and connectors can be more sensitive to strain. Use a quality cable of appropriate length—too long increases clutter and can create loops that catch on things; too short forces tension at the port. For XLR setups, consider a flexible, low-noise cable and secure it so it doesn’t tap the arm when you move. If you have an audio interface, place it where the cable path is short and direct, reducing the chance of snagging. Visually, good cable management makes the workspace feel calmer and more professional, which matters if you’re on video calls or streaming. Functionally, it reduces accidental bumps and keeps the mic and boom arm moving smoothly, which supports consistent audio and a more enjoyable daily workflow.
Ergonomics for Streaming, Podcasting, and Remote Work
Ergonomics often gets overlooked when people shop for audio gear, yet it has a direct impact on vocal performance and comfort. A mic and boom arm supports better posture because it brings the microphone to you, instead of making you lean toward the microphone. When you lean forward, you compress your diaphragm, your breathing becomes shallow, and your voice can sound strained. Over time, that posture can also cause neck and shoulder discomfort. With a boom arm, you can place the microphone at mouth level while keeping your shoulders relaxed and your back supported by your chair. This is especially important for remote work meetings that can run for hours, where comfort and clarity matter more than “studio vibes.”
| Option | Best for | Pros | Cons |
|---|---|---|---|
| USB mic + basic boom arm | Beginners, quick plug-and-play setups | Easy setup; affordable; clean desk positioning | Limited upgrade path; may pick up more room noise; arm can sag with heavier mics |
| XLR dynamic mic + sturdy boom arm | Streaming/podcasting in untreated rooms | Better background-noise rejection; durable; stable positioning | Needs audio interface; higher total cost; more cables |
| Condenser mic + premium boom arm (shock mount) | Voiceover, studio-style clarity in quiet spaces | Detailed sound; smooth articulation; excellent vibration isolation | More sensitive to room noise; often needs phantom power; pricier setup |

Streaming and podcasting add another layer: you often need the microphone to stay out of the way of your monitor, camera, and lighting. A low-profile arm can keep the mic below eye line while still close enough for a warm, present sound. If you do on-camera content, you may prefer the mic to enter frame from below or the side, depending on your visual style. The boom arm makes that framing repeatable. For shared workspaces, the ability to swing the mic away is a major ergonomic win; you can reclaim desk space for writing, drawing, or gaming, then return the mic to position without reconfiguring everything. When the mic and boom arm are set up with comfort in mind, you get better voice consistency, fewer posture-related breaks, and a setup that feels like it’s helping rather than demanding constant attention.
Accessories That Improve a Mic and Boom Arm Rig
Accessories can either solve problems or create clutter, so it helps to choose based on specific needs. A pop filter is a common add-on for managing plosives, especially with close mic placement. Some microphones include foam windscreens that help, but a dedicated pop filter often provides more consistent control without dulling the high frequencies as much. The boom arm makes it easy to position a pop filter at the right distance—usually a couple inches from the mic—so you maintain a stable speaking distance. A shock mount, as mentioned earlier, is another high-impact accessory for reducing vibrations. If your room is lively, simple acoustic treatment behind and to the sides of your speaking position can reduce reflections, making your microphone sound more direct and intimate. If you’re looking for mic and boom arm, this is your best choice.
For XLR setups, an inline gain booster can be useful if your interface is noisy at high gain, which is common with some dynamic microphones. While this isn’t physically part of the mic and boom arm, it affects how you run cables and where you place your interface. Headphones are also part of the monitoring chain; closed-back headphones help prevent sound leakage into the microphone. If you want a clean look on camera, consider a boom arm with internal cable routing or add cable sleeves that match your setup. Finally, a small desk mat can reduce keyboard and mouse noise transmitted through the desk, complementing the isolation benefits of the arm. The best accessories are the ones that quietly improve reliability, reduce noise, and keep your setup comfortable without turning your workspace into a maze of add-ons.
Common Mistakes That Hurt Sound Quality and How to Avoid Them
One frequent mistake is placing the microphone too far away. Even an expensive microphone will sound thin and echoey if it’s a foot from your mouth in a reflective room. A mic and boom arm is meant to enable close placement, so take advantage of it. Another mistake is aiming the microphone incorrectly. Many side-address microphones are designed to be spoken into from the side, not the end, yet people often talk into the top because it “looks” right. That error can make the voice sound muffled or distant. Also common is setting the boom arm too loose or too tight. Too loose leads to sagging and drifting; too tight can cause creaks, premature wear, and difficult repositioning. Find a tension setting that holds position while allowing smooth movement.
Cable mistakes can be just as damaging. If the cable is pulling on the mic, it can rotate the capsule away from your mouth and slowly degrade your sound over time without you noticing. If the cable is rubbing against the arm, you may hear faint scraping when you move. Another issue is ignoring room noise sources: PC fans, air conditioners, and reflective walls. While the boom arm helps with placement, it can’t fully compensate for a noisy environment. Position the mic so the rear of a cardioid pattern faces the noise source, and consider lowering fan curves or moving the computer slightly farther away. Lastly, many people forget to test their setup after changing anything. Small changes in arm height, monitor position, or chair height can alter your speaking angle. A quick level check and a short test recording keep the mic and boom arm delivering consistent results day after day.
Care, Maintenance, and Long-Term Reliability
A boom arm is a mechanical tool, and like any tool it benefits from basic care. Periodically check the clamp tightness, especially if your desk surface compresses over time. Inspect the joints for loosening, and tighten only as much as needed to prevent drift. If your arm uses springs, watch for changes in tension that could indicate wear. For arms with internal tension systems, follow the manufacturer’s adjustment guidance to avoid stripping screws or over-stressing components. Keeping the arm clean matters more than people think: dust can accumulate in joints, and small particles can contribute to squeaking. Wipe down the arm occasionally with a soft cloth, and avoid harsh chemicals that could damage finishes or rubber pads. If you’re looking for mic and boom arm, this is your best choice.

Microphone care is part of the same ecosystem. If your mic and boom arm stay mounted, make sure the microphone is secured properly in its clip or shock mount. Avoid leaving cables under strain; connectors last longer when they aren’t constantly bent at sharp angles. If you move the arm frequently, practice moving it by the arm itself rather than the mic body, reducing stress on the mount and minimizing handling noise. For shared spaces, consider swinging the mic away and covering it when not in use to reduce dust buildup. Over time, a well-maintained setup stays quiet and stable, which is exactly what you want: the arm should disappear into the background while your voice remains the focus. With simple checks and thoughtful handling, the mic and boom arm can remain a reliable part of your recording chain for years.
Buying Considerations: Budget, Build Quality, and Real-World Fit
Price ranges for a mic and boom arm vary widely, and the best choice is the one that fits your real usage. Budget arms can work well for lightweight microphones and occasional use, but they may develop squeaks, droop under load, or require frequent tightening. Midrange arms often provide the best balance: smoother joints, better clamps, and higher weight ratings without the premium cost of broadcast studio hardware. High-end arms can feel effortless to move and hold position with heavy microphones, and they often look cleaner on camera. However, paying more only makes sense if you need the extra load capacity, the smoother movement, or the aesthetic refinement. Otherwise, that money might be better spent on acoustic improvements or a better microphone.
Fit is the factor that makes or breaks satisfaction. Measure your desk thickness and edge shape to ensure the clamp works. Consider your monitor height, whether you use multiple screens, and where a camera or light might sit. Think about your dominant hand and where you want the mic to approach from; many people prefer the arm mounted on the opposite side of their mouse hand to reduce collisions. Also consider how you store the mic when not recording—some arms fold neatly to the side, while others stick out. If you share the desk, quick repositioning may be essential. The best purchasing decision comes from imagining daily use: opening the arm, moving it into place, speaking for an hour, pushing it away, and repeating that routine for months. When the mic and boom arm match your space and habits, the setup feels natural instead of fussy.
Putting It All Together for a Professional Sounding Workspace
A polished recording environment is less about any single piece of gear and more about how everything works together. The mic and boom arm is a central piece because it directly controls placement, comfort, and consistency. Start by mounting the arm where it can reach your ideal speaking position without extreme angles. Add a shock mount if desk vibrations are an issue, and choose a pop filter or windscreen based on how close you speak and how plosive-heavy your voice is. Route the cable so it doesn’t tug or rub, and keep a small slack loop near moving joints. Then set your microphone angle and distance, do a short test recording, and adjust until your voice sounds full without clipping. Once you find the sweet spot, mark it mentally or even with a subtle reference point on the arm so you can return to it quickly.
Finally, focus on repeatability. The best setups are the ones that deliver the same sound every time you sit down, whether you’re joining a meeting, recording a narration, or streaming live. That repeatability comes from stable hardware, thoughtful placement, and a workflow that doesn’t require constant tweaking. If you notice noise or inconsistency, address the mechanical basics first: tighten joints, isolate vibrations, and confirm the microphone is aimed correctly. Small improvements compound over time, and the daily experience becomes smoother and more enjoyable. When your voice comes through clearly and comfortably, you spend less time fixing issues and more time creating. A well-chosen mic and boom arm makes that possible, and it remains one of the most practical upgrades for anyone who cares about sounding professional.
Watch the demonstration video
In this video, you’ll learn how to choose the right microphone and boom arm for your setup, including key features to look for, how to position them for clear audio, and tips for reducing noise and vibrations. You’ll also see how to mount and adjust a boom arm for comfort, stability, and better sound quality. If you’re looking for mic and boom arm, this is your best choice.
Summary
In summary, “mic and boom arm” is a crucial topic that deserves thoughtful consideration. We hope this article has provided you with a comprehensive understanding to help you make better decisions.
Frequently Asked Questions
What is a boom arm used for with a microphone?
A mic and boom arm setup lifts your microphone off the desk, keeps your workspace clean, and makes it easy to position the mic right where you need it—close to your mouth for clearer sound—while also helping cut down on vibrations and noise from the desk.
Will my microphone fit on any boom arm?
Most boom arms come with a standard 5/8″-27 thread, and many also include a 3/8″ option via an adapter. Before you set up your mic and boom arm, double-check the thread size on your mic mount or shock mount and confirm which adapters are included.
How do I choose a boom arm for my mic’s weight?
Choose a boom arm that can comfortably support the full weight of your setup—your mic, shock mount, and pop filter included. If you’re using a heavier microphone, you’ll want a mic and boom arm with a higher load rating and sturdier springs to keep everything stable and secure.
Do I need a shock mount if I use a boom arm?
Not always—but using a shock mount can make a noticeable difference by isolating handling noise and vibrations, especially if you tend to bump your desk or frequently reposition your **mic and boom arm**.
Why does my boom arm squeak or drift down?
Squeaks usually happen when the joints are dry, while a mic that slowly droops is a sign the tension isn’t strong enough to support its weight. For a stable, quiet mic and boom arm setup, tighten the adjustment points and, if the manufacturer recommends it, apply a small amount of light lubricant to the moving parts.
How should I position a mic on a boom arm for best sound?
Position your **mic and boom arm** so the microphone sits about 10–20 cm (4–8 in) from your mouth, then angle it the right way depending on whether it’s an end-address or side-address model. Add a pop filter or windscreen to smooth out plosives and keep your audio clean.
? Looking for more info about mic and boom arm? Follow Our Site for updates and tips!

Trusted External Sources
- Recommendations for a mic and boom arm : r/youtubegaming – Reddit
Nov 20, 2026 … I use a FiFine mic with a shock mount and pop filter. Works great, never had any complaints. Audio sounds crisp, doesn’t pick up the clacking of … If you’re looking for mic and boom arm, this is your best choice.
- Microphone Boom Arm – Amazon.com
Versatile mic stand for podcasts, gaming.
- Unpopular Opinion: Tabletop Mic stands are far superior to boom arms
Apr 23, 2026 … I find the stand was just way easier to set up and have it be consistent. With the boom arm there’s like 5 moving joints. If you accidentally … If you’re looking for mic and boom arm, this is your best choice.
- Boom Arm – Amazon.com
Upgrade your recording setup with the InnoGear mic and boom arm, designed to keep your desk clean and your audio gear perfectly positioned. With built-in cable management and a sturdy desk mount, it delivers a sleek, professional look while offering smooth adjustability, extendable reach, and flexible horizontal positioning—ideal for mics like the Blue Yeti, Shure, and Fifine.
- PL 2T Professional-Quality Microphone Boom Arm – Heil Sound
The Heil PL 2T is an internal-tension boom arm designed for smooth, silent repositioning even while you’re recording. Pair this mic and boom arm setup for a clean, professional workspace—the PL 2T also includes a covered cable channel that helps keep your wiring neatly tucked away and out of sight.