3d printing and prototyping sit at the center of modern product development because they compress time, cost, and risk into a workflow that is far more forgiving than traditional fabrication. Instead of committing early to expensive molds, tooling, or machining programs, teams can turn a digital model into a physical part within hours and then iterate repeatedly. That ability to “touch” an idea early matters because many design issues are invisible on a screen: how a grip feels in the hand, whether a latch can be operated with gloves, how a cable routes around a boss, or whether two moving parts interfere when tolerances stack up. With additive manufacturing, those questions can be answered quickly and objectively, and the resulting learning feeds back into CAD with minimal delay. The impact is not limited to startups; established manufacturers use rapid prototypes to validate concepts before spending on production equipment, and they also use printed jigs, fixtures, and gauges to make existing lines more efficient.
Table of Contents
- My Personal Experience
- Why 3d printing and prototyping changed product development
- Core technologies behind additive manufacturing for prototypes
- Materials selection: balancing realism, cost, and speed
- Design for additive manufacturing in early prototypes
- From concept models to functional prototypes: staged validation
- Accuracy, tolerances, and metrology for printed parts
- Post-processing workflows: improving strength and appearance
- Expert Insight
- Using prototypes to validate ergonomics, UX, and assembly
- Cost and lead-time benefits compared with traditional prototyping
- Industry applications: medical, automotive, aerospace, and consumer products
- Common pitfalls and how to avoid them in rapid iteration
- Integrating 3d printing into a broader prototyping strategy
- Future trends: smarter materials, automation, and faster validation loops
- Watch the demonstration video
- Frequently Asked Questions
- Trusted External Sources
My Personal Experience
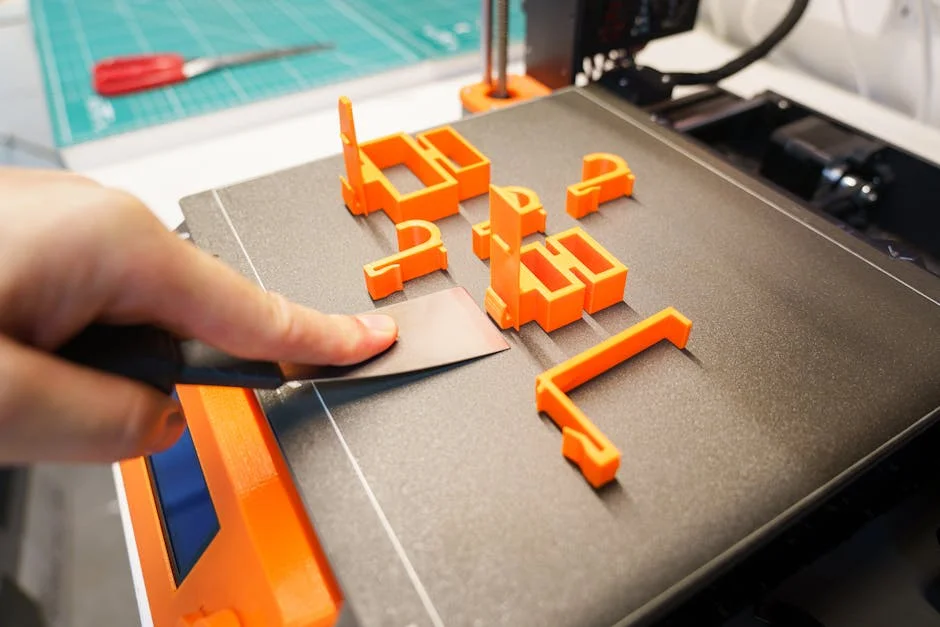
The first time I used a 3D printer for prototyping, I assumed the hardest part would be learning the software, but it was actually figuring out what would fail in the real world. I was building a small enclosure for a sensor board, and my “perfect” CAD model didn’t account for cable clearance or how tight press-fit tabs become once the plastic cools. After two prints with misaligned screw posts and a lid that wouldn’t snap shut, I started making quick iterations—adding a half millimeter here, chamfering an edge there, and printing only the problem corner instead of the whole part to save time. By the fourth version, everything finally clicked into place, and it felt less like I’d “printed” a solution and more like I’d learned a faster way to think through design. If you’re looking for 3d printing and prototyping, this is your best choice.
Why 3d printing and prototyping changed product development
3d printing and prototyping sit at the center of modern product development because they compress time, cost, and risk into a workflow that is far more forgiving than traditional fabrication. Instead of committing early to expensive molds, tooling, or machining programs, teams can turn a digital model into a physical part within hours and then iterate repeatedly. That ability to “touch” an idea early matters because many design issues are invisible on a screen: how a grip feels in the hand, whether a latch can be operated with gloves, how a cable routes around a boss, or whether two moving parts interfere when tolerances stack up. With additive manufacturing, those questions can be answered quickly and objectively, and the resulting learning feeds back into CAD with minimal delay. The impact is not limited to startups; established manufacturers use rapid prototypes to validate concepts before spending on production equipment, and they also use printed jigs, fixtures, and gauges to make existing lines more efficient.
Another reason 3d printing and prototyping have become so influential is that they support multiple levels of fidelity. A “looks-like” model can be printed overnight for customer feedback, while a “works-like” prototype can be produced in a stronger polymer or metal to test load paths and wear. Designers can also print internal features—channels, lattice structures, snap-fit geometries—that are difficult or costly to create with subtractive methods. This expands what is possible at the concept stage and encourages more ambitious exploration. The result is a development culture that rewards evidence-based decisions: print, test, measure, revise, and print again. When stakeholders can see and handle iterations, alignment improves, and costly misunderstandings are reduced. Even when the final product is injection molded or cast, the prototype stages created through additive manufacturing help refine drafts, ribs, wall thickness transitions, and assembly interfaces so that the eventual production process is smoother and less error-prone.
Core technologies behind additive manufacturing for prototypes
Understanding the major additive manufacturing processes helps teams choose the right path for 3d printing and prototyping. Fused deposition modeling (FDM/FFF) is widely used for early-stage form checks and fit tests because it is affordable and fast, with a broad range of thermoplastics. Stereolithography (SLA) cures resin with light to achieve high resolution and smooth surfaces, making it popular for cosmetic prototypes, fine details, and patterns. Selective laser sintering (SLS) fuses nylon powder to create durable parts without support structures, which is ideal for complex geometries and functional testing where strength and isotropy matter. Multi Jet Fusion (MJF) is similar in application to SLS and is valued for consistent mechanical properties and production-like repeatability, useful when multiple prototypes must be compared under controlled conditions.
For higher-performance needs, metal additive processes such as direct metal laser sintering (DMLS) or selective laser melting (SLM) can produce functional parts in stainless steel, aluminum, titanium, and other alloys. These are often used when a prototype must withstand heat, pressure, or high loads, or when the design includes internal channels for cooling or fluid flow. Binder jetting, another metal route, can be effective for certain geometries and volume needs, though it typically requires sintering and may have different density characteristics. Each technology comes with tradeoffs involving surface finish, dimensional accuracy, build volume, mechanical performance, and post-processing requirements. Picking the right method for 3d printing and prototyping is less about “best printer” and more about matching the process to the question being asked: Are you validating ergonomics, assembly, strength, thermal behavior, or appearance? When the goal is clear, the technology choice becomes an engineering decision rather than a guess.
Materials selection: balancing realism, cost, and speed
Materials determine how meaningful a prototype is, and careful selection can dramatically improve outcomes in 3d printing and prototyping. For early iterations, low-cost PLA or standard resins can be perfectly adequate to confirm basic form and fit. As the design matures, engineers often switch to materials that better mimic end-use properties: ABS-like resins for toughness, nylon for fatigue resistance, PETG for impact and chemical stability, or flexible TPU for seals and grips. In powder-bed systems, nylon 12 and nylon 11 are common choices, sometimes reinforced with glass beads or carbon fibers to increase stiffness. In FDM, carbon-fiber filled filaments can create rigid fixtures and brackets, though they may be more brittle and can require hardened nozzles. Material choice also influences tolerance behavior; some plastics shrink more than others, and some absorb moisture, which affects dimensional stability over time.
When prototypes are meant to simulate production parts, the “closest match” approach can reduce surprises later. For example, if the final product will be injection-molded in polycarbonate/ABS, a strong SLA resin might be visually similar but mechanically misleading, while an FDM blend may behave closer in impact and deflection. Conversely, if the goal is to test precise snap fits or threads, a higher-resolution process with a stable material may provide more reliable results than a tougher but rougher method. Material selection for 3d printing and prototyping should also consider post-processing: sanding, painting, vapor smoothing, dyeing, and heat treatment can change surface friction and fit, which matters for moving parts. Finally, regulatory considerations can enter even at prototype stage—biocompatibility, food contact, flame rating, or outgassing—especially in medical, aerospace, and electronics applications. Choosing materials with these constraints in mind prevents rework and accelerates the path from prototype to production.
Design for additive manufacturing in early prototypes
Design for additive manufacturing (DfAM) is a practical mindset that makes 3d printing and prototyping more predictable and less wasteful. Even if the final product will be manufactured using conventional processes, designing prototypes with additive constraints can speed iteration and improve part quality. Key considerations include overhang angles, support placement, wall thickness, and orientation. For FDM, long bridges and steep overhangs can sag, so adding chamfers, self-supporting angles, or splitting a part into multiple pieces can reduce print failures. For SLA, thin walls can warp during curing, and suction forces in the vat can distort geometry, so adding ribs and drainage holes for hollow parts can help. For SLS and MJF, powder removal requires escape paths, and thin features may be fragile, so minimum feature sizes should be respected. These constraints are not limitations as much as design parameters, and learning them early increases success rates.
DfAM also opens opportunities that traditional fabrication cannot match. Lattice structures can reduce weight while maintaining stiffness, internal channels can route air or fluids, and integrated hinges or compliant mechanisms can reduce assembly steps. In 3d printing and prototyping, these features allow designers to explore product architectures that may later be simplified for mass production or, in some cases, preserved if additive manufacturing is used for low-volume manufacturing. Another important aspect is tolerance strategy. Printed parts often have different accuracy in different axes, and hole diameters may print undersized depending on process and orientation. Instead of relying on nominal dimensions, designers can include test coupons, print small calibration artifacts, or oversize holes for post-drilling. Threads may be printed for quick checks, but inserts or tapped holes can provide more reliable assembly for functional testing. By treating additive manufacturing as a set of controllable variables—geometry, orientation, process settings, and post-processing—teams can turn prototypes into dependable experiments rather than unpredictable crafts.
From concept models to functional prototypes: staged validation
Effective 3d printing and prototyping often follow a staged validation approach, where each iteration answers a specific question and avoids unnecessary cost. Early concept models prioritize speed: rough surfaces and simplified internals are acceptable if the goal is to confirm overall size, user interaction, or component placement. These prints can be produced in inexpensive materials and assembled with temporary fasteners, tape, or adhesives. Once the concept is directionally correct, the next stage focuses on fit and interface validation. Here, dimensional accuracy matters: mounting points, clearances, cable paths, and mating surfaces are tested against real components. Printing only the critical sections—like a corner with a mounting boss or a section of a housing—can be faster than printing the entire assembly, and it isolates issues more effectively.
As the design approaches functional testing, prototypes become more realistic in material and structure. A housing might be printed in nylon to test drop resistance, or a bracket might be printed in a fiber-reinforced filament to test stiffness. If the product involves fluids, airtightness or leak paths can be evaluated with sealed prints or coated surfaces. If it involves heat, prototypes can be used to evaluate airflow, ducting, and thermal isolation, even if the material differs from production. The key is to define acceptance criteria for each stage: what constitutes a pass, what measurements matter, and what changes are expected. 3d printing and prototyping become most valuable when iteration is disciplined rather than random. By documenting each build—material, settings, orientation, and results—teams create a knowledge base that reduces future trial-and-error. Over time, this staged approach transforms prototypes into a structured decision-making process that improves product quality and compresses development schedules.
Accuracy, tolerances, and metrology for printed parts
Dimensional accuracy is a frequent concern in 3d printing and prototyping because printed parts behave differently than machined parts. Factors such as shrinkage, warping, layer height, and support removal can cause deviations from CAD. Even within a single process, orientation affects accuracy: surfaces parallel to the build plane may be smoother and more consistent than vertical walls that show layer stepping. Holes and slots are particularly sensitive; circular holes can print slightly oval, and small holes can close up due to over-extrusion or resin cure bleed. Managing these issues starts with realistic tolerance expectations. Instead of assuming injection-mold tolerances, teams can define prototype tolerances that are appropriate for the process and then incorporate adjustment features like slotted holes, shims, or oversized clearances where needed for assembly.
Metrology closes the loop and makes 3d printing and prototyping reliable. Calipers and pin gauges can validate critical dimensions, while 3D scanning can compare entire surfaces against CAD to reveal warp or distortion patterns. For functional assemblies, go/no-go gauges and printed test rigs can quickly confirm whether a part meets requirements. Post-processing can improve tolerance results: reaming holes, tapping threads, heat-setting inserts, and machining critical faces can transform a printed blank into a more accurate functional prototype. This hybrid approach is common in engineering environments because it leverages additive speed while meeting mechanical requirements. Another practical tactic is to print tolerance test arrays—small blocks with varying hole sizes or snap-fit geometries—to dial in design offsets for a specific printer/material combination. Once those offsets are known, they can be applied consistently, turning an uncertain process into a repeatable one. With disciplined measurement and feedback, additive manufacturing becomes a dependable tool for engineering validation rather than a rough visualization method.
Post-processing workflows: improving strength and appearance
Post-processing is often where 3d printing and prototyping either succeed as professional-grade samples or fall short as rough prints. Basic steps like support removal and cleanup are only the beginning. Sanding and filling can remove layer lines for cosmetic prototypes, while priming and painting can produce near-production appearance models for stakeholder reviews, photography, or trade shows. SLA parts may require careful washing and UV curing to reach full mechanical properties, and improper curing can leave parts brittle or dimensionally unstable. For FDM, annealing can improve heat resistance for certain materials, though it can also cause shrinkage that must be anticipated. For SLS and MJF, bead blasting and dyeing can produce consistent surface finishes and colors, useful for consumer-facing prototypes that need to look intentional.
Expert Insight
Start prototypes with the fastest, cheapest print settings that still answer your key question: use a larger nozzle (0.6–0.8 mm), thicker layers (0.28–0.32 mm), and low infill (10–15%) to validate fit and ergonomics before investing time in fine detail. If you’re looking for 3d printing and prototyping, this is your best choice.
Design for iteration by building in adjustability: add clearance (0.2–0.4 mm for FDM mating parts), use heat-set inserts for repeatable fastening, and print small test coupons of critical features (snap-fits, threads, hinges) to dial tolerances before committing to a full build. If you’re looking for 3d printing and prototyping, this is your best choice.
Functional post-processing can be just as important. Heat-set inserts provide durable threads for repeated assembly, and embedded nuts can be designed into pockets for robust fastening. Epoxy coating or vapor smoothing can improve airtightness and reduce friction, which helps in fluid handling prototypes or sliding mechanisms. For metal prints, heat treatment and machining of critical surfaces are common, and they can dramatically improve fatigue performance and dimensional precision. In 3d printing and prototyping, post-processing should be planned early, not treated as an afterthought. Designers can add support-friendly surfaces, masking features for painting, and machining allowances where necessary. A realistic workflow considers labor time and repeatability: a prototype that requires hours of hand finishing may be fine for a one-off, but it becomes inefficient if multiple iterations are expected. By standardizing post-processing steps—documented sanding grits, cure times, insert installation methods, and inspection points—teams can produce prototypes that are both visually convincing and mechanically credible.
Using prototypes to validate ergonomics, UX, and assembly
Many of the most expensive product failures are not caused by a lack of engineering strength but by poor usability, awkward assembly, or overlooked human factors. 3d printing and prototyping provide a practical way to test these elements early, before design decisions become locked in. For handheld devices, grip contours, button placement, reachability, and weight distribution can be evaluated with printed shells and internal ballast. For tools and industrial equipment, prototypes can confirm whether an operator can access fasteners, whether maintenance panels open without interference, and whether labels and indicators are visible in real-world lighting. Because printed parts can be produced quickly, multiple ergonomic variants can be tested side-by-side, giving stakeholders concrete comparisons rather than abstract opinions.
| Approach | Best for | Key trade-offs |
|---|---|---|
| FDM (Filament 3D Printing) | Fast, low-cost concept models and fit-check prototypes | Lowest detail and surface finish; anisotropic strength; may require sanding/finishing |
| SLA/DLP (Resin 3D Printing) | High-detail prototypes, smooth surfaces, small features | Post-processing (wash/cure) required; resins can be brittle; higher material/handling cost |
| SLS (Powder Bed 3D Printing) | Functional prototypes, complex geometries, no support structures | More expensive; rougher surface; lead times and access often depend on service bureaus |
Assembly validation is another major win. Even when CAD assemblies look perfect, real parts reveal issues like screwdriver clearance, cable bend radii, connector access, and tolerance stack-ups that cause binding. With 3d printing and prototyping, teams can run “assembly rehearsals” using printed housings and real hardware, identifying pain points and reducing the risk of late-stage redesign. Color-coded prints can indicate different subassemblies, and transparent materials can reveal internal routing and interference points. Prototypes can also be used to create temporary jigs that guide assembly steps, ensuring consistent results during pilot builds. Beyond the factory, printed prototypes support user testing in realistic contexts: placing a device in a vehicle, mounting it on a wall, or integrating it into existing equipment. Each of these tests generates actionable feedback that is difficult to obtain from renders alone. By treating usability and assembly as testable engineering criteria, additive manufacturing helps create products that are not only functional but also intuitive and economical to build.
Cost and lead-time benefits compared with traditional prototyping
One of the strongest arguments for 3d printing and prototyping is the dramatic reduction in lead time compared with conventional methods. Machined prototypes often require programming, setup, and scheduling, and complex geometries can demand multiple operations or specialized tooling. Injection molding requires molds that are expensive and time-consuming to produce, which makes it impractical for early-stage iterations. Additive manufacturing short-circuits these bottlenecks by building directly from CAD with minimal setup, enabling same-day or next-day parts for many applications. This speed changes behavior: teams are more willing to test ideas, explore alternatives, and correct mistakes early. When iteration is cheap, learning accelerates, and the final design tends to be more robust.
Cost comparisons depend on part size, material, and required performance, but the economic advantage of 3d printing and prototyping often comes from avoiding premature commitments. A prototype that costs more per unit than a machined alternative can still be cheaper overall if it prevents a tool change, a late redesign, or a failed pilot run. Additive manufacturing also reduces inventory and logistics costs by enabling distributed production: prototypes can be printed near the design team, near the customer, or near the test site, minimizing shipping delays. Another cost factor is the ability to print only what is necessary. Instead of machining a full billet, a prototype can be hollowed, latticed, or segmented to reduce material use and print time. For assemblies, multiple components can be printed in one build, and snap-fit features can eliminate temporary fasteners during concept validation. When organizations evaluate total development cost—engineering hours, schedule risk, and rework—additive manufacturing frequently delivers outsized returns, even if individual printed parts are not the cheapest option in isolation.
Industry applications: medical, automotive, aerospace, and consumer products
3d printing and prototyping have broad impact across industries because the underlying need—faster iteration and better validation—is universal. In medical device development, printed anatomical models and device prototypes support surgeon feedback, procedural planning, and early usability studies. Custom-fit components, such as orthotics or surgical guides, can be validated quickly, and design changes can be incorporated without retooling. Material constraints are stricter in regulated environments, but even non-implantable prototypes provide valuable insights into form, access, and workflow. In automotive development, printed fixtures and prototype ducting, brackets, and interior components help engineers validate packaging and assembly. Aerodynamic concepts can be tested with scaled models, and under-hood prototypes can verify routing and clearances before committing to tooling.
Aerospace applications often emphasize weight reduction and complex internal geometries, making additive manufacturing particularly attractive. Prototypes can validate lattice structures, topology-optimized brackets, and internal cooling passages, while also enabling rapid replacement of legacy parts during maintenance and testing. Consumer product teams use 3d printing and prototyping to explore aesthetic directions and user experience, producing multiple variants for focus groups or internal reviews. Wearables, appliances, and electronics enclosures benefit from quick iterations on ergonomics, button feel, and assembly features like clips and bosses. Across all these sectors, printed prototypes also support communication: investors, executives, and customers can respond more accurately to physical samples than to CAD images. That shared understanding reduces churn and helps teams converge on decisions faster, which is often the most valuable benefit of prototyping at all.
Common pitfalls and how to avoid them in rapid iteration
Despite its advantages, 3d printing and prototyping can produce misleading results if common pitfalls are ignored. One frequent issue is testing the wrong property with the wrong process. A brittle resin part may crack in a way that the final molded plastic never would, leading to unnecessary redesign. Conversely, a tough nylon print may survive impacts that would damage a more brittle production material, creating false confidence. Another pitfall is ignoring anisotropy: many printed parts are weaker between layers, so orientation can dominate strength outcomes. If a prototype is used for load testing, it should be printed in an orientation that reflects the intended stress directions, or multiple orientations should be tested to bound the results. Surface finish is also a hidden variable; friction and wear in moving parts can change dramatically after sanding, coating, or dyeing.
Process control prevents many problems. Without documentation, teams may change printer settings, materials, or post-processing steps between iterations and then attribute performance differences to design changes. A simple build log—printer, material batch, orientation, layer height, infill, support strategy, and post-processing—turns prototyping into a controlled experiment. Another risk is over-iterating on details too early. Because printing is fast, it is tempting to refine cosmetics before the architecture is stable, which can waste time. A more effective approach is to freeze major interfaces and functional requirements first, then refine appearance and manufacturability. Finally, teams sometimes treat printed prototypes as disposable and skip inspection, but measurement is essential for learning. Calipers, gauges, and fit checks provide objective feedback that improves future iterations. By matching the method to the test goal, controlling variables, and measuring outcomes, 3d printing and prototyping become a disciplined engine for progress rather than a source of confusion.
Integrating 3d printing into a broader prototyping strategy
The most effective product teams integrate 3d printing and prototyping with other methods rather than treating additive manufacturing as a standalone solution. Foam models, laser-cut mockups, CNC machining, and off-the-shelf components all have roles depending on what needs to be validated. Additive manufacturing excels at complex geometry and fast iteration, but machining can provide superior surface finish and tight tolerances for specific features, and sheet fabrication can better represent thin-walled metal enclosures. A hybrid strategy might print a housing while machining a metal insert for a bearing seat, or print a duct while using standard tubing for connections. This mix-and-match approach allows prototypes to be both fast and meaningful, targeting realism where it matters most.
Workflow integration also includes digital tools and collaboration. Version control for CAD, clear naming conventions for files, and a defined approval process prevent teams from printing outdated geometry. Simulation can complement physical prototyping: finite element analysis can narrow design options, while printed tests validate assumptions and boundary conditions. In organizations with multiple sites, distributed additive manufacturing enables consistent builds if printers, materials, and settings are standardized. When external service bureaus are used, clear drawings and specifications—critical dimensions, surface finish expectations, and post-processing requirements—reduce back-and-forth. Over time, teams can build internal design guidelines: preferred wall thicknesses, snap-fit rules, hole offsets, and insert standards tuned to their printers. By embedding additive manufacturing into the product development system—requirements, testing, documentation, and lessons learned—3d printing and prototyping become repeatable capabilities that scale beyond individual projects.
Future trends: smarter materials, automation, and faster validation loops
The future of 3d printing and prototyping is moving toward greater automation, better materials, and tighter integration with testing and manufacturing. Material portfolios are expanding, with improved high-temperature polymers, flame-retardant options, and composites that better mimic production plastics and metals. Multi-material printing continues to mature, enabling prototypes with soft-touch surfaces, integrated seals, or overmold-like behavior in a single build. This reduces assembly time and makes early prototypes more realistic. On the software side, generative design and topology optimization are producing shapes that are well-suited to additive processes, and improved slicing algorithms are enhancing strength and surface quality without manual tuning.
Automation is also reshaping the economics of rapid iteration. Automated support removal, resin handling, powder recycling, and in-line inspection reduce labor and increase throughput, making it easier to print multiple design variants in parallel. As metrology tools become more accessible, closed-loop validation becomes feasible: scan a prototype, compare to CAD, adjust compensation factors, and print the next iteration with improved accuracy. This shortens the feedback loop and increases confidence in results. Another trend is the blending of prototyping and low-volume production, where the same additive workflow supports pilot runs, market tests, and customized variants. As these capabilities expand, teams that master 3d printing and prototyping will be able to validate ideas faster, make decisions with better evidence, and deliver products that fit user needs and manufacturing constraints with fewer late-stage surprises.
Watch the demonstration video
In this video, you’ll learn how 3D printing speeds up prototyping by turning digital designs into physical parts quickly and affordably. It explains key steps—from modeling and choosing materials to printing, testing, and iterating—so you can refine ideas faster, spot design flaws early, and move from concept to functional prototype with confidence. If you’re looking for 3d printing and prototyping, this is your best choice.
Summary
In summary, “3d printing and prototyping” is a crucial topic that deserves thoughtful consideration. We hope this article has provided you with a comprehensive understanding to help you make better decisions.
Frequently Asked Questions
What is 3D printing used for in prototyping?
It creates quick physical models to validate form, fit, and basic function before committing to expensive tooling or production.
Which 3D printing technology is best for prototypes?
Choosing the right method for **3d printing and prototyping** depends on your goals: **FDM** is budget-friendly and quick for basic models, **SLA/DLP** delivers crisp details with ultra-smooth finishes, and **SLS** produces durable, highly complex parts without needing support structures.
How accurate are 3D-printed prototypes?
Accuracy depends on the specific process and machine settings, but in **3d printing and prototyping** you can typically expect tolerances of roughly **±0.1 to ±0.5 mm**. For parts that need tight fits or precise assemblies, a bit of post-processing—like sanding, drilling, or machining—is often required to dial everything in.
What materials can be used for 3D-printed prototypes?
For **3d printing and prototyping**, popular material choices include PLA, ABS, and PETG for FDM printers, photopolymer resins for SLA/DLP machines, and nylon or TPU-based composites for SLS. Each option is selected to match the project’s priorities—whether that’s higher strength, added flexibility, or a smoother, more refined surface finish.
How long does it take to 3D print a prototype?
Small components can often be finished in just a few hours, but larger pieces or highly detailed jobs may require 12–48+ hours once you factor in setup and post-processing—especially for **3d printing and prototyping** projects where precision and finishing matter.
What are the main limitations of 3D-printed prototypes?
Compared with production parts, prototypes made through **3d printing and prototyping** can vary in strength, surface finish, heat and UV resistance, and dimensional stability—and they often need support structures during printing as well as post-processing afterward.
📢 Looking for more info about 3d printing and prototyping? Follow Our Site for updates and tips!

Trusted External Sources
- Understanding Rapid Prototyping with 3D Printing – Markforged
Rapid prototyping uses digital design tools to quickly turn ideas into physical models, making the development process faster, simpler, and more flexible. By leveraging **3d printing and prototyping** techniques, teams can iterate on designs in hours instead of weeks, test form and function early, and refine products with far less cost and risk than traditional manufacturing methods.
- Prototyping 3D printed product at home and taking it to a … – Reddit
Apr 25, 2026 … You would upload your .stl file to protolabs or xometry, select 3D printing, select the type of 3d printing then the material. Enter how many … If you’re looking for 3d printing and prototyping, this is your best choice.
- 3D Printing Applications: Rapid Prototyping – Formlabs
With affordable in-house 3D printers, **3d printing and prototyping** becomes fast and flexible—letting you produce a prototype in as little as a day, test it quickly, and iterate on your design through multiple refinements.
- Most reliable 3D printer for prototyping? : r/AdditiveManufacturing
Aug 23, 2026 … As others mentioned, Prusa , Construct3D (UK made, great folks), or Pantheon Design if you can stretch your budget a bit. I run a fleet of P1S’s … If you’re looking for 3d printing and prototyping, this is your best choice.
- What’s the right 3D printer for prototyping? Comparing 3D printing …
This article highlights the top 3D printers for the prototyping stage of product development and shares practical design tips to help you get the best results from every build—so you can move faster from concept to test-ready models with **3d printing and prototyping**.