A large print bed 3d printer changes the way makers, engineers, educators, and small manufacturers approach fabrication because it removes one of the most common constraints in desktop additive manufacturing: build volume. When the build platform is expansive, projects that once required splitting into multiple parts can often be produced as a single, stronger piece. That matters for structural prototypes, functional enclosures, cosplay armor sections, large signage, jigs, and fixtures where seams weaken performance or create extra finishing work. The practical value is not only “bigger prints,” but also fewer alignment errors, less time spent bonding segments, and more predictable mechanical properties across the whole part. In many workflows, a larger build surface also enables batch printing, where multiple smaller components are produced in one run to improve throughput. For small businesses running short production cycles, that can translate into fewer machine starts, fewer bed heat cycles, and more consistent scheduling. A wider platform can also be a comfort factor: it gives operators more space to place brims, rafts, and purge lines without crowding the perimeter, which can reduce the chance of edge lift on tricky materials. Even when a user rarely prints at maximum size, the extra room can simplify layout decisions, support placement, and part orientation.
Table of Contents
- My Personal Experience
- Understanding the Appeal of a Large Print Bed 3D Printer
- How Print Bed Size Impacts Real-World Projects
- Core Specifications That Matter Beyond Bed Dimensions
- Materials and Filament Choices for Big-Bed Printing
- Bed Surfaces, Adhesion Methods, and First-Layer Reliability
- Speed, Flow Rate, and Time Management for Large Prints
- Enclosures, Temperature Control, and Warping Prevention
- Expert Insight
- Calibration and Maintenance for Consistent Large-Area Accuracy
- Design Strategies for Large Prints: Strength, Supports, and Segmentation
- Workflow Improvements: Slicing, Monitoring, and Production Planning
- Cost Considerations: Upfront Price, Operating Costs, and Value
- Choosing the Right Large Print Bed 3D Printer for Your Needs
- Conclusion: Making Big Builds Practical and Reliable
- Frequently Asked Questions
My Personal Experience
I switched to a large print bed 3D printer after one too many projects got chopped into awkward sections on my old machine. The first thing I noticed wasn’t even the extra size—it was how much less planning I had to do. I printed a full-size helmet shell in one go instead of splitting it into six pieces, and the hours I didn’t spend aligning seams and sanding joints felt like a win on their own. It wasn’t all smooth sailing, though: leveling the bigger bed took patience, and I had to slow down my first few prints because the corners wanted to lift. Once I added a simple enclosure and got my first-layer routine dialed in, it became the printer I reach for when I want something sturdy and clean without turning assembly into a separate hobby.
Understanding the Appeal of a Large Print Bed 3D Printer
A large print bed 3d printer changes the way makers, engineers, educators, and small manufacturers approach fabrication because it removes one of the most common constraints in desktop additive manufacturing: build volume. When the build platform is expansive, projects that once required splitting into multiple parts can often be produced as a single, stronger piece. That matters for structural prototypes, functional enclosures, cosplay armor sections, large signage, jigs, and fixtures where seams weaken performance or create extra finishing work. The practical value is not only “bigger prints,” but also fewer alignment errors, less time spent bonding segments, and more predictable mechanical properties across the whole part. In many workflows, a larger build surface also enables batch printing, where multiple smaller components are produced in one run to improve throughput. For small businesses running short production cycles, that can translate into fewer machine starts, fewer bed heat cycles, and more consistent scheduling. A wider platform can also be a comfort factor: it gives operators more space to place brims, rafts, and purge lines without crowding the perimeter, which can reduce the chance of edge lift on tricky materials. Even when a user rarely prints at maximum size, the extra room can simplify layout decisions, support placement, and part orientation.
At the same time, choosing a big-format machine is not only about maximum dimensions printed on a spec sheet. A large-format 3D printer introduces new considerations in calibration, thermal management, and mechanical stiffness. The larger the moving gantry or the bed, the more attention must be paid to vibration, belt tension, and frame rigidity to avoid ghosting or layer artifacts. Heat distribution becomes more challenging across a wide heated plate, and that can influence first-layer adhesion and warping, especially with materials like ABS, ASA, nylon, and polycarbonate blends. Many users find that a large build plate rewards a more disciplined approach: careful bed leveling (manual, assisted, or automated), consistent nozzle-to-bed distance, and a clean surface become even more important when the first layer spans hundreds of millimeters. The best experience comes from matching the machine’s design to your priorities—whether that is printing large single pieces, producing multiple parts per run, or maintaining dimensional accuracy on long spans. Understanding these trade-offs early helps ensure the large print bed 3d printer you pick actually improves output rather than adding avoidable troubleshooting.
How Print Bed Size Impacts Real-World Projects
Build volume influences more than the obvious “can it fit” question. A larger platform enables different design strategies. For example, printing a long enclosure or a wide panel in one piece can improve strength because the layers run continuously rather than being interrupted by glue joints. For functional parts, seam placement is often the weak link; eliminating seams can make a prototype closer to the final manufactured intent. A large print bed 3d printer can also reduce the need for complex alignment features like dovetails, pins, or puzzle joints that are commonly added when splitting models. Those features work, but they add design time and can introduce tolerance stacking that shows up as gaps, misalignment, or uneven surfaces. With more room on the bed, you can orient parts for better mechanical performance, such as aligning layer lines to resist bending or impact. Orientation freedom also helps with surface finish, allowing you to place the most visible face upward or reduce supports on cosmetic areas. For creative work, larger beds open up full-scale props, large wall art, and architectural models that look more cohesive when printed as continuous forms.
There is also a productivity angle that matters just as much as maximum part size. A wide bed makes it possible to print many smaller components at once, which is useful for classrooms, robotics clubs, and small shops producing repeatable parts. Instead of starting ten separate jobs, a single batch can run overnight, and the operator returns to a tray of parts. However, batch printing on a large-format printer requires thoughtful risk management. If one part fails and knocks loose, it can interfere with neighboring parts and ruin the run. Some users mitigate this by spacing parts further apart, using brim settings selectively, or printing sequentially (one-at-a-time) if the machine and slicer support safe travel clearances. The larger bed also increases the potential for thermal gradients—edges may cool faster than the center—so uniform adhesion becomes a bigger factor for batch success. Choosing the right build surface (textured PEI, smooth PEI, glass, or specialized plates) and tuning first-layer settings can be the difference between reliable batches and constant babysitting. When the workflow is dialed in, a large print bed 3d printer becomes a platform for both scale and throughput, letting users pick the most efficient approach for each job.
Core Specifications That Matter Beyond Bed Dimensions
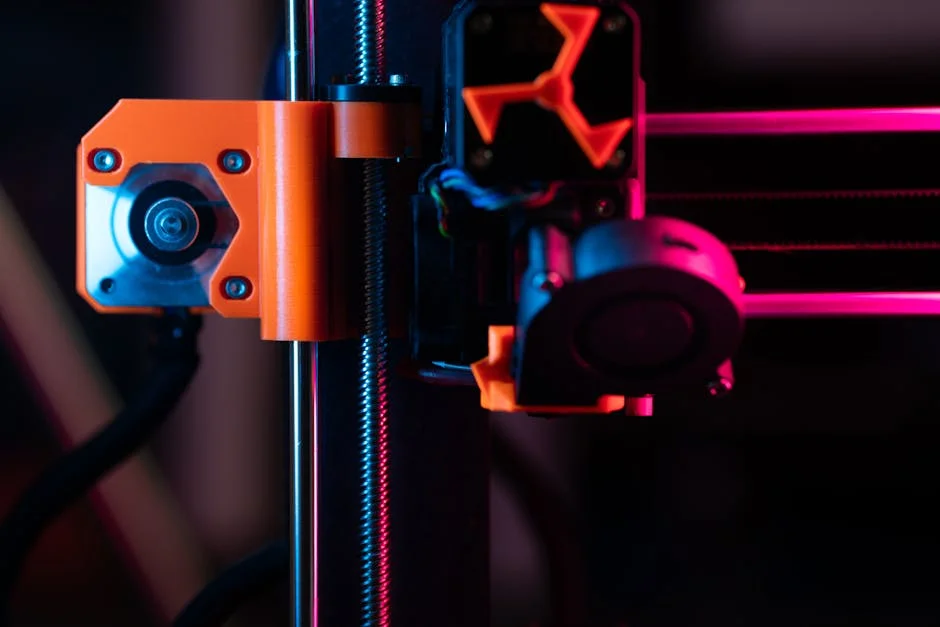
While bed size draws attention, the machine’s overall architecture determines whether large prints come out clean and consistent. Frame rigidity is a major factor: large parts can take many hours, and small vibrations accumulate into visible artifacts. A sturdy, well-braced frame reduces ringing and keeps geometry accurate over long toolpaths. Motion system quality also matters. Linear rails can offer improved stability and smoother travel compared to some wheel-based systems, though well-built wheel systems can still perform strongly when tuned. Belt width, pulley quality, and tensioning mechanisms become more important as gantry spans increase. Stepper drivers, microstepping behavior, and firmware motion planning influence how smooth curves appear and how accurate corners remain at speed. Hotend performance is equally critical; large models often benefit from larger nozzle diameters (0.6 mm or 0.8 mm) to reduce print time, but that requires a hotend that can melt filament consistently at higher flow rates. A large print bed 3d printer that advertises big volume but can’t sustain flow will force slow speeds, undermining the benefit of scale.
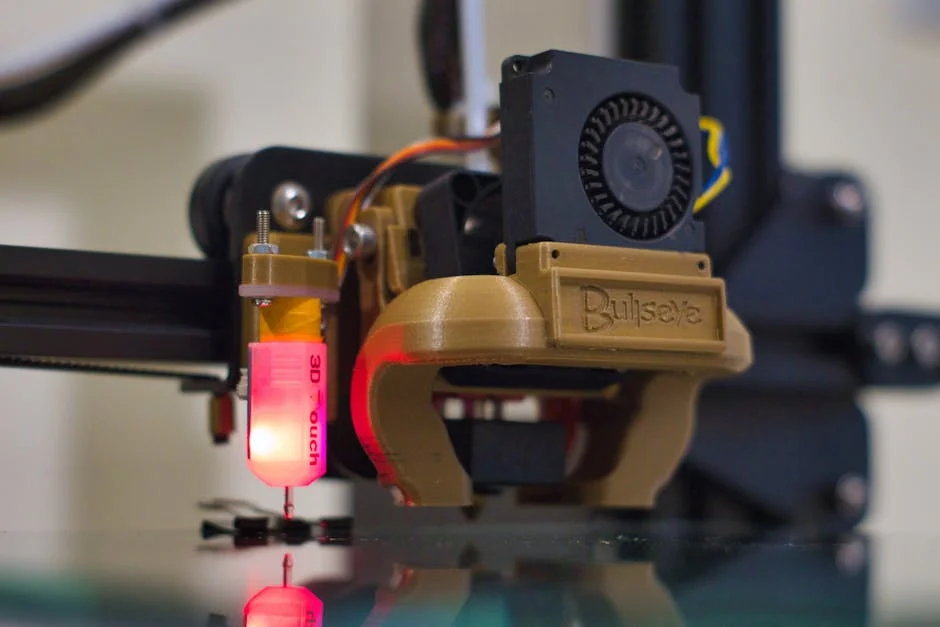
Bed heating capability and temperature uniformity deserve special attention. A big heated bed must deliver stable temperatures across the entire surface, especially if you plan to print materials prone to warping. Some machines use AC-powered heaters for faster warm-up and better stability; others rely on DC beds that can be slower to heat at larger sizes. Safety features—thermal runaway protection, properly grounded AC components, quality wiring strain relief, and stable connectors—matter more when power demands rise. Auto bed leveling or mesh compensation is often valuable on larger platforms because even small deviations become noticeable across wide spans. That said, mesh leveling is not a substitute for a reasonably trammed bed and a rigid gantry; it’s a tool that refines the first layer once the mechanical foundation is sound. Finally, consider usability: a responsive interface, reliable filament runout sensors, power-loss recovery (if implemented well), and network connectivity can improve day-to-day operation. Evaluating these specs alongside build volume helps ensure a large print bed 3d printer delivers predictable results, not just impressive numbers.
Materials and Filament Choices for Big-Bed Printing
Material selection affects success rates more dramatically as part size increases. PLA is often the easiest option for large prints because it warps less and generally adheres well to common surfaces at moderate bed temperatures. For display models, prototypes, and many jigs, PLA can be sufficient and offers a wide range of colors and finishes. However, large PLA parts can deform if exposed to heat, such as inside a car or near machinery, so PETG or ASA may be better for functional components that face elevated temperatures or outdoor conditions. PETG provides improved toughness and temperature resistance compared to PLA, though it can string more and may require careful tuning of retraction and cooling. ASA and ABS are popular for durable, heat-resistant parts, but they demand a stable thermal environment; an enclosure becomes far more important on a large-format 3D printer to prevent edge lift and layer separation. Nylon and nylon composites offer strength and wear resistance, but moisture control becomes critical, especially for long prints that can run overnight or multiple days. If you’re looking for large print bed 3d printer, this is your best choice.
Large prints amplify filament consistency issues. A slight diameter variation, moisture popping, or inconsistent pigment dispersion can show up as surface artifacts across a broad area. For a large print bed 3d printer, it’s often worth investing in reliable filament brands and storing spools in dry boxes or sealed containers with desiccant. Drying filament before long jobs can reduce stringing, improve layer bonding, and prevent random weak spots. Another key decision is nozzle size and layer height. Printing a large object with a 0.4 mm nozzle at fine layers can take an extremely long time, increasing the chance that a small disruption ruins the job. Many users switch to a 0.6 mm nozzle for big parts, balancing detail with speed, and use adaptive layer heights to keep curved surfaces smooth without inflating print time everywhere. For structural pieces, thicker layers can improve interlayer bonding when tuned correctly, though cooling and temperature settings must be adjusted to ensure good fusion. Ultimately, the best material strategy is matching filament behavior to your machine’s thermal control and your project’s real-world demands, so the scale of the bed becomes an advantage rather than a source of warping and failed corners.
Bed Surfaces, Adhesion Methods, and First-Layer Reliability
First-layer success is the foundation of any print, and it becomes more sensitive on a larger platform. Even minor variations in bed flatness or gantry alignment can cause one corner to be too close and another too far, leading to poor adhesion or over-squished lines. Many owners of a large print bed 3d printer rely on a combination of mechanical tramming and mesh leveling to achieve consistent results. The build surface itself plays a major role. Textured PEI spring steel plates are popular because they provide strong adhesion for many materials and allow easy part removal once cooled. Smooth PEI can deliver a cleaner bottom finish but may need more careful cleaning and occasional adhesion aids depending on filament type. Glass can be very flat and produce a glossy underside, but it can also be heavy and slower to heat, which matters when the bed is large. Some users prefer specialized surfaces like garolite for nylon or high-temperature plates for engineering materials.
Adhesion aids should be chosen with the material and surface in mind. Glue stick, PVA-based adhesives, and purpose-made bed adhesives can help with PETG and prevent it from bonding too aggressively to PEI. For ABS/ASA, a light layer of suitable adhesive or a slurry method can improve hold, but enclosure temperature and bed temperature stability are often more important than any single product. Cleaning routines matter more with big beds because skin oils and dust accumulate across a wide area, and a print might start in a spot you haven’t touched recently. Isopropyl alcohol works for many surfaces, while occasional deeper cleaning with warm water and mild soap can restore PEI performance. Another overlooked factor is Z-offset consistency. If the printer uses a probe, ensure the mount is rigid and repeatable, and periodically verify offset with a first-layer test that spans the bed. When the first layer is uniform, large prints stop feeling intimidating; the machine becomes predictable, and the large print bed 3d printer can be trusted for long runs without constant intervention.
Speed, Flow Rate, and Time Management for Large Prints
Large builds can run for many hours or even days, so printing strategy matters as much as raw machine capability. Increasing speed alone is not always the answer; what often limits large-format printing is volumetric flow rate, which depends on hotend design, nozzle size, and filament melt capacity. A large print bed 3d printer can benefit from a hotend that supports higher flow without overheating the filament or causing inconsistent extrusion. Switching from a 0.4 mm nozzle to 0.6 mm or 0.8 mm can dramatically reduce print time for big parts, especially when paired with thicker layers. The trade-off is reduced fine detail, but many large objects—enclosures, brackets, fixtures, cosplay parts—do not require miniature features across the entire surface. Another approach is to use variable layer height: thicker layers in low-detail vertical sections and thinner layers on curves, logos, or visible contours. This can keep surfaces attractive while keeping total hours manageable.
Time management also includes reducing the risk of failure over long durations. Consider using conservative acceleration and jerk settings to limit vibration on a bigger frame, even if top speed is high. Strong part cooling is not always beneficial; for materials like ABS/ASA, too much cooling can cause layer separation, while for PLA, insufficient cooling can soften details on overhangs. Slicer settings like wall count, infill type, and top/bottom layers should be chosen based on function, not habit. A thick shell with modest infill often yields stronger parts than high infill alone, and it prints more efficiently. For very large prints, breaking the model into sections can still be smart when it reduces support needs or allows better orientation for strength, even though the bed could fit it. The goal is not to force everything into one piece, but to use the capacity of a large print bed 3d printer to optimize for reliability, finish quality, and total time-to-part. When settings are tuned for flow and stability, large prints become routine rather than risky marathons.
Enclosures, Temperature Control, and Warping Prevention
As parts get larger, warping forces increase because more material is cooling and shrinking across a wider footprint. That’s why enclosure strategy becomes a key decision for anyone using a large print bed 3d printer for engineering plastics. An enclosure helps maintain a stable ambient temperature around the print, reducing drafts and slowing the cooling rate so layers bond more consistently. For ABS and ASA, an enclosure often shifts printing from frustrating to reliable, especially for wide, flat parts that love to lift at the corners. Even for PETG, an enclosure can help with consistency if the room environment fluctuates, though too much heat can soften PLA and cause extrusion issues if the extruder motor and filament path are not managed. Some machines come with full enclosures, while others support aftermarket panels or DIY builds. What matters is airflow control and safety: electronics and power supplies may need ventilation or relocation if the enclosure gets warm.
| Feature | Why it matters for a large print bed 3D printer | What to look for |
|---|---|---|
| Build volume & usable bed area | Determines the maximum part size you can print in one piece and reduces the need for splitting/assembly. | Clear X×Y×Z specs, plus real usable area (accounting for clips/nozzle offset); rigid frame to support the larger span. |
| Bed heating & surface flatness | Large beds are harder to heat evenly and keep flat; poor uniformity leads to warping and first-layer failures. | Even heat distribution, adequate wattage, insulation; flat bed plate; quality build surface (PEI/glass) and stable temperature control. |
| Leveling/compensation system | As bed size increases, small height variations become more common and more damaging to first-layer consistency. | Automatic bed leveling (ABL) with a reliable probe, mesh/tilt compensation, and an easy calibration workflow; sturdy Z mechanics to hold alignment. |
Expert Insight
For a large print bed 3D printer, prioritize first-layer consistency: level the bed carefully, clean the surface with isopropyl alcohol, and run a full-bed first-layer test pattern to confirm uniform adhesion before starting long prints.
Manage heat and stability across the entire build area: use an enclosure or draft shield to reduce warping, and add brims or mouse ears on wide parts—then slow the first few layers to improve bonding and reduce edge lift. If you’re looking for large print bed 3d printer, this is your best choice.
Temperature control isn’t only about the air. Bed temperature stability and uniformity are crucial, and large beds can develop hot and cool zones. Using an insulating layer beneath the bed can reduce heat loss and improve warm-up time. For very large plates, allowing extra preheat time before starting the print can stabilize temperatures across the surface, improving first-layer consistency. Warping prevention also includes design choices: adding fillets to corners, using mouse ears, increasing brim width, and avoiding sharp internal corners can reduce stress concentration. Material-specific settings matter, too—higher nozzle temperature can improve layer bonding, but it must be balanced against stringing and surface quality. For long prints, consider the environment around the machine: air conditioning vents, open windows, and foot traffic can introduce drafts that cool one side more than the other. When enclosure and thermal habits are dialed in, the large print bed 3d printer becomes capable of producing big ABS/ASA components that look professional and hold up in real use.
Calibration and Maintenance for Consistent Large-Area Accuracy
Consistency across a big bed requires a more systematic calibration routine than many people use on smaller machines. Mechanical alignment starts with ensuring the frame is square, the gantry is level relative to the bed, and all fasteners are tight. Belt tension should be even and appropriate; too loose causes backlash and artifacts, too tight can wear bearings and introduce binding. On a large print bed 3d printer, small mechanical issues can show up as dimensional drift across long distances, so checking pulley set screws, motor mounts, and idlers is worth the time. Bed leveling should be approached as both a mechanical and software task. Mechanical tramming ensures the bed is not significantly tilted, while mesh leveling compensates for minor surface deviations. Probe repeatability becomes important; if the probe mount flexes or the nozzle has debris during probing, the mesh can be inconsistent and first layers become unpredictable. Regularly verifying Z-offset with a wide first-layer pattern helps detect drift early.
Maintenance practices also scale with machine size and usage. Larger beds and longer prints mean more heat cycles, more hours on bearings, and more opportunities for filament dust to accumulate. Keep rails or wheels clean, lubricate as recommended by the manufacturer, and inspect wiring harnesses for chafing, especially where cables flex during travel. Nozzle condition matters on long prints: a partially clogged nozzle can ruin a multi-hour job. Establish a routine for cold pulls or nozzle swaps, and keep spare nozzles on hand, particularly if printing abrasive composites like carbon fiber PETG or glass-filled nylon. Extruder gears should be inspected for filament buildup, and filament paths should be smooth to avoid under-extrusion during long runs. Firmware and slicer profiles deserve attention as well; a well-tuned profile for a large print bed 3d printer often uses different acceleration, jerk, and cooling strategies than a small desktop printer. Treating calibration and maintenance as a schedule rather than an emergency response helps ensure that big prints succeed with less supervision and fewer surprises.
Design Strategies for Large Prints: Strength, Supports, and Segmentation
Designing for a large build platform is not simply scaling up a model. Large parts experience different stresses during printing and in final use. Long spans can sag if not supported, and broad flat surfaces can warp as they cool. When using a large print bed 3d printer, consider adding ribs, gussets, or internal lattices to increase stiffness without excessive material. Wall thickness choices matter: thicker walls can improve durability and reduce resonance in functional parts, but they also increase print time and can trap heat in ways that affect surface quality. For cosmetic pieces, strategic wall counts and moderate infill can yield a lightweight part that still feels sturdy. Supports become more expensive at large scale, both in filament and time, so it pays to design parts that minimize overhangs or incorporate self-supporting angles. Chamfers, arches, and teardrop holes can reduce the need for supports, improving surface finish and lowering risk.
Even with a big bed, segmentation can be a smart choice when it improves print orientation or reduces supports. For example, printing a tall, thin object in one piece might be possible, but splitting it into sections could reduce wobble and improve surface consistency. Segmentation can also allow different materials or settings for different sections, such as a flexible gasket area paired with a rigid body, though multi-material workflows add complexity. If splitting is needed, design joints intentionally: use alignment pins, scarf joints, or interlocking features that increase glue surface area and hide seams. For functional assemblies, incorporate hardware like heat-set inserts or captive nuts to make parts serviceable. A large print bed 3d printer provides freedom, but the best results come from using that freedom thoughtfully—printing in one piece when it improves strength and finish, and dividing intelligently when it improves reliability or reduces support scars. This mindset helps large-format printing feel like a controlled manufacturing process rather than a gamble based on size alone.
Workflow Improvements: Slicing, Monitoring, and Production Planning
A smooth workflow is essential when prints are long and material usage is high. Slicing for a large print bed 3d printer benefits from profiles built around repeatability: consistent first-layer settings, conservative travel moves to prevent collisions, and stable temperatures. Previewing the toolpath is especially important on large jobs, because small mistakes—like a missing support or a thin wall that becomes a single extrusion line—can create failure points hours into the print. Many users adopt a checklist mentality: verify layer time, confirm filament quantity, ensure the spool can unwind freely, and check that the nozzle is clean before starting. Filament runout mid-print is more painful on big objects, so runout sensors can help, but they are not perfect; tangles and spool friction can still cause under-extrusion without triggering a sensor. Using high-quality spools, proper spool holders, and low-friction filament paths reduces that risk.
Monitoring options can improve success rates and reduce wasted time. A camera and remote monitoring software can let you check first layers and early stages without hovering near the machine. Some setups include failure detection, though false positives can be an issue, and nothing replaces a well-tuned printer. Production planning also matters if the machine is used for business. Large prints tie up the machine for long stretches, so scheduling should account for cooling time, post-processing, and potential reprints. Batch printing smaller parts can fill gaps between big jobs and make better use of the platform. For repeat production, keep notes on profiles and environmental conditions that worked, including bed cleaning methods and filament drying times. Over time, the large print bed 3d printer becomes more like a dependable production tool than a hobby device, especially when the workflow is documented and repeatable. That consistency is what turns large build volume into a real advantage for delivering parts on time and with predictable quality.
Cost Considerations: Upfront Price, Operating Costs, and Value
A large build platform often comes with higher upfront cost, but operating costs can matter just as much. Bigger prints use more filament, more electricity for bed heating, and more wear on components over long runtimes. When evaluating a large print bed 3d printer, it’s useful to think in terms of cost per successful part rather than cost of the machine alone. A cheaper machine that requires frequent failed prints, constant maintenance, or slow speeds can be more expensive over time than a sturdier model that runs reliably. Consider the availability and price of replacement parts: nozzles, build plates, belts, hotend components, and sensors. If the printer uses proprietary parts, downtime could be longer and costs higher. Serviceability matters too; a machine that is easy to access, adjust, and repair can reduce long-term expense, especially for users who print frequently.
Electricity usage can be significant for large heated beds, particularly for engineering materials that require high bed temperatures and enclosures. An insulated bed, efficient heater design, and good thermal control can reduce operating costs and improve stability. Filament strategy influences cost as well. Printing large items with thicker nozzles and optimized shells can reduce time and filament waste compared to overly dense infill. Post-processing costs should be considered if the output needs to look polished—sanding, filler, primer, paint, or vapor smoothing supplies add up, and large parts require more of everything. For business use, the value of a large print bed 3d printer is often tied to what it enables: fewer assembly steps, faster prototyping cycles, and the ability to accept projects that smaller machines can’t handle. For hobbyists, value may mean fewer compromises in design and the satisfaction of producing big, cohesive builds. Thinking about total cost of ownership and the kind of work you actually plan to produce helps ensure the investment makes sense.
Choosing the Right Large Print Bed 3D Printer for Your Needs
Not all big-bed machines serve the same user. Some prioritize speed with lightweight gantries and high-flow hotends, while others focus on stability and accuracy with heavier frames and conservative motion tuning. Start by defining what “large” means for your projects: do you need a wide bed for panels, a tall Z height for statues, or both? Then match the machine’s design to your material plans. If you expect to print ABS/ASA regularly, favor printers that support enclosures, stable bed heating, and good thermal isolation. If your focus is PLA props and large decorative pieces, airflow and cooling performance may matter more, and an open-frame machine can still work well if the environment is controlled. Also consider the ecosystem: slicer profile availability, community support, documentation quality, and firmware update cadence can dramatically affect how quickly you get reliable results. A large print bed 3d printer with strong community profiles often reaches stable performance faster than a niche model with limited guidance.
Pay attention to practical details that affect daily use. Bed leveling method, bed surface type, and ease of swapping plates can influence success and convenience. Extruder type (direct drive vs Bowden) affects how well the machine handles flexible filaments and how it manages retraction on long travel moves. Noise level matters if the printer will run overnight near living or working spaces. Footprint and weight matter too; big beds often mean big frames, and you’ll need a sturdy table and enough clearance for moving parts and maintenance access. Finally, think about how you plan to grow: a machine that supports upgrades—better hotends, improved cooling, enclosure kits, or nozzle options—can adapt as your skills and needs expand. When chosen with intention, a large print bed 3d printer becomes a versatile tool that supports ambitious builds, efficient batches, and dependable prototyping without forcing constant compromises.
Conclusion: Making Big Builds Practical and Reliable
Success with large-format printing comes from combining the right machine features with disciplined setup, material handling, and slicing habits. A big bed is most valuable when it is paired with stable mechanics, uniform heating, dependable first-layer performance, and a workflow that anticipates long runtimes. Choosing appropriate filaments, drying them when needed, and using bed surfaces that match the material reduces warping and improves consistency. Thoughtful design—minimizing supports, reinforcing large spans, and segmenting only when it improves reliability—helps produce parts that look better and function longer. Monitoring and planning reduce wasted time, while routine maintenance keeps accuracy stable across wide travel distances. These practices turn large prints from occasional experiments into predictable outcomes that can support creative work, engineering prototypes, and small-scale production. If you’re looking for large print bed 3d printer, this is your best choice.
When the details are dialed in, a large print bed 3d printer becomes less about chasing maximum dimensions and more about expanding what’s practical: printing stronger one-piece parts, running efficient batches, and delivering results with fewer seams and less post-processing. The most satisfying outcome is confidence—knowing that a long job can run without constant intervention and still come off the plate with clean layers and solid adhesion. Whether the goal is full-size props, oversized prototypes, custom fixtures, or production-ready enclosures, the right approach makes large-format printing a repeatable process rather than a gamble, and that is where a large print bed 3d printer truly earns its place in a workshop.
Summary
In summary, “large print bed 3d printer” is a crucial topic that deserves thoughtful consideration. We hope this article has provided you with a comprehensive understanding to help you make better decisions.
Frequently Asked Questions
What is a large print bed 3D printer?
A **large print bed 3d printer** features an oversized build plate—often paired with a bigger overall build volume—so you can print larger parts in one piece or produce multiple items in a single run.
How large is considered a “large” print bed?
Commonly 300×300 mm or larger; “large format” often starts around 400×400 mm and up, depending on the printer type.
What are the main benefits of a large print bed?
With a **large print bed 3d printer**, you can produce bigger, single-piece models without constantly splitting parts and gluing them back together—and you can also batch-print several items at once in a single run.
What drawbacks should I expect with a large print bed 3D printer?
Expect longer warm-up times, higher power consumption, a greater chance of warping on oversized parts, more meticulous bed leveling, and a bigger overall footprint—common trade-offs when working with a **large print bed 3d printer**.
What features matter most for reliable large-bed printing?
Look for a machine with a rigid frame and a flat, heated bed, paired with precise auto bed leveling for reliable first layers every time. Add stable temperature control—ideally an enclosure for more demanding materials—and a high-quality hotend/extruder, and you’ll have the kind of dependable setup you want in a **large print bed 3d printer**.
What materials work best on large print bed printers?
PLA is usually the easiest filament to start with, while PETG is a popular step up when you need stronger, more durable parts. ABS and ASA can deliver great results too, but they often print best with an enclosure to control warping and fumes—especially on a **large print bed 3d printer**. For flexible filaments like TPU, you’ll typically get smoother, more reliable feeding with a direct-drive extruder.
📢 Looking for more info about large print bed 3d printer? Follow Our Site for updates and tips!