xometry 3d printing has become a practical way for engineering teams, product designers, and procurement managers to move from concept to physical parts without the delays that often come with traditional sourcing. When lead times, iteration cycles, and supply chain uncertainty affect a project, the ability to request a quote quickly and receive parts produced through additive manufacturing can change how decisions get made. Instead of treating prototyping as a separate, slow phase, many teams now iterate continuously, validating fit, form, and function while the design is still fluid. That speed is not only about the printer itself; it also depends on materials availability, process selection, and the ability to match a part’s requirements to the right manufacturing method. Additive manufacturing fits neatly into that demand because it can produce complex geometries, internal channels, and weight-reduced structures without the tooling costs that injection molding or die casting would require at early stages.
Table of Contents
- My Personal Experience
- Understanding xometry 3d printing and why it matters for modern manufacturing
- How the ordering and quoting workflow supports faster iteration
- Choosing the right 3D printing process for your part requirements
- Material selection: balancing strength, heat resistance, and appearance
- Design for additive manufacturing: geometry rules that reduce cost and risk
- Surface finish and post-processing options that elevate printed parts
- Tolerances, accuracy, and inspection: setting realistic expectations
- Expert Insight
- Use cases: prototyping, tooling, and low-volume production
- Cost drivers and how to control budget without sacrificing performance
- Lead times, scaling, and supply chain resilience
- Best practices for preparing CAD files and specifications
- Common pitfalls and how to avoid reprints and delays
- Getting the most value from xometry 3d printing over the full product lifecycle
- Frequently Asked Questions
My Personal Experience
I used Xometry’s 3D printing service when I needed a small batch of functional prototypes for a bracket I was designing, and I didn’t have time to shop around local shops. Uploading the STL was straightforward, and the instant quote helped me quickly compare materials and finishes without a bunch of back-and-forth emails. I ended up choosing nylon (SLS) because I needed decent strength and a clean fit, and the parts arrived on schedule with dimensions that were close enough that only one hole needed a quick drill-out. The surface finish was a little rougher than I expected from the photos, but it was consistent across all pieces and worked fine after a light sanding. Overall, it felt like a reliable way to get “good enough to test” parts fast, especially when I was iterating week to week. If you’re looking for xometry 3d printing, this is your best choice.
Understanding xometry 3d printing and why it matters for modern manufacturing
xometry 3d printing has become a practical way for engineering teams, product designers, and procurement managers to move from concept to physical parts without the delays that often come with traditional sourcing. When lead times, iteration cycles, and supply chain uncertainty affect a project, the ability to request a quote quickly and receive parts produced through additive manufacturing can change how decisions get made. Instead of treating prototyping as a separate, slow phase, many teams now iterate continuously, validating fit, form, and function while the design is still fluid. That speed is not only about the printer itself; it also depends on materials availability, process selection, and the ability to match a part’s requirements to the right manufacturing method. Additive manufacturing fits neatly into that demand because it can produce complex geometries, internal channels, and weight-reduced structures without the tooling costs that injection molding or die casting would require at early stages.
Another reason xometry 3d printing draws attention is the way it supports multiple stages of a product lifecycle. Early on, a team might need a handful of concept models to evaluate ergonomics or packaging. Later, they may need functional prototypes that can survive mechanical stress, heat exposure, or chemical contact. Then, once the design stabilizes, they may need bridge production parts in low volumes while tooling is being prepared for higher-volume manufacturing. Additive methods can cover all of these needs, but the details matter: tolerances, surface finish expectations, post-processing options, and the selection between polymer and metal printing all affect outcomes. The most successful users treat additive manufacturing as an engineering tool rather than a novelty. They define requirements clearly, choose materials that match the real operating environment, and plan for finishing operations like sanding, bead blasting, dyeing, heat treatment, or machining where necessary. That approach helps ensure the printed part is not only quick to obtain but also reliable in real-world use.
How the ordering and quoting workflow supports faster iteration
A major advantage associated with xometry 3d printing is the streamlined workflow from design file to production request. For many teams, the slowest part of prototyping is not the fabrication itself but the administrative steps: finding a vendor, requesting quotes, clarifying specifications, and negotiating lead times. A modern digital workflow reduces those bottlenecks by making it easier to submit a CAD model, specify the process and material, and receive pricing and delivery options quickly. This speed supports iterative design because engineers can adjust wall thickness, add ribs, change fillets, or revise mounting features, then resubmit without restarting a lengthy procurement cycle. When iteration is inexpensive and fast, product decisions become more evidence-based. Teams can test multiple versions of a design instead of guessing which compromise is best, and they can validate assumptions about assembly, clearances, and user interaction before committing to expensive tooling.
Speed matters, but clarity matters even more. Effective additive manufacturing orders require good communication of intent: which surfaces are cosmetic, which features must be dimensionally accurate, and which areas can accept visible layer lines. A well-structured workflow helps the buyer specify these details up front so the part is produced to the right standard. For example, a prototype enclosure might need a smooth exterior surface and accurate screw bosses, while interior surfaces can remain as-printed. A bracket might require specific hole tolerances and flatness for mating faces, making post-processing or secondary machining a smart choice. With xometry 3d printing, the buyer can often select finishing options that align with these needs, turning an as-printed part into a component that behaves closer to a production part. The ability to compare lead time versus cost also helps align decisions with project priorities. When a demo is imminent, expedited options can keep the schedule intact; when the goal is cost control, longer lead times and standard finishing may be acceptable.
Choosing the right 3D printing process for your part requirements
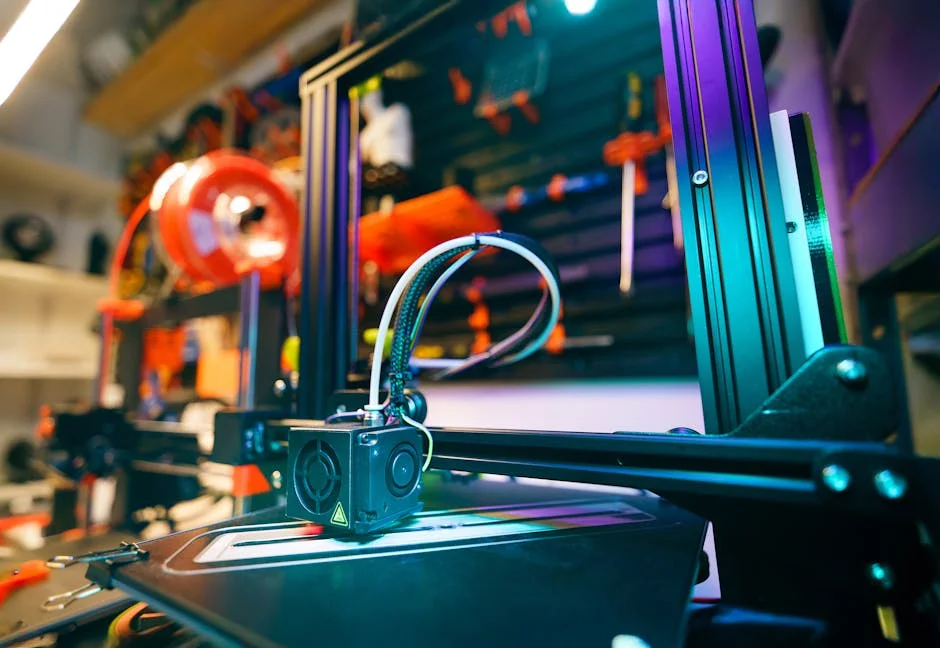
The phrase xometry 3d printing covers a range of additive processes, and selecting the correct one is central to part performance. For polymer parts, common options include SLS (selective laser sintering), MJF (multi jet fusion), FDM/FFF (fused deposition modeling), SLA (stereolithography), and PolyJet-like material jetting methods. Each process has strengths and tradeoffs. SLS and MJF typically excel at durable, functional nylon parts with good mechanical properties and no need for support structures, making them ideal for brackets, housings, clips, and complex assemblies. SLA is known for high detail and smooth surfaces, often chosen for visual models, patterns, and parts where fine features matter, though material properties depend on the resin and may be more brittle than nylon. FDM can be cost-effective for larger parts and simpler geometries, but layer adhesion, anisotropy, and surface finish must be considered carefully.
Metal additive manufacturing introduces additional choices, such as DMLS/SLM (direct metal laser sintering/selective laser melting) and binder jetting paired with sintering and infiltration, depending on availability and the desired properties. Metal printing enables lightweight lattices, internal channels for cooling, and complex shapes that would be difficult or impossible to machine. However, it also demands careful planning around support structures, thermal stress, and post-processing like heat treatment, support removal, and machining critical surfaces. When using xometry 3d printing for metal parts, engineers often design with finishing in mind: leave machining stock on sealing faces, plan access for cutting tools, and specify tolerances realistically. A part that needs high precision on bearing bores might be printed near-net shape and then CNC machined to final dimensions. This hybrid approach can deliver the geometry freedom of additive while still meeting tight functional requirements.
Material selection: balancing strength, heat resistance, and appearance
Material selection is where xometry 3d printing can either shine or disappoint, depending on how well the chosen material matches the real application. For durable polymer parts, nylon families such as PA12 and PA11 are popular because they offer a good balance of toughness, fatigue resistance, and chemical resistance. Glass-filled or carbon-filled variants increase stiffness and dimensional stability, which can be useful for fixtures, jigs, and structural components. TPU and other elastomers support flexible parts like gaskets, grips, and vibration isolators, though designers must account for different print behaviors and the need for consistent wall thickness. For high-temperature needs, specialty polymers may be necessary, and it’s important to confirm the process supports the chosen material. Visual requirements also matter: some processes yield a grainy, matte texture (common with SLS and MJF), while others can achieve smooth surfaces with minimal finishing (common with SLA), making them better for consumer-facing prototypes.
For metal applications, alloys like aluminum, stainless steel, titanium, and nickel-based superalloys are commonly associated with additive manufacturing. Each brings a distinct performance profile. Aluminum can reduce weight and offers good thermal conductivity, making it attractive for heat sinks and housings. Stainless steel is often selected for corrosion resistance and general mechanical strength. Titanium combines high strength with low weight and excellent corrosion resistance, frequently used in aerospace and medical contexts. When a team uses xometry 3d printing to source metal components, they should consider not only the printed material properties but also how post-processing will affect final performance. Heat treatment can improve strength or relieve residual stress; hot isostatic pressing (HIP) can reduce internal porosity; surface finishing can improve fatigue resistance by reducing stress concentrators. The best outcomes come from aligning material choice, process choice, and finishing steps with the part’s load cases and environmental exposure.
Design for additive manufacturing: geometry rules that reduce cost and risk
Design for additive manufacturing (DfAM) is a key factor in getting consistent results from xometry 3d printing. While additive can create complex shapes, it does not eliminate physics. Overhangs, thin walls, unsupported features, and trapped powder or resin can create failures or quality issues if not addressed early. Polymer powder-bed processes like SLS and MJF allow many complex geometries without supports, but designers still need to manage wall thickness and avoid extremely thin, fragile features. Drain holes may be required for hollow parts to remove powder, and internal channels must be sized appropriately to avoid clogging. For SLA, support structures are typically necessary, which can leave marks where supports attach; placing these attachment points on non-cosmetic surfaces improves appearance. For FDM, orientation is critical because strength differs along and across layer lines, and bridging or overhang angles affect surface quality.
Cost and lead time are also influenced by design choices. A part that requires extensive supports, heavy post-processing, or multiple setups will typically cost more than a part designed to print cleanly. With xometry 3d printing, designers can often reduce cost by consolidating assemblies, adding self-aligning features, and minimizing the need for tight tolerances in non-critical areas. It helps to think in terms of functional surfaces: specify critical dimensions only where necessary, and allow looser tolerances elsewhere. If a part needs threads, consider whether printed threads are acceptable or if heat-set inserts or tapped holes are better. For snap fits, design with appropriate flexibility and avoid sharp corners that can crack. For living hinges, choose materials suited to repeated flexing and orient the hinge to reduce layer separation. These DfAM habits lower the risk of reprints, improve repeatability, and help ensure the printed part behaves as expected when assembled and used.
Surface finish and post-processing options that elevate printed parts
Surface finish is often the difference between a prototype that merely fits and a prototype that looks and feels like a production part. xometry 3d printing can deliver parts in an as-printed state, but many applications benefit from post-processing. For SLS and MJF nylon parts, bead blasting can remove loose powder and create a uniform matte finish. Dyeing can produce a consistent black or colored appearance, useful for presentation models and end-use components. Vapor smoothing or chemical smoothing, where available, can reduce surface roughness and improve the feel of the part, though it may slightly soften sharp edges and affect dimensional accuracy. For SLA parts, sanding and priming can produce a paint-ready surface, and clear resins can be polished to improve transparency for lenses, light pipes, or fluidic visualization models.
Metal parts often require more extensive post-processing. Support removal is typically mandatory, and heat treatment may be recommended to achieve desired mechanical properties. Machining is common for precision interfaces such as bearing seats, sealing surfaces, threaded holes, and datum faces. Bead blasting or tumbling can improve appearance, while anodizing or passivation can enhance corrosion resistance depending on the alloy. When a team sources xometry 3d printing for production-intent parts, it’s smart to plan finishing steps in the design stage: add machining stock where needed, avoid thin fins that could warp during heat treatment, and ensure tools can access the surfaces that must be machined. The goal is to treat additive manufacturing as one step in a controlled manufacturing chain, not as a single-step miracle. With the right finishing plan, printed parts can meet demanding cosmetic and functional requirements.
Tolerances, accuracy, and inspection: setting realistic expectations
Tolerances in additive manufacturing depend on the process, material, part geometry, and orientation. xometry 3d printing can produce accurate parts, but it’s important to set expectations based on what the chosen method can reliably achieve. Powder-bed polymer processes can deliver good dimensional stability, yet they still show variation due to thermal behavior and shrinkage. SLA can capture fine detail, but resin shrinkage and support removal can influence final dimensions. FDM accuracy depends heavily on printer calibration, nozzle size, and geometry, and it may be less suitable for tight-tolerance features unless secondary machining is planned. A practical approach is to identify which dimensions truly matter for function—like press fits, sliding fits, and sealing surfaces—and then plan for post-processing or design adjustments in those areas.
| Option | Best for | Key benefits | Trade-offs |
|---|---|---|---|
| Xometry Instant Quoting (3D Printing) | Fast turnarounds and straightforward parts | Instant pricing, broad material/process selection, scalable production, quality controls | Less hands-on guidance than a dedicated local shop; pricing can vary by geometry/material |
| Local 3D Printing Service Bureau | Projects needing close collaboration or in-person iteration | Direct communication, easier prototyping feedback loops, potential for same-day pickup | Limited process/material capacity; may not scale as well for higher volumes |
| In-house Desktop 3D Printer | Frequent prototyping and quick internal iterations | Lowest per-part cost over time, immediate control over schedules, rapid design tweaks | Upfront equipment/maintenance, limited industrial materials/accuracy, operator time required |
Expert Insight
Start by uploading a “manufacturing-ready” file: use a watertight STL/3MF, keep wall thickness within the chosen process minimums, and add clear notes for critical dimensions and cosmetic surfaces. When requesting a quote on Xometry, specify material, finish, and tolerance only where needed—tight tolerances everywhere can raise cost and lead time without improving functional performance. If you’re looking for xometry 3d printing, this is your best choice.
Reduce risk before committing to volume by ordering a small batch in the same process and material you’ll use for production, then validate fit, strength, and post-processing requirements. If you need faster iteration, request multiple variations in one order (e.g., different infill, orientation, or surface finish) to compare results and lock in the best spec for the next run. If you’re looking for xometry 3d printing, this is your best choice.
Inspection and quality control become more important as printed parts move from prototype to end-use. For xometry 3d printing orders intended for functional testing or low-volume production, teams often specify inspection requirements such as dimensional reports, critical-to-quality measurements, or material certifications where applicable. Even without formal inspection, thoughtful measurement on receipt can prevent downstream issues. For example, check hole diameters before installing inserts, verify flatness on mating surfaces, and test-fit assemblies before committing to a larger run. If a part is sensitive to warpage, consider design features that stiffen large flat areas, or choose a process known for better flatness performance. When tolerances are very tight, the most reliable strategy is to print near-net and machine to final size. This hybrid approach helps additive manufacturing deliver complex geometry while maintaining the precision of CNC machining on critical features.
Use cases: prototyping, tooling, and low-volume production
One of the most compelling aspects of xometry 3d printing is how broadly it can be applied across industries and project phases. For prototyping, additive manufacturing enables rapid physical validation of ideas. A consumer product team can test ergonomics and button placement with a nylon or resin prototype. An industrial equipment manufacturer can validate cable routing, mounting hole patterns, and service access with a printed housing. Medical device developers can assess form factors and assembly steps before moving into regulated production pathways. Because additive manufacturing can produce multiple design variants in a single build, teams can compare options side by side, reducing the time it takes to converge on a final design.
Tooling and manufacturing aids are another strong use case. With xometry 3d printing, jigs, fixtures, drill guides, inspection nests, and assembly aids can be produced quickly and updated whenever the production line changes. Printed fixtures can incorporate conformal surfaces that match complex parts, improving repeatability and reducing operator fatigue. In some environments, printed tooling can replace machined aluminum fixtures at a lower cost, especially when loads are moderate. Low-volume production is also a realistic target when the design is stable but volumes do not justify tooling. Replacement parts, custom brackets, specialized enclosures, and niche market products can be produced in batches without the overhead of molds. The key is to choose a process and material that meet durability requirements and to standardize finishing steps so parts are consistent from batch to batch.
Cost drivers and how to control budget without sacrificing performance
Cost in additive manufacturing is influenced by more than part size. With xometry 3d printing, pricing is typically affected by volume of material, machine time, complexity, support requirements, and post-processing. A compact part with intricate lattice structures might take longer to print and finish than a larger but simpler part. Orientation can also influence cost: printing a tall part may increase build time, while a flat orientation might improve speed but require more supports. Material choice matters as well, especially for specialty polymers or metal alloys that have higher raw material and processing costs. Post-processing—dyeing, smoothing, machining, heat treatment—can add value but also increases cost, so it’s best applied where it actually improves function or appearance.
Budget control starts with design discipline. Reducing unnecessary material volume, avoiding extremely tight tolerances where they are not needed, and selecting the simplest process that meets requirements can all reduce cost. For example, if a part is primarily a fit-check model, a lower-cost polymer process may be sufficient. If the part must withstand repeated mechanical loads, a tougher nylon process may be a better investment than a brittle resin. When using xometry 3d printing for production-intent parts, consider whether a hybrid plan could lower total cost: print the complex geometry, then machine only the critical surfaces. Also consider whether consolidating multiple components into one printed part reduces assembly labor enough to offset a higher print cost. A realistic cost strategy looks at total system cost—fabrication, finishing, assembly, rework risk, and schedule impact—rather than focusing only on per-part price.
Lead times, scaling, and supply chain resilience
Lead time is one of the biggest reasons teams adopt xometry 3d printing, especially when project schedules are tight or supply chains are unpredictable. Traditional manufacturing often requires tooling, minimum order quantities, and supplier capacity planning that can stretch timelines. Additive manufacturing can compress early cycles by removing tooling from the critical path. That makes it easier to respond to late-stage design changes, customer feedback, or compliance requirements. For organizations that manage multiple products, additive manufacturing also supports parallel development: different teams can order prototypes without competing for internal machine time, and they can iterate independently while still maintaining a consistent sourcing workflow.
Scaling additive manufacturing requires thoughtful planning. While 3D printing is excellent for low to medium volumes, there is a point where injection molding, casting, or machining may become more economical. The transition is not always abrupt; many products benefit from a staged approach where xometry 3d printing supports bridge production until demand stabilizes. This approach reduces the risk of investing in tooling too early and allows a team to confirm market fit before committing capital. Additive manufacturing also strengthens supply chain resilience by enabling on-demand production of spare parts and replacements. Instead of holding large inventories, organizations can maintain digital inventories and produce parts when needed. That can reduce warehousing costs and help keep equipment running, particularly for legacy systems where original parts are no longer available through conventional suppliers.
Best practices for preparing CAD files and specifications
Successful xometry 3d printing outcomes begin with clean CAD and unambiguous specifications. A watertight, manifold model reduces the risk of slicing errors and unexpected holes. Consistent units, correct scaling, and appropriate file formats are essential. STEP files are often preferred for preserving geometry accuracy, while STL files may be used when mesh-based workflows are required, provided the mesh resolution is high enough to capture curves without faceting. It’s also wise to define what matters most: if certain surfaces are cosmetic, note that; if certain features must be dimensionally accurate, identify them. When a part will be assembled with off-the-shelf components, include those interface requirements, such as screw sizes, insert types, and required clearances.
Print orientation and support strategy can dramatically affect results, so it helps to think ahead about how the part should be built. For example, if a face must be smooth, orient it to minimize supports or place supports on hidden surfaces. If a part has thin walls, consider adding ribs or increasing thickness to reduce warpage. If internal channels are required, ensure they are large enough for powder removal in powder-bed processes and include escape holes where needed. For xometry 3d printing orders that will undergo secondary machining, include notes about machining stock and datums so the finishing steps are straightforward. Clear documentation reduces the back-and-forth that can slow a project and improves the odds that the first build is usable. The more a part behaves like a production component—defined datums, clear tolerances, known finishes—the easier it becomes to reproduce reliably across multiple runs.
Common pitfalls and how to avoid reprints and delays
Additive manufacturing can be fast, but mistakes can still cost days when a part must be reprinted. One common pitfall with xometry 3d printing is assuming that any geometry is printable without consequences. Extremely thin walls can break during shipping or support removal. Sharp internal corners can concentrate stress and crack under load. Deep, narrow holes can print undersized or require reaming. Another frequent issue is failing to plan for assembly: snap fits may be too stiff, screw bosses may split, or tolerances may be too tight for the chosen process. These problems are avoidable when the design is reviewed with the printing method in mind and when the part is tested in conditions that resemble real use, not just a desk fit-check.
Another source of delays is vague finishing expectations. If a part is meant to be presentation-ready, leaving finishing decisions to chance can produce disappointing results. It’s better to specify whether a uniform cosmetic surface is required, whether color matters, and whether layer lines are acceptable. With xometry 3d printing, choosing the correct finish can turn a functional but rough prototype into a part suitable for customer demos or investor meetings. Shipping and handling are also worth considering: delicate features may need protective packaging, and assemblies may be better printed as separate components to avoid damage. Finally, teams sometimes overlook the difference between prototype materials and production materials. A resin that looks great may not have the heat resistance needed for an engine bay test. Avoiding that mismatch saves time by preventing a cycle of redesign and revalidation. Good additive manufacturing practice is to match material properties to the test plan and to treat each build as a step toward a validated, repeatable part.
Getting the most value from xometry 3d printing over the full product lifecycle
The highest value from xometry 3d printing comes when it is integrated into a broader development and manufacturing strategy rather than used only for one-off prototypes. Early in development, additive manufacturing helps teams explore multiple concepts quickly, validate human factors, and identify packaging constraints. As the design matures, printed functional prototypes can support engineering tests, pilot builds, and early customer feedback. When moving toward launch, additive can provide bridge production and reduce schedule risk while tooling is built or while demand is still uncertain. Even after a product is established, additive manufacturing can support service parts, custom variants, and engineering changes without forcing a full redesign of tooling. That flexibility is especially valuable for products that evolve frequently or must be customized for different customers.
To sustain results, teams benefit from standardizing how they specify parts: preferred materials for common applications, default finishes for presentation prototypes, and clear tolerance practices. Keeping records of successful builds—orientation preferences, finishing steps, and any design tweaks that improved strength or fit—helps future orders go smoothly. Over time, organizations can build a repeatable approach where xometry 3d printing supports faster decision-making and reduces the cost of uncertainty. The last step is measuring outcomes: fewer late-stage changes, shorter iteration cycles, reduced assembly complexity, and improved time-to-market. When additive manufacturing is treated as a reliable production tool rather than an experimental option, it becomes easier to justify its use across departments, from engineering to operations. xometry 3d printing can then serve as a practical backbone for rapid iteration, resilient sourcing, and on-demand production that keeps products moving forward even when timelines and requirements change.
Summary
In summary, “xometry 3d printing” is a crucial topic that deserves thoughtful consideration. We hope this article has provided you with a comprehensive understanding to help you make better decisions.
Frequently Asked Questions
What is Xometry 3D printing?
Xometry 3D printing is an on-demand manufacturing service that quotes and produces parts using multiple additive manufacturing processes through Xometry’s platform and partner network.
Which 3D printing processes does Xometry offer?
Popular 3D printing choices include FDM, SLA, SLS, MJF, DMLS/SLM metal printing, and binder jetting—though what’s available can vary based on your material needs, part geometry, and location, including through services like **xometry 3d printing**.
What materials can I print with Xometry?
Common material options range from everyday plastics like ABS, nylon (PA12), TPU, and a variety of resins to durable metals such as aluminum, stainless steel, and titanium—though the exact selection can vary depending on the process and region, including with xometry 3d printing.
How do I get an instant quote from Xometry for 3D printing?
With **xometry 3d printing**, you can simply upload your CAD file, choose your preferred process, material, and finishing options, review any automated DFM feedback, and then receive instant pricing and lead-time estimates—ready to order in just a few clicks.
What tolerances and surface finishes can I expect?
Tolerances vary based on the manufacturing method and your part’s geometry, and with **xometry 3d printing** you can tailor the final look and fit by selecting finishes such as bead blasting, dyeing, polishing, painting, or adding machining on critical features when tighter precision is required.
How long does Xometry 3D printing take?
Lead times depend on the process, material, order quantity, and any finishing you choose—many plastic parts from **xometry 3d printing** can ship in just a few days, while metal components and heavily post-processed pieces typically require more time.
📢 Looking for more info about xometry 3d printing? Follow Our Site for updates and tips!