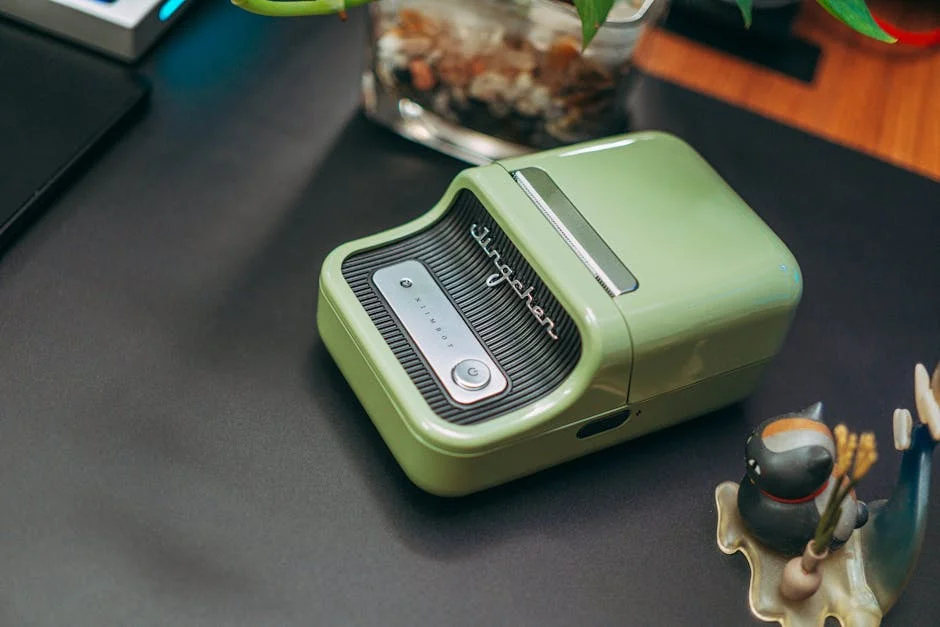
The Anycubic Photon Mono earned attention because it hits a practical balance: sharp resin detail, quick exposure behavior, and a footprint that fits into normal workspaces without turning a room into a dedicated lab. For hobbyists printing tabletop miniatures, dental-style models, jewelry prototypes, or small mechanical parts, the main appeal is repeatable resolution without needing enterprise-level budgets. A monochrome LCD is central to that reputation, because it lets each layer cure faster than older RGB screens while typically lasting longer, which can reduce downtime and cost over time. When someone is choosing a resin 3D printer, that day-to-day reliability matters as much as raw specs. The Anycubic Photon Mono also tends to be approachable for beginners: a straightforward build plate, a standard resin vat with a replaceable FEP film, and slicer profiles that can be tuned without needing deep engineering knowledge on day one.
Table of Contents
- My Personal Experience
- Why the Anycubic Photon Mono Became a Go-To Resin Printer
- Core Technology: Monochrome LCD, UV Light, and What It Means for Prints
- Print Quality Expectations: Detail, Surface Finish, and Dimensional Accuracy
- Speed and Throughput: What “Mono” Changes in Real Production
- Setup and First Prints: Leveling, Resin Choice, and Slicer Basics
- Supports and Orientation: Reducing Failures and Improving Finish
- Resin Handling and Safety: Clean Workflow Without the Mess
- Washing and Curing: Getting Strong, Clean Results After the Print
- Expert Insight
- Common Problems and Practical Fixes: Adhesion, Layer Lines, and Failures
- Maintenance and Consumables: FEP Film, LCD Care, and Long-Term Reliability
- Best Use Cases: Miniatures, Prototypes, and Small-Batch Production
- Choosing Settings That Actually Matter: A Practical Tuning Mindset
- Ownership Experience: Noise, Space, Odor Control, and Daily Routine
- Final Thoughts on Getting the Most from the Anycubic Photon Mono
- Frequently Asked Questions
My Personal Experience
I picked up an Anycubic Photon Mono to print small tabletop minis and was surprised by how quickly I went from “what am I doing?” to getting clean results. The first weekend was a mess—my first plate came up empty because I hadn’t leveled it properly, and I underestimated how much temperature mattered in my garage. After a couple of test prints and dialing in exposure times, the detail started coming through, especially on faces and armor edges. The workflow is still a bit of a routine: gloves, IPA rinse, curing, and scraping supports without snapping thin parts. But once I got the hang of it, it became one of those tools I actually use regularly, not just a gadget that sits on a shelf.
Why the Anycubic Photon Mono Became a Go-To Resin Printer
The Anycubic Photon Mono earned attention because it hits a practical balance: sharp resin detail, quick exposure behavior, and a footprint that fits into normal workspaces without turning a room into a dedicated lab. For hobbyists printing tabletop miniatures, dental-style models, jewelry prototypes, or small mechanical parts, the main appeal is repeatable resolution without needing enterprise-level budgets. A monochrome LCD is central to that reputation, because it lets each layer cure faster than older RGB screens while typically lasting longer, which can reduce downtime and cost over time. When someone is choosing a resin 3D printer, that day-to-day reliability matters as much as raw specs. The Anycubic Photon Mono also tends to be approachable for beginners: a straightforward build plate, a standard resin vat with a replaceable FEP film, and slicer profiles that can be tuned without needing deep engineering knowledge on day one.
Another reason the Anycubic Photon Mono stands out is how it fits into a complete workflow. Resin printing is never just “press print,” and the machine’s real value shows up in how easily it integrates with the steps before and after printing: preparing files, orienting models, generating supports, washing, curing, and disposing of consumables responsibly. Users often look for a printer that doesn’t fight them at every stage, and the Anycubic Photon Mono’s common ecosystem of settings, spare parts, and community-tested parameters reduces trial-and-error. Even if you plan to upgrade later, starting with a platform that has widely shared exposure ranges and troubleshooting knowledge can shorten the learning curve. That combination of speed, detail, and accessible tuning is why the printer often becomes a baseline recommendation for people who want consistent resin results without turning the hobby into constant hardware modifications.
Core Technology: Monochrome LCD, UV Light, and What It Means for Prints
At the heart of the Anycubic Photon Mono is the interplay between its UV light source, the monochrome LCD masking screen, and the photopolymer resin chemistry. In MSLA printing, the LCD acts like a dynamic stencil: the UV light shines through selected pixels to cure each layer. A monochrome LCD allows more UV transmission than older color panels, which typically means shorter exposure times per layer and less heat buildup. Practically, that can translate into faster print jobs and more stable curing behavior, especially on long runs where consistent layer exposure matters. When you’re pushing fine detail—engraved text, surface textures, or tiny mechanical interfaces—stable exposure helps avoid mushy edges and preserves crisp boundaries between features.
Understanding this technology also helps with calibration decisions. Because the Anycubic Photon Mono can cure layers efficiently, the “sweet spot” for exposure is often narrower than beginners expect: a small change in normal exposure can shift results from undercured (weak supports, layer separation) to overcured (loss of detail, elephant foot, harder support removal). The monochrome screen’s efficiency is an advantage, but it rewards careful tuning. Many users find that dialing in the resin profile—layer height, normal exposure, bottom exposure, light-off delay, and lift speeds—has a bigger impact on final quality than chasing minor hardware upgrades. When the printer is operating in a well-calibrated range, you’ll see smoother gradients on curved surfaces, fewer layer lines at common heights like 0.05 mm, and reduced risk of partial failures caused by marginal support strength.
Print Quality Expectations: Detail, Surface Finish, and Dimensional Accuracy
The Anycubic Photon Mono is typically chosen for detail-first applications, and it can deliver impressive results when models are oriented and supported with intention. Resin printers excel at capturing fine textures—skin pores on miniatures, knurling on knobs, embossed logos, or delicate filigree—because each layer is cured across the entire build area with consistent pixel-based masking. Surface finish often appears smoother than filament prints at comparable sizes, particularly on organic shapes. That said, print quality is not just a function of the machine; it’s the combined outcome of layer height, exposure calibration, resin selection, temperature stability, and post-processing technique. If you print a highly detailed figure at 0.05 mm with a properly tuned exposure, the Anycubic Photon Mono can produce crisp edges and subtle shading transitions that paint well and hold washes without losing definition.
Dimensional accuracy is a more nuanced topic. Resin shrinks during curing, and the amount varies by resin type and how aggressively you post-cure. For functional parts—snap fits, gear prototypes, brackets—expect to do test prints and compensate with design tolerances rather than assuming perfect nominal dimensions. The Anycubic Photon Mono can be consistent, which is often more valuable than being perfectly accurate on the first attempt. Once you measure your real-world outputs and adjust scaling or clearances, you can get repeatable fits. Support placement also affects accuracy: heavy supports can leave marks that require sanding, and suction forces from hollow parts can cause slight distortions. With the right orientation, drainage holes for hollow prints, and thoughtful support density, you can get clean mating surfaces and predictable geometry without spending hours correcting defects.
Speed and Throughput: What “Mono” Changes in Real Production
Speed is one of the most cited benefits of the Anycubic Photon Mono, but it’s important to define speed correctly in resin printing. Unlike FDM, where print time scales with the amount of plastic extruded, MSLA print time depends mostly on the number of layers: every layer takes a fixed exposure and movement cycle regardless of how full the build plate is. The monochrome LCD can reduce the exposure time needed per layer, so prints often finish noticeably faster than older RGB-based machines at the same layer height. That can make a big difference for batch production: printing ten miniatures can take roughly the same time as printing one, so a faster layer cycle directly increases daily throughput.
Real throughput also depends on how you manage the full workflow. The Anycubic Photon Mono can finish a plate quickly, but washing and curing can become the bottleneck if you don’t have an efficient setup. If you routinely run multiple plates, it’s worth planning for resin handling tools, spare vats, and a consistent post-cure station. Speed gains can be lost if you spend extra time scraping fragile parts, re-leveling after every run, or troubleshooting adhesion issues. Proper bottom exposure and lift settings help keep prints stuck to the plate rather than the FEP film, which prevents time-consuming failures. When the printer is tuned and the workflow is organized, the “mono” advantage is felt not only in the shorter print timer but also in the confidence that a batch will complete overnight and be ready for cleanup in the morning.
Setup and First Prints: Leveling, Resin Choice, and Slicer Basics
Getting reliable results from the Anycubic Photon Mono starts with a careful initial setup. Build plate leveling is foundational: if the plate is slightly off, you might see uneven first-layer adhesion, warped bases, or prints that detach mid-job. A consistent leveling process—loosening the plate, homing to the screen with paper as a spacer, applying even pressure, and tightening without shifting—can prevent many early frustrations. After leveling, inspect the vat and FEP film for dust or cured resin specks, because even a tiny hard particle can create a pressure point that risks damaging the film or affecting the first layers. Cleanliness matters more in resin printing than many newcomers expect, and the Anycubic Photon Mono rewards a tidy routine.
Resin choice and slicer settings are the next major variables. Standard resins are usually easiest for early success because they have predictable exposure ranges and good detail. Tough or flexible resins can be excellent, but they often require more dialing in. In the slicer, start with a conservative profile: moderate layer height, bottom layers with enough exposure for solid adhesion, and lift speeds that aren’t overly aggressive. Supports should be placed to prevent islands and minimize suction; hollowing can save resin, but it should be paired with drainage holes and internal supports where necessary. The Anycubic Photon Mono has a large user base, so you can often find baseline settings for popular resins, but treat them as starting points rather than guarantees. Once you get a successful calibration print and a couple of real models, adjust one parameter at a time so you can understand cause and effect rather than chasing multiple changes at once.
Supports and Orientation: Reducing Failures and Improving Finish
Support strategy is one of the biggest determinants of success on the Anycubic Photon Mono. Resin prints are pulled from the FEP film layer by layer, and each peel cycle creates forces that can snap thin sections, detach supports, or warp flat surfaces. Orientation helps manage those forces. Angling a model can reduce the cross-sectional area per layer, lowering suction and peel resistance. It can also move support contact points to less visible areas, which improves final appearance. However, extreme angles can increase print height and time, so there is a trade-off. The most reliable approach is to orient for consistent layer-to-layer transitions, reduce large flat areas facing the film, and ensure that early layers have stable support “roots” that won’t flex.
On the support side, the goal is to create enough structure to resist peel forces without leaving heavy scars. Light supports are great for fine surfaces but can fail if they’re underexposed or placed too sparsely on heavy sections. Medium supports can be a safer baseline for larger pieces, while heavy supports are best reserved for high-stress anchor points or large prints where failure would be costly. With the Anycubic Photon Mono, exposure calibration affects support performance significantly: if normal exposure is too low, even well-placed supports can shear. If it’s too high, supports fuse too strongly and become difficult to remove cleanly. Consider using support tips sized appropriately for the detail level: smaller tips for visible surfaces, larger tips for hidden areas. After printing, removing supports after a partial wash—before a full cure—often yields cleaner break points and less pitting, which can reduce sanding and preserve detail.
Resin Handling and Safety: Clean Workflow Without the Mess
Working with the Anycubic Photon Mono means working with liquid photopolymer resin, and that requires a safety-first mindset. Resin can irritate skin and eyes, and fumes can be unpleasant in poorly ventilated spaces. A practical setup includes nitrile gloves, eye protection, and a workspace that can be wiped down easily. Ventilation matters: an open window with a fan or a dedicated filtration approach can make long sessions more comfortable. Keep paper towels, microfiber cloths, and a spill tray nearby so small drips don’t become a sticky problem. It’s also wise to separate “clean” and “dirty” tools—one set for handling uncured resin and another for post-cure parts—so you don’t accidentally contaminate surfaces like door handles or keyboards.
Storage and disposal are part of responsible resin printing. Keep resin bottles sealed and away from sunlight, and label containers if you pour resin back and forth. When filtering resin after a print, use a paint filter or fine mesh funnel to catch cured particles that could damage the FEP film or cause print artifacts. For waste, never pour liquid resin or IPA wash directly down the drain. Instead, cure contaminated paper towels and resin sludge under UV light until solid, then dispose according to local rules for cured resin waste. Used IPA can be reclaimed by letting resin settle, then curing the sediment; the clearer alcohol can often be reused for a “first wash.” With consistent habits, the Anycubic Photon Mono can be part of a clean, repeatable workflow that doesn’t leave your workspace smelling harsh or covered in sticky residue.
Washing and Curing: Getting Strong, Clean Results After the Print
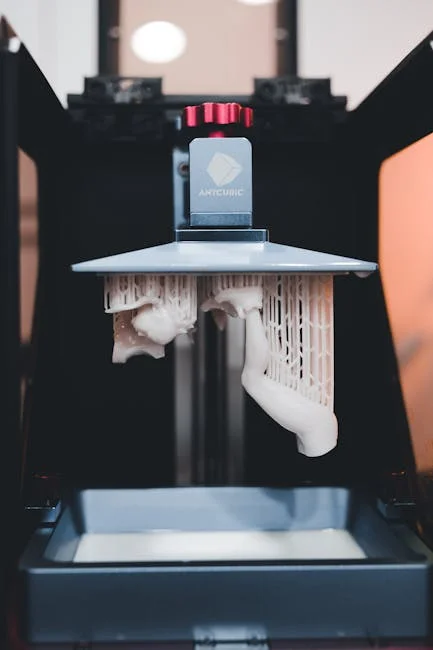
Post-processing is where Anycubic Photon Mono prints go from “fresh off the plate” to durable, display-ready parts. Washing removes uncured resin from surfaces and cavities, which prevents tackiness and preserves detail. Many users rely on isopropyl alcohol, but alternatives exist depending on resin type and local availability. A two-step wash is often effective: a first container to remove the bulk of resin, followed by a second cleaner bath to finish. Agitation improves results, whether by swirling, using a wash station, or gently brushing with a soft tool in hard-to-reach areas. Hollow prints need extra attention: flush the inside thoroughly through drainage holes so liquid resin doesn’t remain trapped and later crack the model.
| Feature | Anycubic Photon Mono | What it means in practice |
|---|---|---|
| Printing speed (mono LCD) | Faster cure times than RGB LCD resin printers | Shorter print jobs and better throughput for frequent printing |
| Print quality & detail | High-detail resin output with crisp edges and smooth surfaces | Well-suited for miniatures, dental models, and fine-feature prototypes |
| Ease of use & workflow | Beginner-friendly setup with straightforward leveling and slicing workflow | Less time troubleshooting; easier to get reliable first prints |
Expert Insight
Dial in exposure with a quick calibration: run a small test print, then adjust normal exposure in 0.2–0.5s steps until fine text and sharp edges appear without swollen details. Keep lift speed conservative and increase lift distance slightly if you see layer separation or suction-related failures. If you’re looking for anycubic photon mono, this is your best choice.
Improve reliability by controlling resin and cleanliness: warm the resin to a stable 22–28°C, mix thoroughly, and filter it back into the bottle after each session to remove cured debris. Re-level the build plate after any hard failure, and inspect the FEP for clouding or dents to prevent random adhesion issues. If you’re looking for anycubic photon mono, this is your best choice.
Curing is equally important, because the initial print is only partially polymerized. Proper UV curing increases strength and reduces long-term odor, but over-curing can make parts brittle or slightly warp thin features. The best approach is controlled curing in short intervals, rotating parts to expose all sides. Supports can be removed before full cure to reduce scarring, but removing them too early can deform delicate sections. Finding the right timing depends on resin and geometry, so it’s worth testing with a small model. For functional parts, consistent curing is key to repeatable dimensions and mechanical behavior. With the Anycubic Photon Mono, strong results often come from a disciplined routine: wash thoroughly, dry completely, remove supports thoughtfully, then cure in measured steps rather than blasting the part with UV for an extended period.
Common Problems and Practical Fixes: Adhesion, Layer Lines, and Failures
Even a well-regarded machine like the Anycubic Photon Mono can run into common resin printing issues, and most of them have predictable causes. Poor adhesion to the build plate often points to insufficient bottom exposure, too few bottom layers, a greasy plate surface, or an unlevel plate. Temperature can also play a role; resin that’s too cold tends to cure less predictably and can increase viscosity, affecting peel behavior. If prints are sticking to the FEP instead of the plate, increase bottom exposure moderately, check leveling, and ensure the vat film is clean and properly tensioned. Another frequent issue is “islands” caused by unsupported geometry; these lead to floating cured bits that can later cause failures or puncture the film. Careful support generation and a quick scan through sliced layers can prevent them.
Layer lines and surface artifacts can be addressed with both settings and orientation. Thicker layer heights show more stepping, while very thin layers can increase print time and may demand tighter exposure control. If you see ripples or banding, consider whether lift speeds are too aggressive, causing flex or suction-related shifts. Reducing lift speed or increasing lift distance can help the Anycubic Photon Mono peel layers more consistently. Z-wobble is less common in resin than in filament printing, but mechanical looseness can still cause repeating patterns. Also watch for overexposure “blooming” that softens details; lowering exposure slightly or reducing light-off delay adjustments can help, depending on resin. When troubleshooting, change one variable at a time and keep notes, because resin printing is a system: exposure, supports, temperature, and motion settings all interact, and a stable baseline is more valuable than chasing the fastest possible layer cycle.
Maintenance and Consumables: FEP Film, LCD Care, and Long-Term Reliability
Maintaining the Anycubic Photon Mono is largely about protecting the components that interact with resin and UV light. The FEP film is a consumable that will eventually cloud, scratch, or lose its release properties. Signs it’s time to replace include persistent adhesion to the film, visible haze, or repeated failures in areas that used to print fine. Replacing FEP is not difficult, but tension matters; a properly installed film helps consistent peeling and reduces the chance of leaks. The resin vat should be cleaned gently—avoid scraping aggressively with metal tools that can damage surfaces. After a failed print, filtering resin and checking for cured fragments is essential before starting another job, because leftover debris can press into the film and create punctures.
The LCD and the area beneath the vat deserve careful attention. Resin spills can damage the screen if left uncured or if they seep into edges. Use protective measures like a screen protector designed for resin printers, and clean with appropriate materials if resin contacts the surface. Periodic checks of the UV exposure pattern can help identify dead pixels or uneven illumination early, before it ruins multiple prints. The build plate should be kept clean and lightly abraded only if necessary; over-sanding can create uneven surfaces that complicate leveling. With steady maintenance habits—cleaning after failures, storing resin properly, inspecting the FEP, and keeping the printer in a stable environment—the Anycubic Photon Mono can remain consistent across many months of printing rather than becoming a machine that works only “when it feels like it.”
Best Use Cases: Miniatures, Prototypes, and Small-Batch Production
The Anycubic Photon Mono fits especially well in detail-driven hobbies and small-scale production where surface quality matters. Miniatures and figurines are a natural match: sharp facial features, clean armor edges, and fine textures like chainmail or fur can print with minimal cleanup when supported intelligently. Model makers also appreciate how resin captures engraved panel lines and subtle greebles on sci-fi kits. For makers creating masters for molding, resin prints from the Anycubic Photon Mono can be sanded and primed to a smooth finish, then used for silicone molds, provided the resin is fully cured and compatible with the molding process. The key is consistency: producing multiple identical parts across several build plates is easier when a printer holds calibration and exposure stability over time.
Functional prototyping is another strong area, as long as the material properties are matched to the job. Standard resin can be brittle, but engineering-style resins can offer better toughness and heat resistance for test-fit parts, brackets, or enclosures. Because resin printing can produce complex shapes with fine tolerances, it’s useful for iterative design, especially when you need to verify ergonomics or assembly before committing to injection molding or machining. Small-batch production is viable for items like custom knobs, branded tags, small fixtures, or cosplay greebles—parts where detail and finish justify the post-processing time. The Anycubic Photon Mono is most effective when the value of each part is high enough to support careful washing and curing, and when the print volume aligns with the machine’s build area and the realities of resin workflow.
Choosing Settings That Actually Matter: A Practical Tuning Mindset
When dialing in the Anycubic Photon Mono, it’s easy to get lost in a sea of numbers, but a few settings usually drive the biggest improvements. Normal exposure time controls how well each layer cures; too low leads to weak layers and support failures, too high blurs detail and makes supports stubborn. Bottom exposure and bottom layer count determine build plate adhesion; these should be strong enough to anchor the print but not so extreme that the base becomes overcured and difficult to remove. Lift speed and lift distance influence peel forces; slower, smoother motion can improve reliability on large cross-sections and hollow parts. Light-off delay or rest times can help resin flow and settle, especially with thicker resins or cooler room temperatures. Focusing on these fundamentals first typically yields better results than tweaking obscure parameters.
A practical tuning mindset also means controlling variables outside the slicer. Resin temperature has a major impact; printing in a cold room can make even “correct” exposure settings behave inconsistently. Keeping resin within a stable, moderate range improves flow and curing predictability. Another overlooked factor is model preparation: hollowing with adequate wall thickness, adding drainage holes, and ensuring no trapped cups that create suction. Calibration prints are helpful, but they should be followed by real-world tests that match your typical models. If you mainly print miniatures, tune with miniature-like geometry rather than only flat exposure tiles. With the Anycubic Photon Mono, the best profiles are often simple, stable, and repeatable—settings that give you clean success across many prints, even if they aren’t the absolute fastest possible on paper.
Ownership Experience: Noise, Space, Odor Control, and Daily Routine
Living with the Anycubic Photon Mono is as much about the environment as the printer itself. Resin printing introduces odor and chemical handling, so placing the machine in a well-ventilated area is a practical quality-of-life improvement. Many people set up in a garage, workshop, or a dedicated corner with airflow and a washable surface. Noise levels are generally manageable—mostly fan noise and the sound of the Z-axis moving—but the bigger “presence” is the routine: putting on gloves, pouring resin, checking the vat, and cleaning tools after the run. If you prefer low-maintenance printing, resin may feel more involved than filament, but the trade-off is the finish and detail that the Anycubic Photon Mono can produce.
Space planning makes the workflow smoother. Beyond the printer, you need room for wash containers or a wash station, a curing area, paper towels, filters, and a safe place for uncured parts to drip. A simple silicone mat and a dedicated trash container for contaminated waste can keep the area tidy. Odor control improves when you keep resin bottles sealed, wipe drips immediately, and avoid leaving open IPA containers. A consistent daily routine reduces mistakes: check the build plate screws, confirm the vat is clean, stir resin gently if it has settled, and verify your file and supports before starting. Over time, the Anycubic Photon Mono can feel less like an experimental device and more like a reliable tool, but that happens when the workflow is treated as a system rather than a single button press.
Final Thoughts on Getting the Most from the Anycubic Photon Mono
The Anycubic Photon Mono is most rewarding when you lean into what resin printing does best: high detail, smooth surfaces, and predictable layer-based production that scales well across a full build plate. Success comes from a combination of disciplined setup, thoughtful orientation and supports, and a clean post-processing routine that protects both your parts and your workspace. When exposure is calibrated to your resin and your environment is stable, the printer can deliver results that look professional even for small, intricate models. It’s also a platform that encourages skill-building: each improvement in supports, washing, and curing shows up clearly in the finish, so time spent learning pays back quickly in better prints and fewer failures.
For anyone weighing resin printing as a hobby tool or a small-production asset, the Anycubic Photon Mono remains a strong option because it balances speed, detail, and an approachable ownership experience. It won’t eliminate the hands-on nature of resin—gloves, cleanup, and careful handling are part of the deal—but it can make those steps feel worthwhile when the final parts come out crisp and consistent. If you treat calibration as a one-time foundation, keep consumables like the FEP film in good condition, and maintain a workflow that prioritizes cleanliness and safety, the Anycubic Photon Mono can stay reliable long after the first exciting print and continue producing the kind of detailed resin work that made you consider it in the first place.
Summary
In summary, “anycubic photon mono” is a crucial topic that deserves thoughtful consideration. We hope this article has provided you with a comprehensive understanding to help you make better decisions.
Frequently Asked Questions
What is the Anycubic Photon Mono?
A desktop MSLA resin 3D printer that uses a monochrome LCD to cure UV resin for high-detail prints.
What file formats does the Photon Mono use?
It usually prints slicer-generated files—often in formats like **.pwmx** (depending on the model)—created in tools such as Anycubic Photon Workshop, Lychee Slicer, or Chitubox, making it easy to prep and run prints on the **anycubic photon mono**.
How do I choose exposure settings for the Photon Mono?
Begin with the resin maker’s suggested exposure settings, then print an exposure calibration test on your **anycubic photon mono** and fine-tune the normal exposure in small increments—about 0.2 to 0.5 seconds at a time—until the details come out crisp and consistent.
Why are my prints not sticking to the build plate?
Common culprits include underexposure, a build plate that isn’t properly leveled, a plate surface that’s dirty or oily, resin that’s too cold, or an FEP film that’s loose, worn, or damaged—issues you’ll want to check first on an **anycubic photon mono**.
How often should I replace the FEP film?
Replace it when it’s cloudy, scratched, punctured, or causing frequent failures; lifespan varies with use and handling.
What maintenance should I do regularly?
To keep your **anycubic photon mono** running smoothly, regularly clean the resin vat and build plate, strain and filter your resin after any failed prints, and wipe down the LCD screen and UV cover to remove dust or residue. While you’re at it, inspect the FEP film for scratches or clouding, and make sure the Z-axis rails stay properly lubricated for consistent, reliable movement.
📢 Looking for more info about anycubic photon mono? Follow Our Site for updates and tips!