The Ultimaker S5 is widely recognized as a professional FFF 3D printing system built for teams that need repeatable results, predictable workflows, and reliable uptime rather than hobby-level tinkering. Its reputation comes from a combination of robust mechanics, a mature material ecosystem, and a software toolchain that aims to make day-to-day printing more consistent across different operators. In practical terms, this means the Ultimaker S5 is often selected for engineering departments, product design studios, R&D labs, and manufacturing support groups where prints are expected to function as prototypes, jigs, fixtures, or end-use components. The machine’s value is closely tied to its ability to produce dimensionally stable parts with good surface quality while keeping the setup process approachable for non-specialists. Many organizations also like that it supports dual extrusion, enabling soluble supports or multi-material builds that reduce manual post-processing and expand geometric freedom. When evaluating whether the platform is a match, it helps to think in terms of system reliability, material breadth, and operational efficiency: how quickly a user can go from CAD to a part, how confidently a team can schedule long builds, and how smoothly failures are detected and prevented.
Table of Contents
- My Personal Experience
- Ultimaker S5 overview: what the platform is designed to deliver
- Build volume and mechanical architecture for large, accurate parts
- Dual extrusion and the practical benefits of multi-material printing
- Print cores, nozzle options, and how they influence quality and throughput
- Material compatibility, engineering polymers, and composite use cases
- Software workflow: slicing, profiles, and repeatable production settings
- Connectivity, fleet management, and collaboration in team environments
- Expert Insight
- Calibration, bed leveling, and controlling first-layer success
- Typical applications: prototyping, tooling, fixtures, and end-use parts
- Print quality, tolerances, and strategies for dimensional accuracy
- Maintenance, uptime, and best practices for long-term reliability
- Cost considerations, total value, and when the investment makes sense
- Choosing the right setup: materials, accessories, and process standards
- Watch the demonstration video
- Frequently Asked Questions
- Trusted External Sources
My Personal Experience
I’ve been using an Ultimaker S5 at our small workshop for about a year, mostly for functional prototypes and jigs, and it’s become the printer we rely on when a deadline is tight. The setup was straightforward, and the touchscreen workflow feels more “appliance-like” than the hobby machines I started with. What surprised me most was how consistent it is once you dial in a material profile—PLA and PETG are basically set-and-forget, and even longer prints tend to finish without the weird layer shifts I used to babysit. The dual extrusion has been genuinely useful for soluble supports on tricky parts, though I’ve learned to keep the nozzles clean and store filament properly or the first layer will tell on you immediately. It’s not perfect (the material costs add up and you still have to respect calibration), but the S5 has saved me enough reprints that it’s earned its space on the bench.
Ultimaker S5 overview: what the platform is designed to deliver
The Ultimaker S5 is widely recognized as a professional FFF 3D printing system built for teams that need repeatable results, predictable workflows, and reliable uptime rather than hobby-level tinkering. Its reputation comes from a combination of robust mechanics, a mature material ecosystem, and a software toolchain that aims to make day-to-day printing more consistent across different operators. In practical terms, this means the Ultimaker S5 is often selected for engineering departments, product design studios, R&D labs, and manufacturing support groups where prints are expected to function as prototypes, jigs, fixtures, or end-use components. The machine’s value is closely tied to its ability to produce dimensionally stable parts with good surface quality while keeping the setup process approachable for non-specialists. Many organizations also like that it supports dual extrusion, enabling soluble supports or multi-material builds that reduce manual post-processing and expand geometric freedom. When evaluating whether the platform is a match, it helps to think in terms of system reliability, material breadth, and operational efficiency: how quickly a user can go from CAD to a part, how confidently a team can schedule long builds, and how smoothly failures are detected and prevented.
From a workflow perspective, the Ultimaker S5 typically sits at the center of a small additive manufacturing cell, paired with slicing software, material management practices, and post-processing tools. It is not just a printer; it is part of a repeatable process that can be standardized across a team. The large-format build capability helps consolidate jobs that would otherwise be split, while the dual-nozzle approach enables supports that can be dissolved or peeled away with less risk of damaging critical surfaces. Teams also value the ability to standardize print profiles and share them, so that a part printed by one operator on Monday can be reproduced by another operator weeks later with similar results. Over time, the platform becomes less about experimentation and more about process control: consistent adhesion, stable extrusion, predictable cooling, and a clear path to troubleshooting when a print deviates from expectations. This focus on repeatability is a core reason the Ultimaker S5 is frequently positioned as a dependable workhorse for professional prototyping and light production tasks.
Build volume and mechanical architecture for large, accurate parts
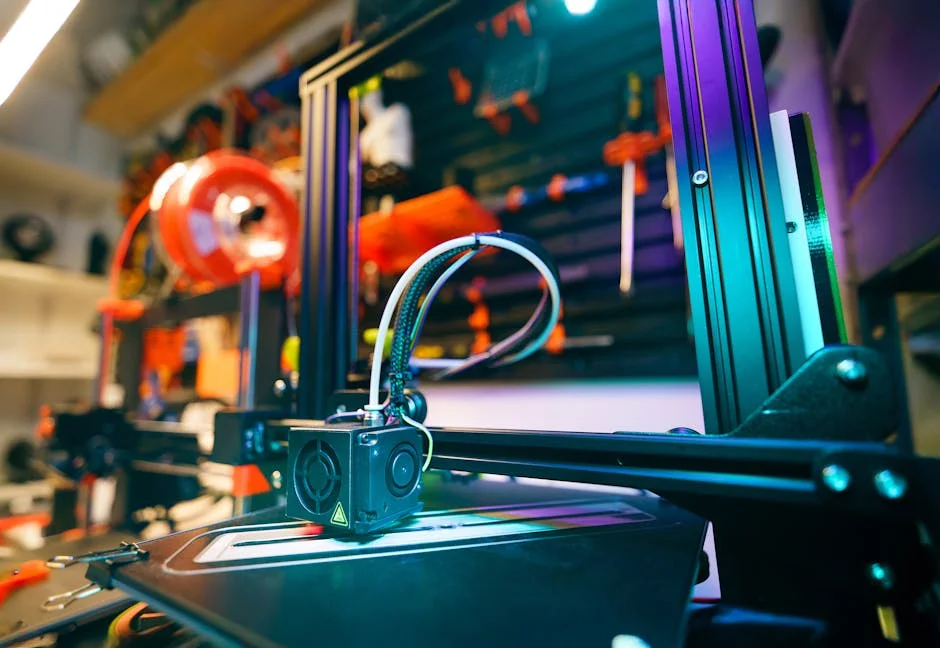
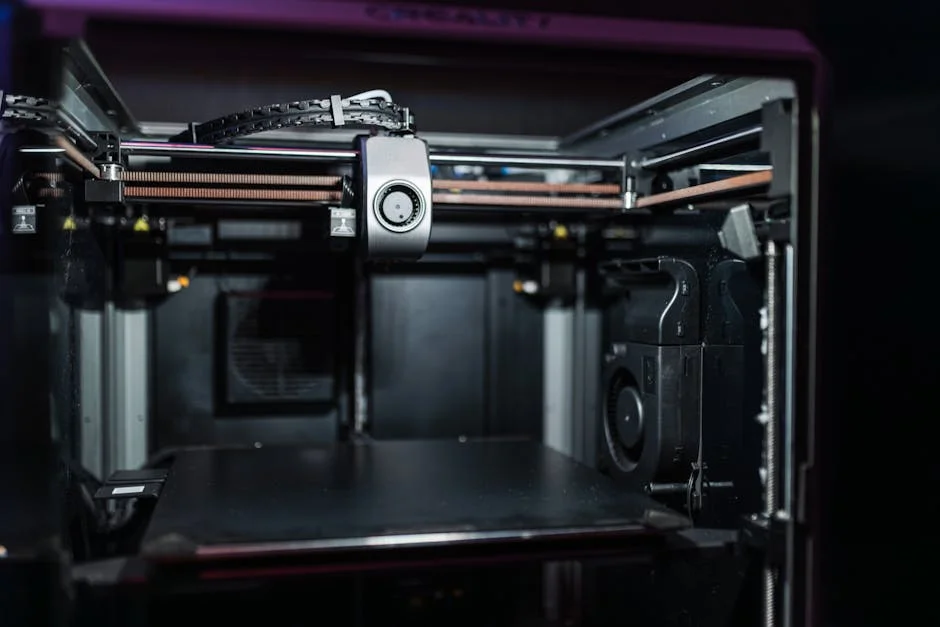
A major reason teams adopt the Ultimaker S5 is the combination of its large build volume and the mechanical stability needed to use that space effectively. Large-format printing is not only about fitting a bigger object; it is about maintaining accuracy and surface consistency across a longer toolpath and longer print duration. When prints run for many hours or even days, small variations in extrusion, temperature, or motion can accumulate into visible artifacts, dimensional drift, or weak layer bonding. The Ultimaker S5 is designed to mitigate those risks through a rigid frame, a motion system intended to remain stable at typical production speeds, and an enclosed front that helps reduce drafts that can cause warping in certain materials. For design teams, the advantage is straightforward: printing one full-scale prototype can be faster and more accurate than splitting a part into multiple segments, then bonding and finishing those seams. For manufacturing support, larger build capacity can translate into printing jigs, assembly aids, drill guides, and fixtures as single pieces, improving strength and reducing assembly time.
Mechanical design choices matter most when the printer is used as a daily tool. The Ultimaker S5 is often appreciated for predictable first-layer performance, consistent bed leveling behavior, and stable motion that supports fine-feature printing when tuned correctly. Large parts also raise the stakes for adhesion and thermal management; a slight corner lift on a small part might be tolerable, but on a large component it can ruin a long job. The printer’s platform and material profiles aim to reduce these problems by guiding the operator toward workable settings for each filament, including temperatures, cooling strategies, and speeds. In real operations, teams frequently develop internal standards: specific bed prep methods, preferred adhesives, and qualification prints that confirm the machine is behaving normally. Because the Ultimaker S5 is typically used by multiple people, this kind of process consistency is crucial. The machine’s physical design supports that goal by making the everyday actions—loading filament, changing print cores, cleaning the build surface, and inspecting the first layers—relatively straightforward and repeatable across shifts and skill levels.
Dual extrusion and the practical benefits of multi-material printing
Dual extrusion is one of the defining capabilities that elevates the Ultimaker S5 above many single-nozzle systems in professional environments. The practical value of dual extrusion is not limited to printing in two colors; it is primarily about pairing a model material with a dedicated support material to achieve complex geometry without sacrificing surface finish. With the Ultimaker S5, users commonly combine a structural filament—such as PLA, Tough PLA, PETG, Nylon, or a composite—with a support material like PVA (water-soluble) or Breakaway. Soluble supports are especially helpful for internal channels, deep cavities, and intricate overhangs where mechanical removal would be difficult or could damage the part. This ability expands what can be produced reliably, enabling designers to prototype functional assemblies with snap fits, living hinges, or complex airflow paths that might otherwise require redesign or alternative fabrication methods.
In day-to-day use, multi-material printing also changes how teams think about part orientation and surface quality. When supports can be dissolved or separated cleanly, a part can be oriented for strength or dimensional accuracy rather than simply to minimize support scarring. That means a bracket can be printed with layers aligned to handle loads, or a cosmetic surface can be kept on the top side for better finish. The Ultimaker S5 ecosystem encourages this by offering curated profiles and print core options that are meant to simplify the switching of nozzle sizes and material types. Operationally, dual extrusion does add complexity: more variables to manage, more opportunities for stringing, oozing, or support interface issues, and longer print times. Yet many teams accept those tradeoffs because the output can be dramatically easier to post-process and more faithful to the CAD geometry. When used with disciplined material handling and well-maintained print cores, the Ultimaker S5 dual-extrusion workflow can become a reliable method for producing complex parts with a predictable finish.
Print cores, nozzle options, and how they influence quality and throughput
A key element of the Ultimaker S5 platform is its swappable print core system, which is intended to reduce downtime and streamline maintenance. In traditional FFF setups, changing a nozzle can be time-consuming and messy, and diagnosing nozzle-related issues can require disassembly and trial-and-error. With the Ultimaker S5 approach, print cores are modular, making it easier to switch between different nozzle diameters or material categories and to replace a core when wear or clogging becomes a concern. For professional use, this modularity can be a meaningful productivity gain because it reduces the friction of moving between high-detail work and high-throughput printing. A smaller nozzle can help with fine text, small features, and smoother curves, while a larger nozzle can accelerate printing of large fixtures or prototypes where surface finish is secondary to speed and strength.
Nozzle choice also affects mechanical performance and reliability. Larger nozzles can lay down thicker lines, improving interlayer bonding in some cases and reducing print time, but they can also reduce the fidelity of small features. Smaller nozzles can produce crisp details but may require slower speeds and can be more sensitive to material impurities, moisture, or aggressive retraction settings. Teams that standardize on the Ultimaker S5 often keep a set of print cores on hand and define internal rules: which core is used for which material, what the acceptable wear indicators are, and how often cores are inspected or replaced. This kind of operational discipline helps maintain consistent output across operators. It also supports better scheduling: if a core begins to under-extrude, it can be swapped quickly to keep production moving while the problematic core is serviced. Over time, the print core system becomes part of a preventative maintenance strategy that aligns with professional expectations of uptime and predictable performance on the Ultimaker S5.
Material compatibility, engineering polymers, and composite use cases
Material range is one of the most important reasons organizations invest in the Ultimaker S5, because real-world applications rarely fit neatly into a single filament category. Early-stage prototypes may be fine in PLA, but functional testing often demands better temperature resistance, impact behavior, chemical resistance, or fatigue performance. The Ultimaker S5 ecosystem is commonly associated with a broad set of supported materials and profiles that aim to reduce guesswork. In many workflows, PLA and Tough PLA serve as fast, dimensionally stable options for form and fit checks, while PETG provides a balance of durability and ease of printing for functional prototypes. Nylon can be used when toughness and wear resistance matter, and TPU is often selected for flexible parts such as gaskets, bumpers, and protective covers. When the goal shifts toward higher stiffness, composite filaments with fibers can be considered, though they bring extra considerations around abrasion and nozzle wear.
Engineering materials also introduce operational requirements that teams must plan for, especially moisture control and storage. Many higher-performance filaments are hygroscopic, meaning they absorb water from the air, which can lead to stringing, popping, weak layers, and poor surface finish. To get consistent results from the Ultimaker S5, organizations often implement dry storage solutions, monitor humidity, and establish rules for how long a spool can remain exposed. The choice of support material also matters: PVA can be highly sensitive to moisture, so handling and storage discipline become essential. Composite filaments may require hardened components or dedicated cores and may produce more wear, which affects long-term operating cost. Still, the benefit is significant: a well-managed material program can turn the Ultimaker S5 into a dependable tool for producing parts that behave more like production plastics. That capability can shorten iteration cycles, reduce reliance on external machine shops for certain prototypes, and enable on-demand fabrication of functional aids in production environments.
Software workflow: slicing, profiles, and repeatable production settings
Professional output depends as much on software discipline as it does on hardware, and the Ultimaker S5 is typically used with a slicing workflow that emphasizes validated profiles and reproducible settings. A mature slicing environment helps teams avoid the trap of constantly tweaking parameters without documentation, which can create inconsistent results across projects and operators. In practice, many organizations establish a small library of approved profiles: one for fast concept models, another for functional prototypes, and a third for high-quality presentation parts. Each profile can define layer height, wall thickness, infill strategy, support behavior, and temperatures, aiming to balance strength, accuracy, and time. The Ultimaker S5 benefits when these settings are standardized and stored in a controlled way, because it reduces the variability introduced by individual preferences and helps ensure that a part printed today can be replicated later with minimal rework.
Beyond basic slicing, teams often refine their workflow around part orientation, tolerance allowances, and support interface tuning. For example, press-fit features may require intentional clearance values based on the chosen material and the desired friction. Threads may be printed with specific layer heights to improve engagement, or redesigned to use inserts for durability. Support settings become especially important in dual-extrusion workflows, where the interface between model and support can determine surface finish and removal time. The Ultimaker S5 can be integrated into a broader digital workflow where job naming conventions, revision control, and print logs are tracked to correlate outcomes with settings. This is particularly useful in regulated or quality-conscious environments, where teams need traceability for prototypes used in testing or fixtures used on a production line. When the software workflow is treated as part of the manufacturing process, the Ultimaker S5 can deliver more consistent results and reduce the time spent troubleshooting unpredictable print behavior.
Connectivity, fleet management, and collaboration in team environments
The Ultimaker S5 is frequently deployed in environments where multiple stakeholders rely on the same printer, making connectivity and collaboration features more than a convenience. When a printer is shared across product designers, engineers, and technicians, the ability to manage jobs, monitor progress, and coordinate queues becomes critical. In such contexts, a printer that requires constant local interaction can become a bottleneck. A connected workflow can reduce idle time by allowing users to prepare jobs in advance, verify that the correct material is loaded, and keep an eye on long prints without hovering near the machine. This matters for large builds where the time investment is substantial and early detection of issues can save significant material and schedule impact. The Ultimaker S5 is often valued for the way it fits into a networked workspace, supporting remote monitoring practices that align with how modern teams operate.
Expert Insight
Calibrate for reliability: run active leveling before long prints, then print a small first-layer test and adjust Z-offset and bed temperature until adhesion is consistent edge-to-edge. Keep the glass plate clean with isopropyl alcohol and use a thin, even layer of adhesive only when needed to prevent warping and reduce part removal damage. If you’re looking for ultimaker s5, this is your best choice.
Optimize materials and workflow: store filaments dry and set the correct material profile in Cura, then fine-tune with a temperature tower and retraction test for each new spool. For dual extrusion, add a prime tower and enable ooze shield to minimize cross-contamination, and schedule nozzle cleaning after abrasive or filled materials to maintain dimensional accuracy. If you’re looking for ultimaker s5, this is your best choice.
Collaboration also benefits from shared standards. When multiple people send jobs to the Ultimaker S5, consistency requires clear rules: how files are named, which profiles are approved, and how priority is assigned when deadlines collide. Some teams designate a printer steward who maintains the machine, manages print cores, and validates new materials. Others use a sign-off process for critical prints, where a second person checks orientation, supports, and material choice before a long run begins. These practices are not about bureaucracy; they are about protecting time and ensuring that the printer remains a reliable asset rather than a source of uncertainty. Connectivity helps support these processes by making information visible: what is printing, how long remains, and whether intervention is needed. When the Ultimaker S5 is treated as shared infrastructure, it often delivers better value because it reduces duplicated effort and makes additive manufacturing more accessible across the organization.
Calibration, bed leveling, and controlling first-layer success
For any FFF printer, first-layer performance is a major determinant of success, and the Ultimaker S5 is no exception. Large build plates and long print times magnify the cost of a poor first layer: if adhesion fails after several hours, the loss is not just filament but also time and opportunity. Teams using the Ultimaker S5 typically develop a disciplined approach to calibration and bed preparation that matches their material choices. This includes ensuring the build surface is clean, selecting a consistent adhesion method, and confirming that the leveling system is functioning as intended. Even with automated assistance, environmental factors such as room temperature, drafts, and dust can influence outcomes. A stable process often involves simple, repeatable routines: cleaning the plate at defined intervals, inspecting for residue, and running small test prints when changing materials or print cores.
| Feature | Ultimaker S5 | Why it matters |
|---|---|---|
| Build volume | Large-format dual-extrusion platform | Enables bigger prototypes or batching multiple parts in one print job. |
| Material capability | Dual extrusion with broad material support (including composites) | Print functional parts with soluble supports and engineering-grade materials. |
| Workflow & reliability | Integrated ecosystem (Cura + network management) and pro-grade repeatability | Simplifies setup, monitoring, and consistent results for teams and production runs. |
Controlling the first layer also includes thoughtful slicing choices. For example, a slightly thicker first layer or a slower initial speed can improve adhesion, while a brim can help stabilize corners on materials prone to warping. Cooling strategy is another lever: too much cooling too early can contribute to edge lift, while too little cooling can cause sagging or poor detail in overhangs. The Ultimaker S5 can produce highly consistent first layers when these variables are managed systematically. In professional settings, it is common to document what works for each material and geometry type, then reuse those proven settings rather than reinventing them for every job. This is particularly important when the printer is used for functional parts that must meet dimensional expectations. A reliable first layer is not just about avoiding failures; it is also about ensuring that the base of the part is flat, the dimensions are stable, and the mechanical properties are consistent across builds. With a controlled process, the Ultimaker S5 can become a predictable tool for both prototyping and production support.
Typical applications: prototyping, tooling, fixtures, and end-use parts
The Ultimaker S5 is commonly deployed across a wide range of applications because it balances ease of use with professional-grade output. In product development, it can produce early-stage concept models quickly, enabling teams to evaluate ergonomics, packaging constraints, and assembly sequences. As designs mature, the same platform can shift toward functional prototypes that are drilled, tapped, or tested under moderate loads. This continuity is valuable: instead of changing machines or outsourcing as the project advances, teams can keep iteration cycles tight and maintain control over sensitive designs. In addition, dual extrusion can support more complex prototypes with internal geometries, reducing the need to simplify designs just to make them printable. For organizations that run frequent design reviews, the ability to generate consistent physical models on demand can improve communication and reduce misinterpretation that sometimes occurs with screen-only evaluations.
Beyond prototyping, many of the most cost-effective uses of the Ultimaker S5 appear in tooling and manufacturing support. Jigs, fixtures, assembly aids, protective covers, and gauges can often be printed faster and cheaper than machined equivalents, especially when the geometry is complex or needs frequent revision. Printed fixtures can be optimized for the task: contoured nests that match a part’s shape, lightweight structures that reduce operator fatigue, or integrated labeling and alignment features that improve repeatability. In maintenance environments, the printer can be used to produce replacement covers, brackets, and custom adapters that keep equipment running while waiting for procurement. Some organizations also produce limited end-use parts when the material and performance envelope is appropriate, particularly for low-volume products, custom accessories, or internal-use components. The Ultimaker S5 is often chosen for these scenarios because it can be operated as a dependable in-house resource, reducing lead times and enabling incremental improvements to processes that would otherwise be constrained by external supply chains.
Print quality, tolerances, and strategies for dimensional accuracy
Print quality on the Ultimaker S5 is influenced by a combination of mechanical stability, slicing choices, material behavior, and environmental control. When teams talk about quality, they often mean different things: surface finish, dimensional accuracy, layer consistency, and mechanical strength. The Ultimaker S5 can deliver strong results across these categories when the process is tuned and standardized. For surface finish, smaller layer heights and careful cooling can reduce visible stepping on curves, while appropriate wall counts and top layers help avoid pillowing and infill show-through. For dimensional accuracy, the most important factor is often material shrinkage and how it interacts with part geometry. A long, flat part will behave differently than a compact, thick part, and certain materials will be more prone to warping or internal stress. The printer’s consistent extrusion and motion help, but the operator’s strategy—orientation, supports, and temperature management—often determines whether a part meets tolerance expectations.
Teams seeking predictable tolerances often develop calibration artifacts and acceptance criteria. For example, they may print a small gauge with holes, pins, and thin walls to verify that the Ultimaker S5 is producing expected dimensions with a given material. They may also define standard offsets for holes, since printed holes can come out slightly undersized depending on layer height and extrusion width. In functional assemblies, it is common to design in clearances that match the printer’s real-world behavior rather than nominal CAD values. Post-processing can also play a role: reaming holes, sanding mating surfaces, or using heat-set inserts for threaded connections. The goal is not perfection straight off the bed, but predictable outcomes that can be achieved with minimal finishing. When this approach is applied consistently, the Ultimaker S5 becomes a reliable tool for producing parts that fit together as intended, support meaningful mechanical testing, and reduce the iteration count needed to reach a workable design.
Maintenance, uptime, and best practices for long-term reliability
Long-term reliability is one of the main expectations placed on the Ultimaker S5 in professional environments, and achieving that reliability depends on routine maintenance and disciplined operation. Even a well-designed printer will suffer from degraded performance if consumables are ignored, materials are stored poorly, or components are allowed to accumulate residue. A practical maintenance approach typically includes regular inspection of print cores, cleaning the build surface, verifying feeder performance, and keeping the motion system free of dust and debris. Over time, certain materials—especially composites—can accelerate nozzle wear, while flexible filaments can leave residue that affects feeding. By tracking which materials are used and how frequently, teams can anticipate when a print core might need replacement rather than waiting for a failure during a critical job. The Ultimaker S5 benefits from being treated like production equipment: a scheduled routine, documented procedures, and clear responsibility for upkeep.
Uptime is also influenced by how prints are prepared and launched. Many failed prints are not caused by hardware defects but by preventable process issues: wet filament, insufficient adhesion, incorrect support settings, or an unsuitable orientation. Teams can improve Ultimaker S5 reliability by implementing preflight checks, such as confirming spool condition, verifying that the correct print core is installed, and watching the first layers before leaving a long job unattended. For organizations running many prints per week, a simple log of failures and fixes can quickly reveal patterns, such as a particular material that needs higher drying standards or a certain geometry that benefits from a brim. Spare parts and consumables planning also matter; keeping spare print cores, build surface supplies, and commonly used tools on hand can prevent small issues from turning into multi-day delays. With these best practices, the Ultimaker S5 can maintain consistent output over the long term, supporting both rapid prototyping and operational tooling needs without constant firefighting.
Cost considerations, total value, and when the investment makes sense
Evaluating the Ultimaker S5 is rarely about upfront price alone; it is about total value in a specific workflow. Organizations typically justify the investment when the printer reduces iteration time, lowers outsourcing costs, or enables capabilities that are otherwise hard to obtain on demand. The value can show up as faster design cycles, fewer delays waiting for machined prototypes, and improved collaboration through tangible models. In manufacturing settings, the return can come from printing fixtures that improve throughput or quality, reducing scrap, and enabling ergonomic improvements that protect workers and reduce fatigue. The Ultimaker S5 can also provide value by standardizing additive manufacturing across a team: consistent profiles, controlled materials, and a repeatable process that reduces the dependence on a single “3D printing expert.” When output is dependable, more stakeholders can rely on printed parts, and the printer becomes integrated into everyday operations rather than used only for special projects.
Total cost also includes consumables, maintenance, and the time spent by staff. Material costs vary widely depending on whether a team uses basic PLA or higher-end engineering polymers, and support materials can add expense, especially when prints require extensive scaffolding. Print core replacement, build surface supplies, and occasional downtime should be considered as part of operational budgeting. Yet, for many teams, the largest hidden cost is labor: time spent troubleshooting, reprinting, or manually removing difficult supports. The Ultimaker S5 can reduce some of that labor through a stable ecosystem, dual extrusion support strategies, and standardized profiles, but it still benefits from good training and process ownership. The investment tends to make the most sense when the printer is used frequently, when prints have real operational impact, and when the organization can commit to basic process discipline around materials and maintenance. Under those conditions, the Ultimaker S5 often delivers strong value by turning additive manufacturing into a predictable, scalable internal capability rather than an occasional experiment.
Choosing the right setup: materials, accessories, and process standards
Getting the best results from the Ultimaker S5 is often less about a single “perfect” configuration and more about selecting a coherent setup that matches the organization’s priorities. For a design studio focused on appearance models, the emphasis might be on fine layer heights, consistent color, and clean support removal. For an engineering team, the priority may shift to strength, temperature resistance, and repeatable tolerances. These differences influence which materials are kept in inventory, which print cores are used most often, and what post-processing tools are necessary. A practical approach is to start with a small, validated set of filaments and expand only when there is a clear use case. That reduces variability and makes it easier to train new users. It also helps avoid the common problem of having many partially used spools with unknown moisture exposure, which can lead to inconsistent results and unnecessary troubleshooting on the Ultimaker S5.
Accessories and process standards can amplify performance. Dry storage solutions, labeled spools, and documented handling procedures can dramatically improve consistency, especially with moisture-sensitive materials. A standardized set of build surface preparation tools and cleaning supplies helps ensure that adhesion is repeatable. Post-processing standards—such as how supports are removed, how parts are cleaned after dissolving supports, and how dimensions are verified—can reduce variability in final outcomes. Many teams also benefit from creating a small internal “print handbook” that lists approved profiles, recommended orientations for common part types, and troubleshooting steps for typical issues like stringing, under-extrusion, or warping. When these standards are in place, the Ultimaker S5 becomes easier to scale across multiple operators and projects. The overall result is that the printer behaves more like a reliable production tool and less like a device that requires constant attention. With a thoughtful setup and disciplined process, the Ultimaker S5 can serve as a stable foundation for prototyping, tooling, and on-demand fabrication.
Watch the demonstration video
In this video, you’ll learn what makes the Ultimaker S5 a powerful professional 3D printer, including its key features, build volume, and print quality. It covers how the S5 handles different materials, its dual-extrusion capabilities, and practical tips for setup and everyday use to get reliable results.
Summary
In summary, “ultimaker s5” is a crucial topic that deserves thoughtful consideration. We hope this article has provided you with a comprehensive understanding to help you make better decisions.
Frequently Asked Questions
What is the Ultimaker S5?
The Ultimaker S5 is a professional dual-extrusion FFF/FDM 3D printer designed for reliable production of functional prototypes and end-use parts.
What is the build volume of the Ultimaker S5?
Its build volume is approximately 330 × 240 × 300 mm (X × Y × Z).
Does the Ultimaker S5 support dual-material printing?
Yes—it uses dual print cores, letting you print two materials or two colors in a single job. With the **ultimaker s5**, you can also combine compatible materials to create soluble supports, making complex prints much easier to finish cleanly.
Which materials can I print on the Ultimaker S5?
Popular choices range from easy-to-print PLA and Tough PLA to more durable options like PETG, ABS, Nylon, TPU, PC, and a variety of composite filaments—what you can use depends on your print core and material settings, especially when working with the ultimaker s5.
How do I prepare and send prints to the Ultimaker S5?
Slice your model in Ultimaker Cura, then send it to the **ultimaker s5** in whatever way suits your setup—over the network (Wi‑Fi or Ethernet), via USB, or directly through your connected workflow.
What are common maintenance tasks for the Ultimaker S5?
Routine maintenance involves cleaning the build plate, checking and adjusting feeder tension, keeping the print cores/nozzles free of debris, lubricating the axes according to the manufacturer’s guidelines, and staying current with firmware and software updates—especially if you’re running an **ultimaker s5**.
📢 Looking for more info about ultimaker s5? Follow Our Site for updates and tips!

Trusted External Sources
- Thoughts about the Ultimaker S5 – Reddit
Jan 4, 2026 … I used it for 4 months, but it has been in the company for around 2 years. It is reliable and prints fail very rarely, no bed adhesion and first … If you’re looking for ultimaker s5, this is your best choice.
- Expand your 3D printing ambitions – UltiMaker S5
The S5 makes it easy to click and print with an unrivalled range of materials so your 3D printing applications can meet the demands of the real world. Choose … If you’re looking for ultimaker s5, this is your best choice.
- Shop UltiMaker S5 3D Printer
Easily 3D print larger parts with world-leading material compatibility, an award-winning touch interface, and filament run-out detection.
- Recovering a bricked Ultimaker S5 – Page 2
Mar 28, 2026 — I accidentally bricked my **ultimaker s5** (S5R1) and have been trying to restore it by flashing several different recovery images, including the official Ultimaker files and your custom ones, but nothing has worked so far.
- What are the differences between the UltiMaker S5 versions?
The UltiMaker S5 versions are sometimes referred to as UltiMaker S5R1 (2026-2026) and UltiMaker S5R2 (2026 onwards). · The firmware file for the wrong version of …