Fusion 360 for 3d printing works especially well because it combines parametric modeling, direct editing, assembly tools, and manufacturing-focused features in a single environment that is friendly to iteration. When preparing a printable part, most of the time is spent refining geometry so it prints reliably, fits with real-world components, and can be changed quickly when the first prototype reveals an issue. A CAD tool that makes it easy to adjust dimensions, rebuild features, and test variations is a major advantage. Fusion’s timeline-based approach lets you change a sketch dimension, rebuild the model, and keep downstream features consistent, which is ideal when you’re tuning tolerances, wall thickness, and clearances for a specific printer and material. It also supports both solid and surface modeling, so you can approach functional mechanical parts and aesthetic enclosures with the same toolset rather than switching between multiple programs.
Table of Contents
- My Personal Experience
- Why Fusion 360 Fits the 3D Printing Workflow So Well
- Setting Up a Project and Units for Reliable Prints
- Parametric Modeling for Printable, Adjustable Parts
- Designing for Printability: Walls, Overhangs, and Orientation
- Using Sketches and Constraints to Control Dimensions Precisely
- Building Assemblies and Multi-Part Prints with Components
- Creating Threads, Fastener Features, and Hardware-Friendly Geometry
- Expert Insight
- Working with Meshes, Scans, and Reverse Engineering for Printable Parts
- Exporting STL and 3MF Correctly: Resolution, Units, and Naming
- Designing Tolerances, Clearances, and Fits for Real Printers
- Using Analysis Tools to Predict Problems Before Printing
- Practical Techniques for Supports, Splitting Models, and Post-Processing
- From Prototype to Production: Iteration, Versions, and Reuse
- Watch the demonstration video
- Frequently Asked Questions
- Trusted External Sources
My Personal Experience
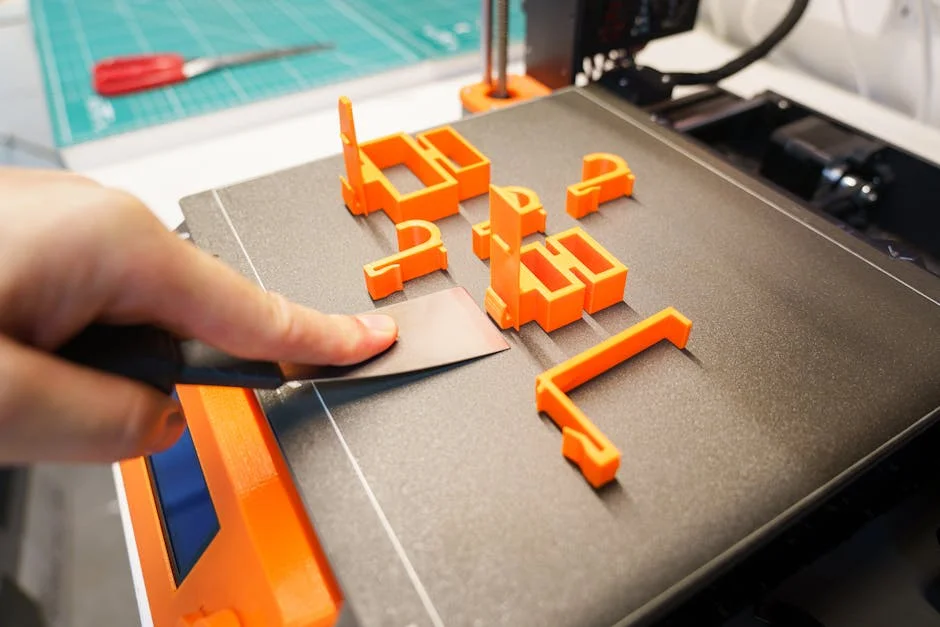
I started using Fusion 360 for 3D printing after getting tired of downloading models that almost fit my needs but always needed small tweaks. At first the interface felt overwhelming, but once I learned to build sketches with proper dimensions and use parameters, it clicked—especially for parts like brackets and spacers where a millimeter matters. I like being able to go back and change one value and have the whole model update instead of remodeling from scratch. The first time it really paid off was designing a snap-fit cover for a small electronics project; my initial print was too tight, so I adjusted the clearance and re-exported the STL in minutes. Now my workflow is basically Fusion 360 → export STL → slice, and I’ve gotten into the habit of adding chamfers and fillets early because it makes prints stronger and easier to assemble.
Why Fusion 360 Fits the 3D Printing Workflow So Well
Fusion 360 for 3d printing works especially well because it combines parametric modeling, direct editing, assembly tools, and manufacturing-focused features in a single environment that is friendly to iteration. When preparing a printable part, most of the time is spent refining geometry so it prints reliably, fits with real-world components, and can be changed quickly when the first prototype reveals an issue. A CAD tool that makes it easy to adjust dimensions, rebuild features, and test variations is a major advantage. Fusion’s timeline-based approach lets you change a sketch dimension, rebuild the model, and keep downstream features consistent, which is ideal when you’re tuning tolerances, wall thickness, and clearances for a specific printer and material. It also supports both solid and surface modeling, so you can approach functional mechanical parts and aesthetic enclosures with the same toolset rather than switching between multiple programs.
Another reason Fusion 360 for 3d printing is popular is the practical ecosystem around it: importing common file types, organizing projects, working with components, and exporting print-ready meshes without leaving the design environment. Many 3D printing projects start with reference geometry, such as STEP files for purchased hardware, scans, or vendor models. Fusion handles these inputs well, letting you design around real constraints like screw head clearance, connector placement, or bearing seats. The ability to create multiple bodies and components in one file is helpful for designing assemblies that will be printed as separate parts and later fastened together. Even if you only own a single printer, your workflow often includes design variants—different sizes, different mounting patterns, different logo treatments—and Fusion’s parametric tools make those variants predictable and repeatable. The result is less time fighting CAD and more time dialing in print success.
Setting Up a Project and Units for Reliable Prints
Successful prints start with predictable scale, and a clean setup in Fusion 360 for 3d printing reduces the risk of exporting a model that is accidentally 25.4× larger or smaller than intended. The first step is choosing the correct document units (millimeters for most consumer printers and slicers, though some industrial workflows use inches). While you can convert units later, setting them correctly at the start keeps sketches, constraints, and dimension inputs consistent. It also makes it easier to follow common rules of thumb for printability—such as minimum wall thickness, hole sizing, and clearance gaps—because most published guidelines assume millimeters. A good practice is to create a template project with preferred units, default parameters, and common user parameters (like “clearance,” “wall,” “layerHeight,” or “nozzleDiameter”) so new designs begin with the same baseline assumptions.
Organization matters because 3D printing tends to be iterative, and Fusion 360 for 3d printing supports that iteration best when your file structure is tidy. Use components for parts that will be printed separately, and name them clearly: “Base,” “Lid,” “Latch,” “Bracket_Left,” rather than leaving them as “Body1” or “Component2.” If you plan to print multiple variants, consider using separate designs for major forks, or keep a single master model with parameters that drive size changes. When you do this, it becomes much easier to re-export updated meshes and keep track of which STL corresponds to which revision. It also helps to set the document’s appearance and color tags early if you are printing multi-part assemblies; visual separation in the CAD workspace reduces mistakes like exporting the wrong body or leaving a component hidden. A few minutes of setup can prevent hours of confusion after a couple of prototype rounds.
Parametric Modeling for Printable, Adjustable Parts
Parametric design is one of the biggest reasons Fusion 360 for 3d printing is a go-to choice for functional parts. A print that looks great on screen can fail in real life due to small dimensional issues: holes too tight, snap fits too stiff, lids that wobble, or press-fit features that crack. Parametric modeling makes it possible to encode the relationships between features so that when you adjust a key dimension, the rest of the model updates logically. For example, you can define a “boltDiameter” parameter and use it to drive clearance holes, counterbores, and nut traps. If you switch from M3 to M4 hardware, you update the parameter once and regenerate the design rather than manually editing multiple sketches and features.
In Fusion 360 for 3d printing, the combination of sketches, constraints, and the timeline enables repeatable experimentation. You can create a set of test coupons—like a tolerance gauge with multiple hole sizes or a snap-fit strip with varying latch thickness—and then adjust parameters to match your printer’s real-world behavior. This is particularly useful because different materials shrink differently, and printers vary in extrusion accuracy. By building your design with parameters for clearance (for example, 0.2 mm, 0.3 mm, or 0.4 mm depending on your setup), you can quickly retune the model for PLA, PETG, ABS, or nylon. Parametric patterns also help when you need evenly spaced vent slots, grip texture, or mounting holes. Instead of redrawing geometry, you adjust counts, spacing, and offsets. This approach leads to a more professional workflow: fewer “one-off” edits, more controlled revisions, and a library of reusable design logic for future prints.
Designing for Printability: Walls, Overhangs, and Orientation
Designing geometry that prints reliably often means making compromises that are easier to manage inside Fusion 360 for 3d printing than in mesh-only tools. Wall thickness is a common example. For FDM printing, walls should typically align with nozzle width and perimeter counts; a 0.4 mm nozzle often produces best results with wall thicknesses like 0.8 mm, 1.2 mm, or 1.6 mm depending on slicer settings. If you model a random thickness like 1.0 mm, the slicer may generate inconsistent toolpaths, leading to weak walls or gaps. Fusion makes it straightforward to set wall thickness using offsets and shell features, and you can tie those values to parameters so the model matches your printer profile. Overhangs and bridging also influence design. A sharp 90-degree overhang will need support, while a 45-degree chamfer may print cleanly. By adding chamfers, fillets, and self-supporting angles directly in CAD, you reduce support material, post-processing, and risk of scarring on visible faces.
Part orientation is another key factor, and Fusion 360 for 3d printing helps you think through it early. The direction of layer lines affects strength; a bracket loaded in tension across layers may delaminate, while a bracket loaded along layers can be much stronger. When you design with intended orientation in mind, you can place fillets to reduce stress risers, add ribs where needed, and avoid thin “knife edges” that warp. You can also split a part into multiple components to print in orientations that improve surface quality and strength, then join them with screws, pins, or dovetails. Fusion’s construction planes and split body tools make these decisions easier to execute cleanly. If a surface must be cosmetically clean, you can design it to face upward or sideways to minimize support contact. If a bore needs to be round and accurate, you might design it as a vertical hole or oversize it slightly and plan for reaming. Printability is rarely an afterthought; it’s a set of design constraints you incorporate from the first sketch.
Using Sketches and Constraints to Control Dimensions Precisely
For functional parts, accuracy starts in the sketch. Fusion 360 for 3d printing benefits from well-constrained sketches because they prevent accidental drift when you later modify features. A common pitfall is leaving sketches under-constrained, which can cause geometry to shift unpredictably after a dimension change. By applying constraints—horizontal/vertical, coincident, tangent, concentric, equal, and symmetry—you lock down design intent. That’s especially important for printable mechanisms like hinges, sliding tracks, and snap fits, where a small change in one feature can break alignment across the model. A disciplined sketching approach also reduces the number of dimensions you need: you can define a centerline and mirror features, use equal constraints for repeated slots, and use parameters for repeated offsets. The result is a model that behaves like an engineered product rather than a drawing that happens to be extruded.
Fusion 360 for 3d printing also rewards careful dimension strategy. Instead of dimensioning everything from arbitrary edges, dimension from datums that represent how the part is used: a mounting plane, a center axis, or a reference face that mates to another component. This makes it easier to maintain fit when you change external dimensions. For example, an enclosure for electronics might have a fixed PCB mounting pattern; you can anchor the standoffs to the PCB origin and let the outer shell grow or shrink around it. If you later swap to a different board revision, you can update the mounting coordinates without breaking the shell. Another practical technique is to sketch with manufacturing allowances in mind: add a “clearance” parameter for sliding fits, a “pressFit” parameter for interference features, and a “supportGap” parameter for areas where you want supports to detach more easily. By building these allowances into the sketch stage, you reduce the temptation to “fix it in the slicer,” and you keep the design portable across different slicer profiles and printers.
Building Assemblies and Multi-Part Prints with Components
Many real projects are not single-piece prints. Fusion 360 for 3d printing supports a component-based workflow that makes multi-part design manageable. Components represent parts, and each can contain bodies, sketches, and features. When you create joints between components, you can simulate how parts will move and check for interference. This is valuable for printed hinges, latches, bayonet mounts, or rotating knobs where clearances and travel matter. Even if you plan to print parts separately and assemble later, modeling the assembly helps you verify that screw heads clear walls, that nuts can be inserted, and that tools can reach fasteners. Fusion’s section analysis and interference checking help you spot collisions that might not be obvious from external views.
For Fusion 360 for 3d printing, components also simplify exporting. You can isolate a component and export only that part as an STL or 3MF, keeping file names consistent with the assembly structure. This reduces mistakes like exporting an entire assembly as one mesh when you intended separate prints. It also helps when you want to create print plates: you can export individual parts, arrange them in the slicer, and iterate only on the part that needs a change. Another advantage is reuse. If you design a standard hinge module, a battery door latch, or a camera mount interface, you can insert that component into new projects and adapt it with parameters. Over time, you build a library of proven printable subassemblies. This is where Fusion’s modeling discipline pays off: components, named features, and clear references make your designs easier to maintain months later when you return to reprint a spare part or adapt the design for a friend’s different hardware.
Creating Threads, Fastener Features, and Hardware-Friendly Geometry
Threads are common in printed parts, but they require realistic expectations. Fusion 360 for 3d printing provides thread tools that can model cosmetic threads or fully modeled threads. For many FDM prints, fully modeled fine threads may be unreliable unless they are large and printed with tuned settings. Still, modeling threads can be useful for visualization and for larger profiles like bottle-cap style threads. Often, a better approach is to design for heat-set inserts, captured nuts, or self-tapping screws. Fusion makes it easy to build these features accurately: counterbores, countersinks, hex pockets, and insert bosses. If you use heat-set inserts, you can dimension the hole to match the insert’s recommended pilot diameter and include a chamfer to guide insertion. You can also design a soldering-iron access path and a shoulder that prevents the insert from sinking too far.
Expert Insight
Model with printing in mind: set user parameters for wall thickness, hole diameters, and clearances (e.g., 0.2–0.4 mm for FDM fits), then use the Section Analysis tool to verify minimum thickness and spot unsupported cavities before exporting. If you’re looking for fusion 360 for 3d printing, this is your best choice.
Prep the file for clean slicing: run Inspect > Interference and Repair Body if needed, then export via 3D Print with refinement set to High and “Send to 3D Print Utility” off; confirm units (mm) and orient the part to minimize supports and maximize bed contact. If you’re looking for fusion 360 for 3d printing, this is your best choice.
When using Fusion 360 for 3d printing, it’s worth modeling assembly realities. Screw heads need clearance; drivers need space; nuts need a way to be inserted and held. A hex pocket that is too shallow may allow the nut to spin; too tight may crack the surrounding wall. You can also add anti-rotation features like small flats or ribs. For self-tapping screws in plastics, boss design is critical: sufficient wall thickness around the pilot hole, generous fillets at the base, and ribs if the boss is tall. Fusion’s fillet tools and rib features can quickly reinforce these areas. Another practical technique is to include “escape gaps” for trapped supports or to allow debris to fall out after printing. For example, a nut trap may need a small relief channel so supports can be removed without destroying the pocket. Designing with hardware in mind tends to produce prints that assemble smoothly and survive repeated use, and Fusion’s feature-based modeling makes those details easy to control and revise.
Working with Meshes, Scans, and Reverse Engineering for Printable Parts
Not every project begins with clean CAD. Sometimes you start with a downloaded STL, a scan of a broken part, or a vendor mesh model. Fusion 360 for 3d printing includes mesh tools that help you inspect, repair, and convert mesh data into usable geometry. While mesh editing is not a replacement for dedicated sculpting tools, Fusion can handle many practical tasks: reducing triangle count, converting a mesh to a BRep for limited editing, and using mesh bodies as references for parametric remodels. A common workflow is to insert the mesh, align it to origin planes, and then create sketches that trace key cross-sections. From those sketches, you rebuild the part as a parametric solid with clean faces and editable dimensions. This approach is often faster than trying to directly edit a dense mesh and results in a model that is easier to adjust for better printability.
| Feature | Why it matters for 3D printing | Fusion 360 highlights |
|---|---|---|
| Parametric modeling | Quickly adjust dimensions (tolerances, wall thickness, hole sizes) without remodeling. | User parameters, timeline edits, constraint-driven sketches for iterative fit checks. |
| Mesh & STL workflow | Most printers/slicers use meshes; clean exports reduce print artifacts and failures. | Mesh workspace tools, repair/simplify, and controlled STL/3MF export settings. |
| Print-ready design tools | Designing for manufacturability improves strength, reduces supports, and saves material. | Draft/fillet/shell tools, interference checks, section analysis, and assemblies for fit. |
Reverse engineering with Fusion 360 for 3d printing is especially useful for replacement parts. You can measure the original with calipers, then create a parametric model that includes intentional tolerances. For example, if a clip must snap onto a metal rail, you can model the rail profile as reference geometry and then design the clip with a controlled interference. If the first print is too tight, you adjust a single parameter and reprint. Fusion also supports inserting canvases (images) and calibrating them, which helps when you have a photo of a part or a technical drawing. For organic shapes, Fusion’s form (T-spline) tools can create smooth, ergonomic surfaces such as grips or covers, then convert them into solids for precise features like mounting bosses. The key is to use meshes and scans as guides, then rely on parametric features for the final printable design so you can iterate without starting over.
Exporting STL and 3MF Correctly: Resolution, Units, and Naming
Export settings can make or break a print. Fusion 360 for 3d printing typically ends with exporting an STL or 3MF to a slicer. The most common problems are wrong units, overly coarse mesh resolution, and exporting the wrong bodies. To avoid unit issues, keep your design in millimeters if that matches your slicer, and verify the export dialog indicates the correct unit. Mesh resolution matters because curved surfaces are approximated by triangles. If the resolution is too low, circles become polygons and mating parts may not fit as expected. If the resolution is too high, files become huge and can slow down slicing. A practical approach is to use a higher refinement for small mechanical parts with tight fits (like gears or threaded caps) and a medium refinement for larger cosmetic parts. Always inspect the exported mesh in the slicer: look at circles, fillets, and any surfaces that must be smooth or dimensionally accurate.
File naming and versioning is another overlooked aspect of Fusion 360 for 3d printing. When you iterate, it’s easy to print an old file by mistake. A consistent naming scheme helps: include the part name, revision, material, and perhaps nozzle size if it matters (for example, “Bracket_R3_PETG_0p4.stl”). If you export multiple components, export them separately and keep a folder per project. 3MF can be useful because it supports additional metadata and can preserve multiple bodies in some workflows, but STL remains widely compatible. Regardless of format, ensure the body is watertight (manifold) and free of self-intersections. Fusion usually produces clean solids, but if you have imported geometry or complex operations, it’s worth running an inspection step by slicing with “show errors” enabled. Clean exports reduce slicer surprises and make your prints more predictable.
Designing Tolerances, Clearances, and Fits for Real Printers
Dimensional accuracy in printing is not only about the CAD model; it’s about how your printer and material behave. Fusion 360 for 3d printing gives you the tools to design with realistic tolerances rather than idealized numbers. A classic example is holes. FDM-printed holes often come out undersized due to extrusion width and the way perimeters approximate circles. If you need a 5 mm clearance hole, you might model it at 5.2 mm or even 5.3 mm depending on your machine. Instead of guessing each time, create a parameter such as “holeOversize” and apply it to critical holes. For press fits, you can build an “interference” parameter and adjust it after printing a small test piece. Clearances for sliding parts also need tuning. A typical starting point might be 0.2–0.4 mm total clearance for PLA, but PETG may need more due to stringing and surface texture, and resin printing may need different values entirely.
Fusion 360 for 3d printing also supports fit strategies beyond simple clearances. You can add lead-in chamfers to pins, taper entries to sockets, and reliefs at the bottom of holes to prevent elephant’s foot from interfering with assembly. Elephant’s foot—where the first layers bulge slightly—often ruins tight fits at the base of parts. A small chamfer at the bottom edge of a mating feature can compensate, and it’s easy to model in Fusion. You can also design compliance into parts: living hinges, flexures, and snap features that tolerate variation. These features require careful thickness control and generous fillets to avoid cracking. Fusion’s fillet and shell tools make it straightforward to adjust these features while keeping the rest of the geometry stable. A useful habit is to print calibration parts and record results, then encode what you learn into parameters. Over time, your Fusion models become tailored to your specific printer, producing parts that fit right the first or second try instead of the fifth.
Using Analysis Tools to Predict Problems Before Printing
Fusion 360 for 3d printing is not only for shaping geometry; it also offers analysis tools that can reveal issues early. Even without heavy simulation, you can use section analysis to inspect internal cavities, verify wall thickness, and ensure channels are open. This is important for parts like ducts, cable guides, or enclosures with internal standoffs, where hidden geometry can accidentally intersect. Interference checks in assemblies help confirm that moving parts won’t collide and that fasteners have the space they need. You can also use draft analysis to see where overhangs might become problematic for certain orientations, even though draft tools are traditionally used for molding. When you treat printing as a manufacturing process with constraints, these checks become a practical way to reduce failed prints and wasted material.
For functional parts, basic structural reasoning matters, and Fusion 360 for 3d printing can support that with simulation features if you choose to use them. While full finite element analysis is not always necessary, even a simple static stress study can highlight stress concentrations at sharp corners or thin sections. This can guide you to add fillets, thicken ribs, or change geometry so the printed part survives real loads. Keep in mind that printed materials are anisotropic; strength differs along layer lines. Simulation typically assumes isotropic material properties unless you customize them, so treat results as directional guidance rather than absolute truth. Still, the process of applying loads and constraints encourages you to think about how the part is used: where it’s bolted, where it’s pushed, and where it might flex. Combined with print-oriented design choices—like orienting layers to resist the main load—analysis tools can help you get closer to a durable result without endless trial and error.
Practical Techniques for Supports, Splitting Models, and Post-Processing
Supports are sometimes unavoidable, but design choices can reduce them dramatically. Fusion 360 for 3d printing makes it easy to modify geometry so it becomes self-supporting. Chamfers can replace sharp overhangs; arches can replace flat bridges; and teardrop-shaped holes can print cleaner than perfect circles when oriented horizontally. If a part still needs supports, consider splitting it into multiple pieces so each piece prints with fewer supports and better surface quality. Fusion’s split body tool, construction planes, and alignment features help create clean splits. Once split, you can add alignment pins, dovetail joints, or tongue-and-groove features to make assembly easy. These joints can be parameterized for clearance and glued or screwed together. Splitting can also help you fit large parts on a smaller build plate, or print a part in a stronger orientation while keeping cosmetic surfaces clean.
Post-processing should be considered during modeling, and Fusion 360 for 3d printing supports that by letting you design access and allowance. If you plan to sand a surface, you might add a small extra thickness. If you plan to drill out holes, you can model pilot holes at a safe size. For resin prints, you may need drain holes and internal channels to prevent suction and reduce trapped resin; those can be modeled precisely with sketches and extrudes. For FDM prints, you might add wrench flats to a round feature so it can be tightened without marring it. You can also design sacrificial “mouse ears” or brim-like tabs as part of the model for tricky warping scenarios, though slicer brims are often simpler. The main point is that the CAD model can anticipate the realities of printing and finishing. When you plan for supports, splitting, and post-processing at the design stage, you get parts that not only print successfully but also assemble and look better with less manual work.
From Prototype to Production: Iteration, Versions, and Reuse
3D printing is often a rapid prototyping loop: design, print, test, revise. Fusion 360 for 3d printing supports this loop best when you treat each prototype as data that feeds back into the model. After a test fit, record what changed: “lid clearance +0.2 mm,” “snap thickness -0.3 mm,” “bolt holes +0.15 mm.” Then implement those changes as parameter updates rather than ad-hoc edits. This keeps the model coherent and makes it easier to revisit later. If you are printing for a small batch—say, a dozen parts for a club project or a small product run—consistency matters. A parametric model with controlled revisions helps ensure that Part #12 matches Part #1. It also reduces the risk of mixing incompatible versions, which can happen if you tweak meshes directly in the slicer without updating the source CAD.
Reuse is where Fusion 360 for 3d printing can save the most time over the long term. Once you have a proven enclosure style, a hinge design, a cable strain relief, or a mounting pattern, you can adapt it to new projects quickly. Keep a personal library of components and sketches, and use parameters so common features scale cleanly. When you build this way, you stop reinventing basics and focus on the unique parts of each project. It also helps to document print settings that worked: material, layer height, perimeter count, infill type, and orientation. While those settings live in the slicer, the CAD model can embed assumptions—like wall thickness matching perimeter counts—that make the print profile more predictable. Over time, your workflow becomes less about troubleshooting and more about engineering. The final result is that Fusion 360 for 3d printing becomes not just a modeling tool, but a repeatable system for turning ideas into reliable physical parts.
Watch the demonstration video
Learn how to use Fusion 360 to design clean, printable 3D models from start to finish. This video covers essential tools for sketching, parametric modeling, and adding practical features like fillets and tolerances, then shows how to export STL/3MF files correctly so your parts slice well and print accurately. If you’re looking for fusion 360 for 3d printing, this is your best choice.
Summary
In summary, “fusion 360 for 3d printing” is a crucial topic that deserves thoughtful consideration. We hope this article has provided you with a comprehensive understanding to help you make better decisions.
Frequently Asked Questions
How do I set up Fusion 360 units and scale for 3D printing?
In **fusion 360 for 3d printing**, start by setting your design units in **Document Settings**—millimeters are usually the standard. Only use **Modify > Scale** if you truly need to resize the model, and always double-check critical dimensions with **Inspect > Measure** before you export your file.
How do I export an STL from Fusion 360 for printing?
To export your model, right-click the body or component and select **Save as Mesh** (or go to **File > 3D Print**). Choose **STL** as the format, pick a refinement level like **Medium** or **High**, double-check the units, then save the file—an essential step when using **fusion 360 for 3d printing**.
What STL export settings should I use for good print quality?
For smooth curves and tiny details, choose **High** refinement; for most functional parts, **Medium** usually does the job. In **fusion 360 for 3d printing**, aim for the lowest refinement that still preserves the shape you need—so you get clean results without creating unnecessarily massive mesh files.
How can I make a model watertight/manifold in Fusion 360?
Ensure it’s a solid body (not just surfaces). Use Inspect > Section Analysis to find gaps, and use Repair tools like Stitch (for surfaces) or modify features to eliminate internal faces and holes. If you’re looking for fusion 360 for 3d printing, this is your best choice.
How do I design proper tolerances and clearances for FDM printing?
A good starting point is to design in about **0.2–0.3 mm of clearance per side** for smooth sliding fits, and **0.1–0.2 mm per side** for a snug, press-together fit—though the ideal values will vary with your printer and filament. When using **fusion 360 for 3d printing**, it’s smart to print a few small calibration pieces first, then fine-tune your clearances based on real-world results.
How do I add supports, infill, and orientation in Fusion 360?
Fusion 360 is mainly for modeling; do supports/infill/orientation in a slicer (e.g., Cura, PrusaSlicer, Bambu Studio). In Fusion 360, focus on adding chamfers/fillets, split parts, and flat faces to print easier. If you’re looking for fusion 360 for 3d printing, this is your best choice.
📢 Looking for more info about fusion 360 for 3d printing? Follow Our Site for updates and tips!

Trusted External Sources
- Fusion 360 Tutorial For Beginners (QUICK & EASY) + … – YouTube
On Feb 24, 2026, check out this quick and easy Fusion 360 tutorial for beginners—packed with simple, step-by-step guidance and a clear walkthrough on exporting your model for 3D printing. With over 431K views, it’s a popular pick for anyone learning **fusion 360 for 3d printing** and wanting to go from design to a ready-to-print file fast.
- All New Fusion 360 for 3D Printing for Absolute Beginners. – YouTube
Share your videos with friends, family, and the world.
- Day 1: Learn Fusion 360 for 3D Printing | Introduction – YouTube
Jan 16, 2026 … Learn to Design and Sell Your Own 3D Printed Products: https://www.skool.com/3dprinting Socials: Instagram: …
- New to 3d printing- solid works or fusion 360 to design stuff and can …
Jun 22, 2026 … Easy, try Fusion first, and if the 10 active files as a time gets too annoying (free license limitation), then test out Solidworks.
- Autodesk Fusion for personal use
… 360, and learn which CAD, CAM, CAE and PCB software is the right solution … Autodesk Fusion includes all design and 3D modeling tools, plus a fully …