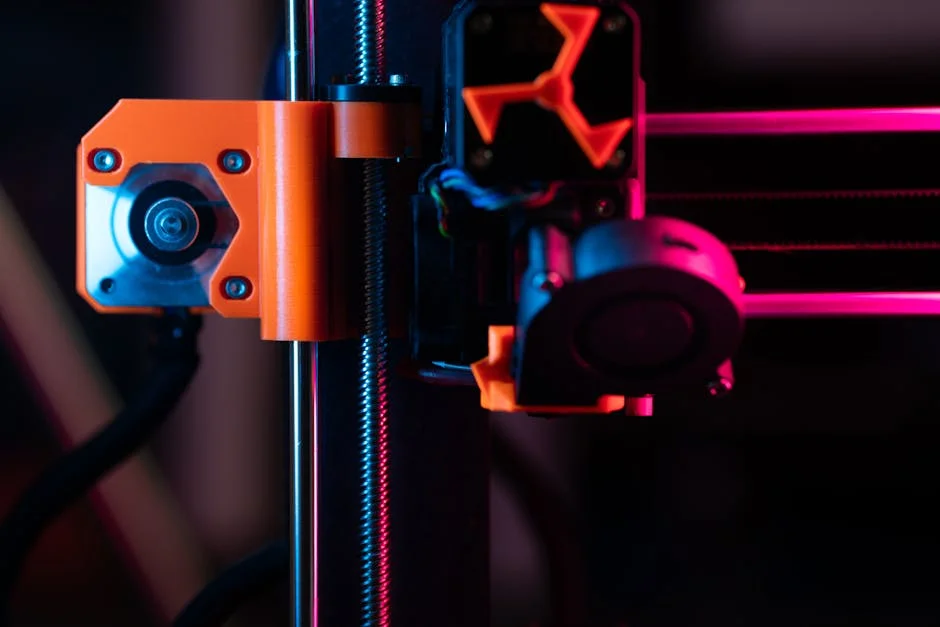
Beginner 3d printing is the moment when a hobby turns into a practical skill: you stop only consuming objects and start producing them. That shift can feel intimidating because it blends software, hardware, materials, and a little bit of craft. Yet the learning curve is friendlier than it looks when you treat it like a workflow rather than a mystery. A typical first setup uses a desktop FDM (fused deposition modeling) printer that melts plastic filament and lays it down in layers. The printer is guided by a “sliced” file, usually generated from a 3D model. Each layer is a thin cross-section that stacks into a finished part. When the basics click—how to level a bed, how to load filament, how to choose temperatures—beginner 3d printing becomes predictable, and predictability is where creativity thrives. Instead of hoping a print succeeds, you start making small, deliberate adjustments and seeing consistent results. The best early mindset is to treat every print as a data point: what settings were used, what the room conditions were, what the part looked like, and what you changed next time.
Table of Contents
- My Personal Experience
- Getting Started With Beginner 3D Printing: What It Is and Why It Feels Different From Other Hobbies
- Choosing the Right Printer for a First Setup: FDM vs Resin and What Matters Most
- Setting Up Your Workspace: Safety, Ventilation, and a Smooth Printing Routine
- Understanding Filament and Materials: PLA, PETG, ABS, and When to Use Each
- Slicer Software Basics: Layer Height, Infill, Supports, and Speed Without the Confusion
- Bed Leveling and First-Layer Success: The Skill That Makes Everything Else Easier
- Calibration That Actually Matters: Temperature Towers, Flow Rate, and Retraction in Practical Terms
- Expert Insight
- Designing or Downloading Models: How to Pick Good Starter Prints and Avoid Common Traps
- Troubleshooting Print Problems: Stringing, Warping, Layer Shifts, and Weak Parts
- Post-Processing for Beginners: Removing Supports, Sanding, Painting, and Functional Finishing
- Smart First Projects: Practical Prints That Teach Skills Without Wasting Time and Filament
- Long-Term Habits: Maintenance, Upgrades, and How to Keep Beginner 3D Printing Enjoyable
- Watch the demonstration video
- Frequently Asked Questions
- Trusted External Sources
My Personal Experience
When I first got into 3D printing, I thought it would be as simple as downloading a file and hitting “print,” but my first few attempts were a mess. The benchy boat I started with looked more like a melted candle—stringing everywhere, warped corners, and the first layer barely stuck to the bed. I spent an evening watching the nozzle move while tweaking tiny things: leveling the bed again (and again), cleaning it with isopropyl alcohol, slowing the first layer down, and bumping the nozzle temperature a few degrees. The biggest “aha” moment was realizing most problems weren’t the printer being broken, it was my settings and setup. After a week of trial and error—and a small pile of failed prints—I finally got a clean, solid print, and it felt weirdly satisfying to hold something I made from scratch, even if it was just a simple little hook for my desk. If you’re looking for beginner 3d printing, this is your best choice.
Getting Started With Beginner 3D Printing: What It Is and Why It Feels Different From Other Hobbies
Beginner 3d printing is the moment when a hobby turns into a practical skill: you stop only consuming objects and start producing them. That shift can feel intimidating because it blends software, hardware, materials, and a little bit of craft. Yet the learning curve is friendlier than it looks when you treat it like a workflow rather than a mystery. A typical first setup uses a desktop FDM (fused deposition modeling) printer that melts plastic filament and lays it down in layers. The printer is guided by a “sliced” file, usually generated from a 3D model. Each layer is a thin cross-section that stacks into a finished part. When the basics click—how to level a bed, how to load filament, how to choose temperatures—beginner 3d printing becomes predictable, and predictability is where creativity thrives. Instead of hoping a print succeeds, you start making small, deliberate adjustments and seeing consistent results. The best early mindset is to treat every print as a data point: what settings were used, what the room conditions were, what the part looked like, and what you changed next time.
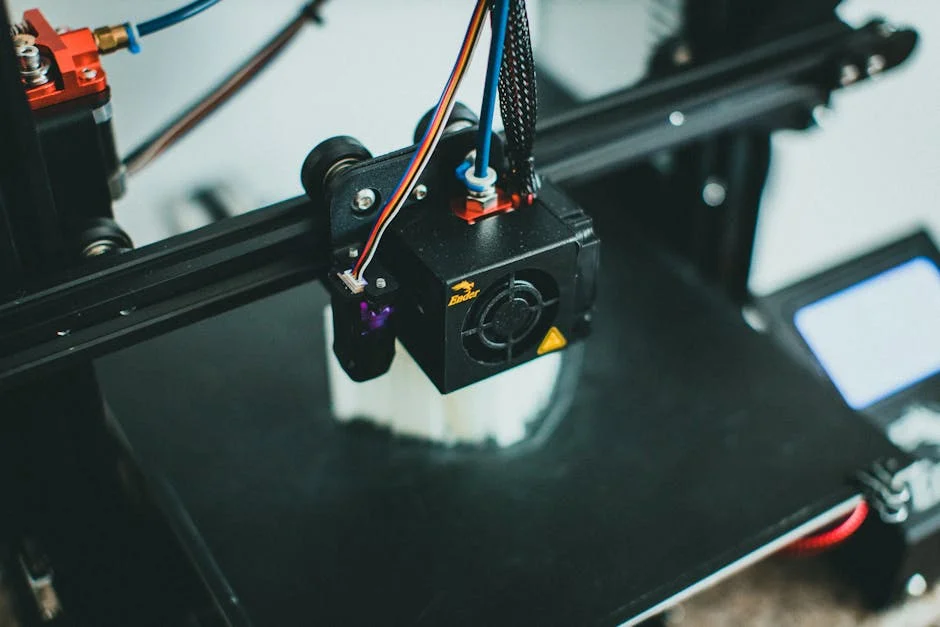
One reason beginner 3d printing feels different from many crafts is that the “tool” is also a small robot with its own limits. It can be precise, but it can also be sensitive to first-layer adhesion, airflow, and minor mechanical looseness. Beginners often expect a printer to behave like a paper printer: press a button, get a flawless object. A more accurate expectation is closer to cooking: ingredients, temperature, timing, and technique matter, and small changes can yield big differences. This doesn’t mean it’s fragile; it means it’s tunable. The upside is that once you learn the foundation, you can produce replacement parts, organizers, prototypes, cosplay props, tabletop accessories, or custom mounts that fit your exact needs. The reward is not only the object but also the feedback loop: design, print, test, improve. If you start with simple shapes and build habits—cleaning the build surface, storing filament properly, and taking notes—your success rate goes up quickly. The goal at the start is not perfection; it’s repeatability, and repeatability is the fastest path to confidence.
Choosing the Right Printer for a First Setup: FDM vs Resin and What Matters Most
For beginner 3d printing, the printer you choose affects nearly everything: the learning experience, the type of projects you can tackle, and the amount of maintenance you’ll accept. Most newcomers do best with an FDM printer because it’s versatile, relatively clean, and uses inexpensive filament. FDM shines for functional parts, larger objects, and day-to-day household prints. Resin printers (SLA/MSLA) excel at tiny details and smooth surfaces, which is fantastic for miniatures and jewelry prototypes, but they introduce extra steps: handling liquid resin, washing, curing, and more stringent safety practices. If your first goals involve brackets, desk organizers, replacement knobs, simple toys, or prototypes you plan to drill or sand, FDM is usually the smoother entry point. If your dream is painting highly detailed character minis, resin may be worth it, but plan for ventilation, gloves, and a dedicated workspace. Either path works, but mixing expectations can cause frustration—choosing based on the kinds of objects you want to make is the clearest decision filter.
Beyond technology, focus on practical selection criteria that reduce friction for beginner 3d printing. Build volume matters, but reliability and community support matter more. A slightly smaller printer that prints consistently will teach you faster than a large machine that requires constant troubleshooting. Look for features that help novices: automatic bed leveling (or at least assisted leveling), a removable build surface, filament runout detection, and a direct-drive extruder if you plan to print flexible materials later. Also consider noise, because stepper motors and fans can be distracting in a bedroom or office. Review the availability of spare parts, the reputation of the manufacturer, and how easy it is to find profiles for common slicers. A printer with a strong user community often has better documented fixes and proven settings. Finally, consider the ecosystem: if the printer uses common nozzles, standard Bowden or direct-drive parts, and an open slicer workflow, you won’t be locked into expensive proprietary consumables. The best first printer isn’t the most advanced; it’s the one that encourages you to print often, learn steadily, and spend more time making than repairing.
Setting Up Your Workspace: Safety, Ventilation, and a Smooth Printing Routine
A good workspace turns beginner 3d printing from a sporadic experiment into a dependable habit. Start with a stable surface: a sturdy table that doesn’t wobble reduces vibration artifacts and keeps the printer from shifting during long jobs. Keep the printer away from direct drafts, open windows, and heating vents; sudden temperature changes can affect layer bonding and cause warping, especially with larger prints. Lighting matters more than people expect—being able to clearly see the first layer and the nozzle area helps you catch problems early. Organize basic tools within reach: flush cutters, tweezers, a small scraper (used carefully), a brass brush for nozzles, hex keys, and a digital caliper for checking dimensions. A small tray for nozzles, screws, and spare parts prevents “lost piece” chaos. If you plan to print regularly, a simple routine—wipe the bed, check the nozzle, confirm filament path—saves time and reduces failed prints that waste material.
Safety is part of beginner 3d printing even with “friendly” materials like PLA. Hotends and beds can exceed temperatures that cause burns, so treat the printer like a hot appliance. Keep cables tidy, avoid leaving loose filament strands near moving parts, and never reach into the printer while it’s homing or moving at speed. Ventilation is a smart baseline: FDM printing can produce odors and ultrafine particles, especially with certain plastics. PLA is generally considered lower odor, but good airflow is still beneficial. If you move into ABS, ASA, or resin printing, ventilation becomes more important. For resin, use nitrile gloves, eye protection, and avoid skin contact; resin can be sensitizing. Store chemicals safely and dispose of waste responsibly. Also plan for noise and pets: curious animals and moving gantries don’t mix well. A simple enclosure can reduce drafts and noise, but ensure it doesn’t overheat electronics. When the workspace is comfortable and consistent, you’ll print more often, and frequency is what accelerates skill development. The more you print, the faster you recognize patterns: what a good first layer looks like, what under-extrusion sounds like, and when a print is worth stopping early.
Understanding Filament and Materials: PLA, PETG, ABS, and When to Use Each
Material choice is a core skill in beginner 3d printing because it affects print temperature, adhesion, strength, and finish. PLA is the standard starting filament: it prints at relatively low temperatures, sticks well to most build surfaces, and rarely warps. It’s ideal for decorative prints, prototypes, and many functional items that won’t face high heat. PLA can be surprisingly strong in the right geometry, but it softens at temperatures you might find in a hot car or near appliances. PETG is a common next step. It offers better heat resistance and toughness than PLA, making it good for parts that will be handled, flexed slightly, or used outdoors. PETG can be stringy and may require tuning retraction and cooling, but it’s very achievable once you have a few successful PLA projects. ABS and ASA are tougher and more heat resistant, but they warp more easily and often benefit from an enclosure. ASA is favored for outdoor durability because it handles UV exposure better than ABS.
Moisture management is a hidden factor for beginner 3d printing. Many filaments absorb water from the air, which can cause popping sounds, rough surfaces, stringing, and weaker prints. PLA is less sensitive than some materials, but it can still degrade in humid environments. PETG, nylon, and TPU can be notably moisture-prone. Storing filament in sealed bags or bins with desiccant is a low-effort upgrade that improves consistency. Color and brand also matter: different pigments can slightly alter print behavior, and budget spools can vary in diameter or winding quality. Use a caliper occasionally to verify filament diameter if you suspect issues, and watch for tangles that can snag mid-print. When selecting materials, match them to the environment and forces your part will face. For example, a phone stand in PLA may be fine indoors, but a car-mounted holder could deform; PETG or ASA might be safer. For snap-fit parts, PETG’s toughness can help, while PLA can crack if designed too thin. Material knowledge doesn’t require memorizing everything; it’s about building a small “material toolbox” and choosing deliberately rather than hoping one filament can do every job.
Slicer Software Basics: Layer Height, Infill, Supports, and Speed Without the Confusion
Slicing is where beginner 3d printing starts to feel like engineering, but the core ideas are simple: you’re deciding how the printer will build the object layer by layer. Layer height controls detail and print time. A common starting point is 0.2 mm for a 0.4 mm nozzle, balancing speed and quality. Smaller layer heights can improve surface smoothness on curves but increase print time. Infill determines how solid the interior is; many functional parts work well at 15–30% infill with a strong pattern like gyroid or grid, while purely decorative items can use less. Walls (perimeters) often matter more than infill for strength; increasing wall count can make parts sturdier without dramatically increasing time. Top and bottom layers control surface closure; if you see gaps on the top, add more top layers or increase infill slightly. These settings are levers, and learning which lever to pull is a major milestone in beginner 3d printing.
Supports and orientation are where beginners can save or waste hours. Supports are temporary structures that hold up overhangs, but they leave marks and add time. Often the best solution is to rotate the model to minimize overhangs or redesign the part with chamfers and arches. If you must use supports, adjust density and interface settings so they remove cleanly. Print speed is another tempting setting: faster is not always better, especially early on. A moderate speed with good cooling often produces cleaner results than pushing the machine. Temperature, fan speed, and retraction settings work together: too hot can cause stringing and droopy bridges, too cool can reduce layer adhesion. Start with a known-good profile for your printer and filament, then change one variable at a time. Keep notes on what you changed and what improved. A reliable beginner 3d printing workflow is less about discovering “magic settings” and more about building a stable baseline you can return to whenever experimentation goes sideways.
Bed Leveling and First-Layer Success: The Skill That Makes Everything Else Easier
If there is one skill that defines early progress in beginner 3d printing, it’s first-layer control. The first layer is the foundation; if it’s uneven, too squished, or not sticking, the rest of the print is likely to fail. Bed leveling is really about creating a consistent gap between the nozzle and the build surface across the entire printing area. Even printers with auto-leveling still benefit from a correctly set Z-offset. A good first layer looks slightly flattened, with lines touching each other without ridges or gaps. If the nozzle is too high, lines look round and may peel up. If it’s too low, the extruder can struggle, the surface looks rough, and you can damage the build surface. Spend time dialing this in—it pays back every single print. Use a simple first-layer test pattern and adjust in small increments. Many printers allow “baby stepping” Z during the first layer, letting you fine-tune live.
Adhesion also depends on surface prep and temperature. Clean the build plate regularly; skin oils can reduce stickiness dramatically. For many surfaces, warm water with dish soap works better than alcohol for removing oils, though isopropyl alcohol is useful for quick wipes. Bed temperature should match the filament: PLA often prints well around 50–60°C, PETG a bit higher, and ABS higher still. Ambient conditions matter too—cold rooms can cause corners to lift. If you see warping, consider adding a brim, increasing bed temperature slightly, reducing cooling for the first layers, or using an enclosure for warp-prone materials. Avoid over-relying on adhesives as a crutch; glue sticks and specialty sprays have their place, but they can mask a leveling or temperature problem. Strong beginner 3d printing habits come from understanding why adhesion fails and fixing the root cause. Once you trust your first layer, you’ll feel comfortable starting longer prints, and that confidence is what unlocks bigger projects and more ambitious designs.
Calibration That Actually Matters: Temperature Towers, Flow Rate, and Retraction in Practical Terms
Calibration can overwhelm beginner 3d printing because there are many tests and charts online, but only a few adjustments make a big difference early. Temperature is a primary one. Filament labels provide a range, but your printer, cooling, and room conditions determine the sweet spot. A temperature tower helps you choose a setting that balances layer adhesion with clean surfaces and minimal stringing. Once temperature is reasonable, flow rate (extrusion multiplier) becomes important for dimensional accuracy and surface quality. If the printer extrudes too much, corners bulge and holes shrink; too little, and you get gaps and weak layers. A simple single-wall cube test can help you tune flow by measuring wall thickness with calipers and adjusting accordingly. This isn’t about perfection; it’s about getting close enough that parts fit and look consistent. For many beginners, doing temperature and flow calibration once per filament type is a practical approach.
| Option | Best for beginners | Pros | Cons |
|---|---|---|---|
| FDM (Filament) Printer | First-time users learning basics and low-cost printing | Affordable machines & materials; easy to maintain; wide material choices (PLA, PETG) | Visible layer lines; needs tuning (bed leveling, temperature); supports can be messy |
| Resin (SLA/MSLA) Printer | Miniatures, detailed models, and smooth surface finishes | Very high detail; smooth prints; great for small parts | Messy post-processing (wash/cure); resin safety/odor; consumables add cost |
| All-in-one “Beginner-Friendly” FDM (Auto-level + Enclosure) | Users who want fewer setup steps and more reliable first prints | Faster setup; more consistent adhesion; safer/quieter with enclosure; better for ABS/ASA | Higher upfront price; enclosure limits access for tinkering; still requires basic calibration |
Expert Insight
Start with a simple calibration routine: level the bed carefully, then print a small first-layer test (like a single-layer square) and adjust nozzle height until the lines are slightly squished and fully connected. Lock in reliable settings before changing materials or speeds, and keep notes on what works. If you’re looking for beginner 3d printing, this is your best choice.
Choose beginner-friendly prints and settings: use PLA, a 0.2 mm layer height, and moderate speeds, then add a brim for better adhesion on small parts. If a print fails, change only one variable at a time (temperature, speed, retraction, or cooling) so you can quickly identify the cause. If you’re looking for beginner 3d printing, this is your best choice.
Retraction reduces stringing by pulling filament back during travel moves. Too little retraction can cause wispy strings between features; too much can cause jams or under-extrusion at the start of lines. Direct-drive extruders usually need less retraction distance than Bowden setups. Travel speed and temperature also influence stringing, so avoid changing everything at once. Cooling and fan settings affect bridging and overhangs; more fan can improve PLA details but may weaken layer bonding in some materials. Mechanical checks matter too: ensure belts are properly tensioned, the hotend is tight, and the extruder gear is clean. Beginner 3d printing improves fastest when calibration is tied to a visible problem you want to solve. If your prints already look good, don’t chase micro-optimizations. Instead, print real objects and note what fails under use—does a clip snap, does a lid not fit, does a surface look rough? Those real-world observations guide which calibration step is worth your time, and they prevent you from spending weeks tuning for a benchmark rather than for your own projects.
Designing or Downloading Models: How to Pick Good Starter Prints and Avoid Common Traps
Beginner 3d printing often starts with downloading models, which is a smart way to learn the machine before learning CAD. The key is choosing models that are designed with printing in mind. Good starter prints have a flat base, minimal supports, and forgiving tolerances. Calibration cubes, simple tool holders, cable clips, and small organizers are excellent because they print quickly and teach you about walls, infill, and fit. When browsing models, look at photos from other makers and read comments for printer settings and known issues. Pay attention to scale: a model that looks small on screen might be huge on your build plate. Also watch for thin features that are smaller than your nozzle width; they may not slice correctly or may print as fragile strands. A model designed for a 0.4 mm nozzle might not work well on a larger nozzle without adjustment. Choosing the right early prints reduces frustration and gives you a steady stream of wins, which is essential for building momentum in beginner 3d printing.
When you’re ready to design, start with simple parametric tools and functional geometry. Many successful beginner 3d printing designs are just combinations of rectangles, cylinders, and chamfers with thoughtful dimensions. Learn basic tolerances: holes often print smaller than designed, and pins may print slightly larger. A common approach is to design holes 0.2–0.4 mm larger than the intended screw or shaft, then adjust based on your printer. For snap fits, use fillets to reduce stress concentrations and test small samples before committing to a large print. Orientation is part of design: parts are weaker between layers than along a continuous strand, so align stress with the layer lines when possible. Add ribs instead of making walls thick; ribs increase stiffness efficiently and print well. If you plan to use heat-set inserts, design pockets with the correct diameter and depth. Over time, you’ll notice that design choices can eliminate the need for supports, reduce print time, and make parts stronger. That’s the deeper payoff of beginner 3d printing: you’re not just making objects—you’re learning how to shape them for a specific manufacturing method.
Troubleshooting Print Problems: Stringing, Warping, Layer Shifts, and Weak Parts
Troubleshooting is unavoidable in beginner 3d printing, but it becomes manageable when you categorize symptoms. Stringing usually points to a combination of high temperature, insufficient retraction, or wet filament. Start by lowering temperature slightly within the filament’s safe range, then adjust retraction and travel. Warping and corner lift often come from poor first-layer adhesion, drafts, or bed temperature issues; solutions include better cleaning, a brim, higher bed heat, reduced cooling on early layers, and shielding the printer from airflow. Layer shifts typically indicate mechanical resistance or belt issues: a loose belt, a snagging cable, a dirty rail, or printing too fast for the machine’s acceleration settings. If a print suddenly shifts, check that the bed and toolhead move smoothly by hand when the printer is off, and inspect pulleys and set screws. Under-extrusion can be caused by a partial nozzle clog, incorrect temperature, or extruder tension issues. Each problem has a small set of likely causes—avoid random setting changes and instead test one hypothesis at a time.
Weak parts are a special category because they may look fine but fail in use. Strength depends on material, temperature, wall count, layer adhesion, and orientation. If a part snaps along layer lines, consider increasing nozzle temperature slightly, reducing fan, increasing wall count, or reorienting the model so layers run along the stress direction. If a part cracks through the middle, more walls and better infill can help, but walls often deliver the biggest improvement. If screw holes strip easily, consider using inserts or redesigning with more material around the hole. Surface artifacts like ringing (ghosting) often come from vibration; reduce speed, acceleration, or jerk, and ensure the printer is on a stable surface. Z-banding can come from a bent lead screw, dirt, or inconsistent motion. Beginner 3d printing gets easier when you document problems with photos and keep a small log of changes. Over time, you’ll build a personal “diagnostic map” that makes failures less emotional and more mechanical: a puzzle with repeatable steps. That mindset turns troubleshooting from an obstacle into a skill that improves every print you make.
Post-Processing for Beginners: Removing Supports, Sanding, Painting, and Functional Finishing
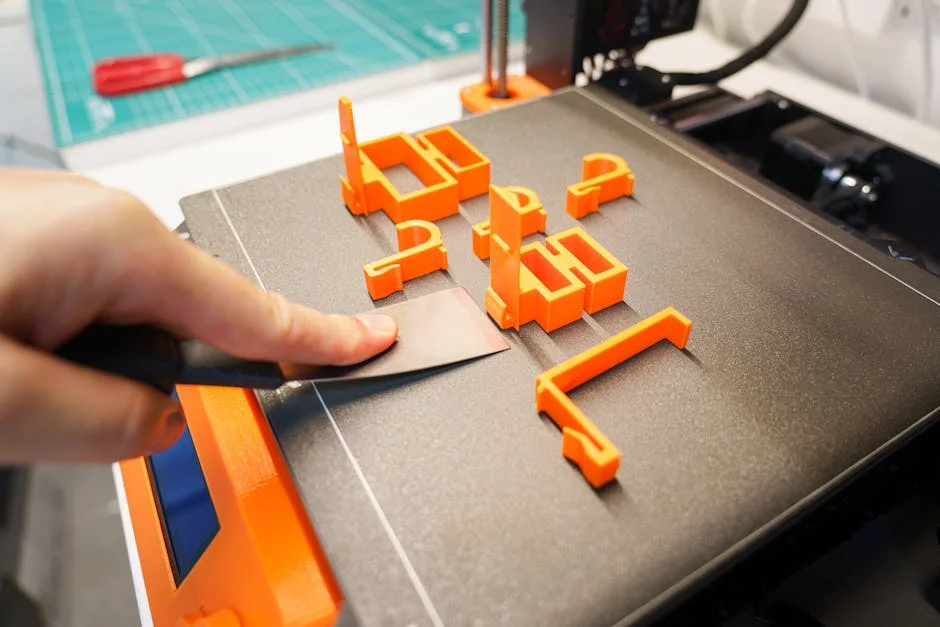
Post-processing is where beginner 3d printing can move from “looks printed” to “looks finished,” but it should match your goals. For functional parts, post-processing may be as simple as removing a brim, trimming stringing with a hobby knife, and deburring edges. Support removal is easier when supports are tuned well; if they fuse to the model, reduce support density, add an interface layer, or adjust Z-gap. Use flush cutters and small pliers carefully, working slowly to avoid tearing layers. Sanding is effective on PLA and PETG, though PETG can be gummy; start with a lower grit like 120–220 for major lines and move up to 400+ for smoothing. Wet sanding can reduce heat buildup. For holes and fits, a hand reamer or drill bit can refine dimensions, but go slowly to avoid cracking. Heat-set inserts are a powerful finishing method for functional assemblies; they let you use machine screws repeatedly without wearing out plastic threads.
For cosmetic finishes, primer and paint can transform a print. A filler primer helps hide layer lines, especially on larger objects. Apply thin coats, sand between layers, and be patient; rushing leads to drips and uneven texture. If you want a smooth look without endless sanding, consider printing at a smaller layer height on visible surfaces and orienting the part to minimize stair-stepping. For multi-part prints, adhesives vary by material: cyanoacrylate (super glue) works for PLA and many plastics, while epoxy offers gap filling and strength. Clamping and alignment pins can improve seams. For resin prints, washing and curing are essential steps, and sanding is often easier due to the smoother starting surface. Functional finishing also includes adding rubber feet, magnets, or foam tape. Beginner 3d printing becomes more satisfying when you treat prints as components in a broader build, not just standalone objects. A simple enclosure panel, a custom bracket, or a tool organizer becomes more useful when you add thoughtful finishing steps that improve durability and comfort in daily use.
Smart First Projects: Practical Prints That Teach Skills Without Wasting Time and Filament
The best early projects in beginner 3d printing are small, useful, and diagnostic. A first-layer calibration square teaches bed leveling and Z-offset. A temperature tower teaches material behavior. A simple storage bin teaches long straight walls, infill, and cooling. Cable clips and label holders teach tolerances and snapping features. A phone stand teaches overhangs and stability. These projects are not glamorous, but they build muscle memory and a library of settings you can reuse. Keep prints short at first—30 to 90 minutes—so you can iterate quickly. If a print fails, you learn faster when you can try again the same day. Choose objects you’ll genuinely use; usefulness creates motivation, and motivation keeps you practicing. When you print something that solves a small annoyance—like a spacer, a hook, a drawer divider—you begin to see your printer as a tool rather than a toy.
As your confidence grows, combine skills with slightly more complex builds. Print a modular organizer with multiple parts that fit together; this teaches dimensional accuracy and assembly planning. Try a hinged box; it teaches clearance and bridging. Print a replacement knob or handle; it teaches strength, grip ergonomics, and the importance of wall count. If you enjoy electronics, print a small project enclosure; it teaches screw bosses, cable routing, and heat considerations. If you enjoy tabletop games, print terrain pieces; it teaches layer height tradeoffs and post-processing. The key in beginner 3d printing is to scale complexity in a controlled way: add one new challenge per project, not five. For example, if you’re trying PETG for the first time, don’t also attempt a huge model with heavy supports and tight tolerances. Keep variables limited so you can attribute success or failure to the right cause. This approach reduces wasted filament and replaces random experimentation with intentional learning, which is what turns early curiosity into long-term competence.
Long-Term Habits: Maintenance, Upgrades, and How to Keep Beginner 3D Printing Enjoyable
Consistency is the secret to making beginner 3d printing stick as a long-term hobby. Simple maintenance prevents many “mysterious” issues. Clean the nozzle area occasionally, check that the hotend is tight, and inspect belts for wear and proper tension. Keep the build surface clean and replace it when it becomes damaged or loses adhesion. Lubricate rods or lead screws according to your printer’s recommendations, and keep dust away from wheels and rails. Update firmware only when you have a reason, and document your settings before changing anything major. Filament care is part of maintenance too: store spools dry, label them with purchase dates, and dry them if you notice stringing or brittle behavior. If you print rarely, run a small test print before starting an all-day job; it’s easier to discover a problem on a 20-minute part than on a 12-hour print.
Upgrades can help, but they can also derail beginner 3d printing if done too early. The most valuable “upgrade” is often learning to use your slicer well and keeping your machine mechanically sound. If you do upgrade, prioritize reliability and quality-of-life: a better build surface, improved part cooling, or a filament dry box can yield more benefit than chasing extreme speed. Adding an enclosure can help with temperature stability for certain materials, but ensure electronics remain cool. Switching nozzle sizes can be transformative: a 0.6 mm nozzle prints functional parts faster, while a 0.25 mm nozzle can improve fine detail, though it’s less forgiving. Make one change at a time and validate with known test prints. Keep a folder of “baseline” profiles that worked before upgrades so you can revert easily. Most importantly, keep the hobby enjoyable by balancing tinkering with making. A printer can be a project in itself, but it’s also a manufacturing tool. When you spend regular time printing objects that improve your workspace, home, or hobbies, beginner 3d printing feels rewarding and sustainable rather than like an endless cycle of repairs and half-finished experiments.
Watch the demonstration video
This video introduces beginner 3D printing from the ground up, showing how to choose a printer, set up and level the bed, load filament, and slice a model for printing. You’ll learn essential settings, common mistakes to avoid, and simple troubleshooting tips so you can get clean, reliable prints on your first projects.
Summary
In summary, “beginner 3d printing” is a crucial topic that deserves thoughtful consideration. We hope this article has provided you with a comprehensive understanding to help you make better decisions.
Frequently Asked Questions
What do I need to start 3D printing at home?
To get started with **beginner 3d printing**, you’ll need an FDM 3D printer, a spool of filament (PLA is the easiest to learn with), slicing software to prep your models, and a few simple tools like a scraper and flush cutters—plus a safe, well‑ventilated spot to print.
Which filament is best for beginners?
PLA: it prints at lower temperatures, warps less, has low odor, and works well without an enclosure.
How do I choose a first 3D printer?
For **beginner 3d printing**, focus on choosing a printer that’s reliable and backed by a helpful community. Look for must-have features like auto bed leveling and a heated bed, make sure replacement parts are easy to find, and pick a build volume that comfortably matches the size of the projects you want to create.
What is a slicer and what settings matter most?
A slicer is the software that converts your 3D model into step-by-step printer instructions called G-code. For **beginner 3d printing**, the most important settings to understand are layer height, nozzle and bed temperatures, print speed, infill density, support placement, and retraction—since these directly affect print quality, strength, and how cleanly your parts come out.
How do I get good first-layer adhesion?
For **beginner 3d printing**, start by leveling your printer bed and dialing in the correct Z-offset so the nozzle sits just right. Make sure the build plate is clean, set an appropriate bed temperature for your filament, and slow down the first layer to improve adhesion. If prints still lift at the edges, adding a brim can give you extra stability.
What are common beginner print problems and quick fixes?
If you’re into **beginner 3d printing**, a few quick fixes can solve the most common problems: for stringing, try increasing retraction or lowering the nozzle temperature; for warping, boost bed adhesion and consider raising the bed temperature; for under-extrusion, inspect the nozzle for clogs and make sure the filament feeds smoothly; and for layer shifts, tighten your belts and slow the print down a bit.
📢 Looking for more info about beginner 3d printing? Follow Our Site for updates and tips!

Trusted External Sources
- The Beginner 3D Printing Guide I Wish I Had – YouTube
Dec 24, 2026 … Just got a new 3D printer and want to avoid the biggest beginner mistakes? In this video, I’ll show you how to get great results fast, … If you’re looking for beginner 3d printing, this is your best choice.
- Where should I start learning about 3d printing? Is there a beginners …
On Oct 14, 2026, I suggested that anyone diving into **beginner 3d printing** should start with Thomas Sanladerer’s *3D Printing Basics* video series—it’s a clear, friendly introduction that helps you understand the essentials and avoid common early mistakes.
- Beginners Guide To Starting 3D Printing In 2026 – YouTube
As of Feb 25, 2026, this **beginner 3d printing** guide makes it easy to start 3D printing in 2026, walking you through the basics step by step. The comments say it all—over 3.1K people have chimed in, with one parent sharing that their 11-year-old son has been completely obsessed with 3D printing ever since.
- Is there any “complete beginners guide” ? : r/3Dprinting – Reddit
Dec 21, 2026 … Comments Section · ‘ TinkerCad ‘: Simple to use and a good starting point for beginners. · ‘DesignSpark Mechanical’: Free and easy to use – Two … If you’re looking for beginner 3d printing, this is your best choice.
- 3D PRINTING 101: The ULTIMATE Beginner’s Guide – YouTube
May 6, 2026 — Getting started with **beginner 3d printing** doesn’t have to feel overwhelming. In this 3D Printing 101 course, we’ll guide you through each step—from choosing your first printer and materials to setting up, slicing, and successfully completing your first prints.