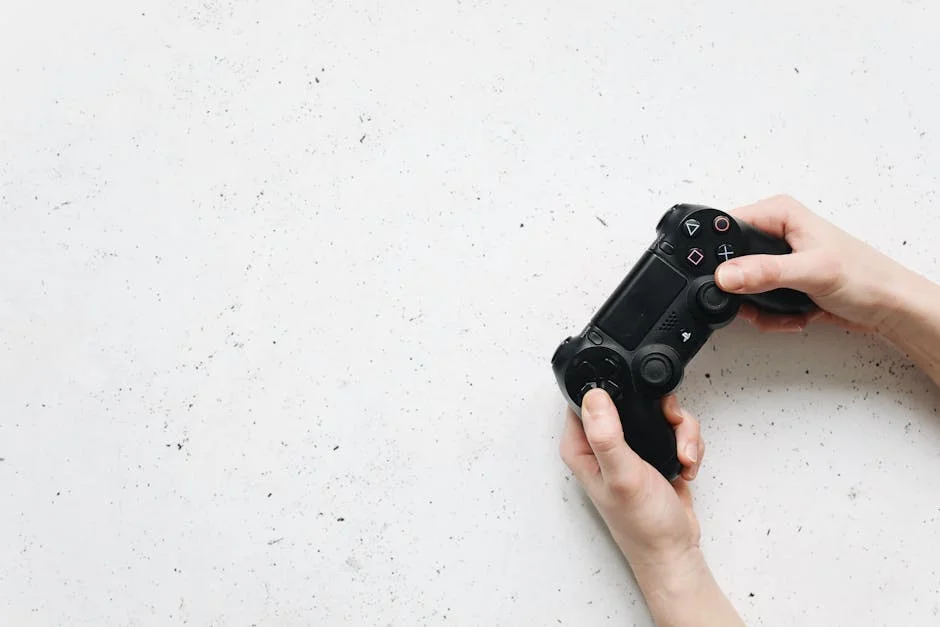
A microphone boom stand is one of the most practical pieces of audio gear because it solves problems that listeners notice immediately: inconsistent volume, unwanted room noise, and the “hollow” sound that happens when a mic is positioned poorly. When a microphone is held in the hand or balanced on a desk, small movements become big changes in tone. A boom arm or boom-style stand keeps the capsule fixed at a predictable distance and angle, so the voice stays steady and intelligible. That stability also reduces the temptation to crank up gain, which often brings up computer fans, HVAC noise, and reflections from hard surfaces. For creators, musicians, streamers, and podcasters, the stand is less about looking professional and more about controlling variables that make editing easier and recordings more consistent. The difference is especially obvious with dynamic microphones, which typically need close placement for a full sound; the right stand lets you stay close without hunching forward or blocking a screen.
Table of Contents
- My Personal Experience
- Why a Microphone Boom Stand Matters for Clean Sound
- Types of Microphone Boom Stand Designs and When to Use Them
- Key Components: Boom Arm, Clutch, Counterweight, and Base Stability
- Choosing the Right Microphone Boom Stand for Your Microphone Weight
- Placement Techniques for Voice, Podcasting, and Streaming
- Using a Boom Stand for Instruments: Guitar, Piano, Drums, and More
- Desk Boom Arms vs Floor Boom Stands: Workspace and Ergonomics
- Expert Insight
- Noise Control: Handling, Vibration, and Mechanical Creaks
- Setup and Adjustment: Height, Reach, Angle, and Safety
- Materials, Build Quality, and Longevity in Daily Use
- Accessories That Improve a Boom Stand Setup: Shock Mounts, Pop Filters, and Cable Management
- Common Mistakes and How to Avoid Them
- Maintenance, Storage, and Getting Consistent Results Over Time
- Watch the demonstration video
- Frequently Asked Questions
- Trusted External Sources
My Personal Experience
I didn’t think a microphone boom stand would make much difference until I started recording vocals in my bedroom and kept bumping my desk stand every time I leaned in. I picked up a basic boom stand, and the first night I used it I realized how much easier it was to find a comfortable position without hunching over. The boom arm let me swing the mic just off to the side of my monitor, and I could finally keep the cable out of the way instead of tangling it around my keyboard. It wasn’t perfect—if I didn’t tighten the clutch enough, the mic would slowly droop mid-take—but once I got in the habit of checking the knobs, it became one of those pieces of gear I stopped thinking about because it just worked.
Why a Microphone Boom Stand Matters for Clean Sound
A microphone boom stand is one of the most practical pieces of audio gear because it solves problems that listeners notice immediately: inconsistent volume, unwanted room noise, and the “hollow” sound that happens when a mic is positioned poorly. When a microphone is held in the hand or balanced on a desk, small movements become big changes in tone. A boom arm or boom-style stand keeps the capsule fixed at a predictable distance and angle, so the voice stays steady and intelligible. That stability also reduces the temptation to crank up gain, which often brings up computer fans, HVAC noise, and reflections from hard surfaces. For creators, musicians, streamers, and podcasters, the stand is less about looking professional and more about controlling variables that make editing easier and recordings more consistent. The difference is especially obvious with dynamic microphones, which typically need close placement for a full sound; the right stand lets you stay close without hunching forward or blocking a screen.
Beyond sound quality, a microphone boom stand improves workflow. A fixed mic position means you can focus on performance—speaking naturally, singing with confidence, or playing an instrument—without constantly adjusting hardware. Good stands also allow rapid repositioning: swing the mic away to take a call, bring it back for a take, or angle it toward a guitar amp for a quick test. When paired with proper cable management, a boom setup also keeps the workspace tidy, reducing snags and accidental pulls that can topple equipment. Many people start with a basic straight stand, then discover that a boom provides the reach needed to place the mic where it sounds best rather than where the stand happens to fit. That freedom of placement is the real value: a microphone boom stand helps you put the mic in the acoustic “sweet spot” while keeping your posture comfortable and your setup repeatable.
Types of Microphone Boom Stand Designs and When to Use Them
Not every microphone boom stand is built the same, and understanding the main designs makes it easier to match the stand to your room and your recording style. The most common floor model is the tripod-base boom stand, which combines a vertical shaft with a horizontal boom arm that can be angled and extended. This style is popular for vocals, acoustic instruments, and home studios because it’s relatively affordable and folds up for storage. The tripod legs spread out to provide stability, but they also take up floor space, which matters if you record in tight rooms or share a workspace with other equipment. Another floor option is the round-base stand, which uses a heavy disc for stability. Round bases are great where foot traffic is common, such as live stages, because they reduce tripping compared with tripod legs. They can be heavier to carry, but the weight is a feature: it helps counterbalance a long boom and a heavy microphone.
Desk-mounted boom arms are another major category and are often chosen for streaming, voiceover, and podcasting. A clamp-on arm keeps the floor clear and allows the mic to float into position from the side, which is useful when you need the desk surface for a keyboard, mixer, or writing. These arms often use springs or internal tension systems to hold position quietly, and they can be paired with a shock mount to reduce vibration from typing. For broadcast-style setups, an articulated arm can be more convenient than a floor stand because you can swing it away without changing height. However, desk booms rely on a solid mounting point; a flimsy desk edge can flex, and hollow furniture can transmit vibration. There are also low-profile booms for drum overheads and instrument miking, as well as telescoping booms designed for extra reach. Choosing among these types is less about “best” and more about the space you have, the mic weight you’re supporting, and how often you need to reposition the microphone. If you’re looking for microphone boom stand, this is your best choice.
Key Components: Boom Arm, Clutch, Counterweight, and Base Stability
A microphone boom stand looks simple, but small design details determine whether it feels solid or frustrating. The boom arm is the horizontal section that lets you position the mic over a desk, in front of a singer, or above an instrument. Better booms offer smooth extension with markings or a secure telescoping mechanism that doesn’t slip after tightening. The clutch or pivot joint at the boom angle is another critical point. If this joint is weak, the mic slowly droops during a take, forcing constant readjustment. Some stands use a single knob to lock the boom angle; others use a toothed or rosette-style joint that resists movement more effectively. When you’re placing a mic precisely—especially for voiceover where slight changes in distance alter tone—this joint quality matters as much as the microphone itself.
Counterbalancing is the next factor. Many floor stands rely on the base weight and leg spread to counter the boom’s leverage. Some models include a counterweight on the rear of the boom arm; this can dramatically improve stability when using heavy broadcast microphones or large-diaphragm condensers in shock mounts. On desk arms, tension springs serve a similar purpose, holding the arm in place while allowing movement. The base is the foundation: tripod legs should lock firmly and resist twisting, while round bases should have enough mass to prevent tipping when the boom is extended. Rubber feet reduce sliding and can dampen vibration from floors. Even the threading at the mic mount matters; stripped threads or loose adapters lead to wobbly mounts and unwanted rattles. When evaluating a microphone boom stand, it’s smart to think like an engineer: you’re building a lever system, and the quality of the joints, locks, and base determine whether it stays exactly where you put it.
Choosing the Right Microphone Boom Stand for Your Microphone Weight
Microphone weight is often underestimated, and it’s a common reason people buy a microphone boom stand twice. A lightweight handheld dynamic mic might weigh only a few hundred grams, while a broadcast dynamic mic with a yoke mount can be substantially heavier. Add a shock mount, pop filter, and a long XLR cable pulling at an angle, and the effective load increases. If the stand is rated for a light mic but you mount a heavier setup, you’ll notice drooping, joint creep, or a base that feels precarious when the boom is extended. Manufacturers sometimes list maximum load ratings, but those numbers can be optimistic if the boom is extended to its full length. A safer approach is to choose a stand that can comfortably handle your rig with room to spare, especially if you plan to upgrade microphones later.
Desk boom arms have similar considerations. Many popular arms are designed for typical studio mics, but some struggle with heavier broadcast models unless tension is adjusted correctly. If the arm uses external springs, it may creak or transmit noise when moved; internal spring designs can be quieter but still need proper tension. Floor stands for studio condensers should have a sturdy boom and a base that won’t shift if someone brushes past. If you’re using a ribbon microphone, stability becomes even more important because ribbons can be sensitive to sudden movement and air blasts; a stand that sags can lead to awkward repositioning that risks damaging the mic. A good match between mic and stand also improves safety: fewer tip-overs, fewer cable yanks, and less stress on connectors. Selecting a microphone boom stand with an appropriate weight capacity is less about overbuying and more about ensuring your recordings aren’t interrupted by hardware that can’t hold position reliably.
Placement Techniques for Voice, Podcasting, and Streaming
For spoken voice, a microphone boom stand gives you the precision needed to maintain consistent tone and minimize room sound. A common technique is to place the mic slightly off-axis—angled toward the corner of the mouth rather than directly in front—so plosives and breath noise are reduced without relying entirely on a pop filter. The boom makes this easy because you can float the mic in from the side at mouth height, keeping the stand out of the camera frame if you stream. Distance is another key variable: many dynamic microphones sound best when you’re close, often within a few inches, while condensers can work well a bit farther back. The stand lets you set that distance and keep it constant, which means your compressor and noise gate settings remain stable across sessions. If you tend to move while speaking, consider positioning the boom so the mic is slightly above mouth level and angled down; this can reduce the effect of leaning forward and back.
Desk vibration is a frequent issue in streaming setups. Keyboard taps, mouse clicks, and even subtle desk bumps can travel through the stand into the microphone. A microphone boom stand that clamps to the desk can still work well if you add a shock mount and route cables so they don’t tug on the mic. Another technique is to clamp the arm to a sturdier section of the desk, such as near a leg or frame support, rather than the center of a thin tabletop. Monitoring your positioning with a simple test recording helps: speak at your normal volume, turn your head as you naturally would, and listen for tonal shifts. Then adjust boom placement to keep your mouth within the mic’s pickup “window.” With practice, the stand becomes a repeatable positioning tool: you can mark the arm’s joints lightly, note the angle, and recreate the same sound every time you go live or record a narration.
Using a Boom Stand for Instruments: Guitar, Piano, Drums, and More
Instrument recording often benefits even more from a microphone boom stand because the best mic placement is rarely where a straight stand can reach comfortably. For acoustic guitar, a common approach is to aim the mic at the 12th fret area from several inches away, avoiding the sound hole to reduce boominess. A boom arm lets you place the mic precisely without the stand legs colliding with the player’s feet or chair. If you’re recording a guitar amp, the boom helps you angle the mic toward the speaker cone while keeping the base out of the way of cables and pedals. Small adjustments—moving the mic a centimeter or changing the angle slightly—can change brightness and punch, so a stand that locks securely and doesn’t drift is essential. For string instruments, the boom can reach over music stands and position the mic above the instrument’s body without obstructing the performer.
For drums, overhead placement often demands height and reach. A tall boom stand allows an overhead mic to sit above the kit, angled to capture cymbals and overall balance. Stability is crucial here because a falling stand can be dangerous and expensive. Using sandbags or counterweights can add safety, especially if the boom is extended far from the center of the base. For piano, a boom makes it possible to place a mic over an open lid or near the soundboard without putting a stand directly in the player’s space. In ensemble settings, booms can reach into tight areas between musicians, helping you capture sound while keeping walkways clear. In all these cases, the microphone boom stand functions as a positioning instrument: it gives you repeatable geometry, so if you find a sweet spot during one session, you can return to it later without guessing. That repeatability is a major advantage when layering tracks or matching tone across multiple recording days.
Desk Boom Arms vs Floor Boom Stands: Workspace and Ergonomics
Choosing between a desk-mounted microphone boom stand and a floor stand often comes down to how you use your space. Desk arms excel when you need the floor clear, such as in a small office where rolling chairs, footrests, and cables already compete for room. They also provide excellent ergonomics for computer-based work: you can pull the mic close when speaking, then push it away to type or game without changing the height of a floor stand. This is particularly helpful for streamers who need a consistent on-camera framing; the mic can be positioned just outside the frame, then swung in for a closer sound when needed. Desk arms can also reduce the visual clutter of tripod legs and make cleaning easier. However, they depend on the desk’s rigidity, and some furniture surfaces transmit vibration easily, which can make a desk arm feel noisier than expected unless you add isolation.
Expert Insight
Position the boom so the microphone “floats” into place: keep the stand’s base leg directly under the boom arm, extend the boom only as far as needed, and add a small counterweight (or shift the boom angle) to prevent tipping and reduce vibration. If you’re looking for microphone boom stand, this is your best choice.
Control noise at the source by tightening all clutch points, routing the cable along the boom with soft ties (leave a little slack at the mic end), and using a shock mount or isolation clip to minimize handling and floor-borne rumble. If you’re looking for microphone boom stand, this is your best choice.
Floor boom stands, on the other hand, are more universal. They don’t require a compatible desk edge, they can be moved around a room quickly, and they can reach positions that desk arms cannot, such as behind a singer or over a drum kit. They’re also easier to share among multiple people in a recording session because you can place them wherever needed without rearranging furniture. Ergonomically, a floor stand can be better for performers who stand while recording, as it can be adjusted to chest or head height and angled precisely. The tradeoff is footprint: tripod legs can become obstacles, and round bases can be heavy. For hybrid setups—work-from-home by day, recording by night—some people keep a desk boom for voice and a separate floor boom for instruments. The best approach is to consider your most frequent use case and choose the microphone boom stand style that supports it without constant compromises in posture, placement, or room flow.
Noise Control: Handling, Vibration, and Mechanical Creaks
A microphone boom stand can either reduce noise or add it, depending on build quality and setup. Mechanical noise typically comes from loose joints, cheap tightening knobs, or spring systems that creak when the arm moves. While you can often avoid moving the stand during a take, real-world sessions involve adjustments, script page turns, and occasional bumps. A well-made stand has tighter tolerances and better materials at contact points, which reduces rattles. If you already own a stand that makes noise, small fixes can help: tighten all joints firmly, ensure washers are seated, and check that the mic clip or shock mount is not vibrating against the boom. Cable noise is another culprit; if an XLR cable hangs loosely, it can tap the stand or transmit movement to the mic. Securing the cable along the boom with soft ties and leaving a small service loop near the mic can reduce transmitted vibration.
| Type | Best for | Pros | Considerations |
|---|---|---|---|
| Tripod Boom Stand | Home studios, vocals, instruments | Stable base, widely compatible, adjustable boom reach | Takes more floor space; can be awkward in tight setups |
| Desk Clamp Boom Arm | Podcasting, streaming, voiceovers at a desk | Saves floor space, easy repositioning, clean cable routing | Requires a sturdy desk edge; clamp may mark surfaces without a pad |
| Low-Profile / Weighted Base Boom Stand | Stage use, tight spaces, seated recording | Compact footprint, quick setup, good stability with weight | Less height range than tripod stands; heavier to transport |
Vibration control becomes especially important in desk setups. Typing, tapping a desk, or adjusting a monitor can send low-frequency thumps into the microphone. A shock mount is often the first line of defense, but the stand and mounting surface matter too. If a desk arm is clamped to a resonant tabletop, adding a small isolation pad between the clamp and desk can help, as can clamping near a more rigid portion of the desk. For floor stands, vibration can travel through a wooden floor when people walk nearby. Rubber feet reduce this, and placing the base on a small rug can further dampen impact noise. Another overlooked factor is airflow: fans or air conditioners can cause the boom to vibrate slightly, especially with long, lightweight arms. Positioning the stand so the boom is not directly in an air stream can prevent subtle rumble. A quiet microphone boom stand setup is not just about the mic; it’s a system that includes joints, cables, mounting surfaces, and how you interact with the space during recording.
Setup and Adjustment: Height, Reach, Angle, and Safety
Proper setup of a microphone boom stand starts with stability. For tripod models, fully spread the legs and ensure each leg is locked before extending the boom. For round-base stands, confirm the base is flat and not rocking on an uneven surface. When adjusting height, raise the vertical shaft first, then set the boom angle and extension. This sequence keeps the center of gravity more predictable and reduces the chance of tipping. If your stand has a telescoping boom, extend it only as much as needed; every extra inch increases leverage and makes droop more likely. Tighten knobs firmly but avoid over-tightening to the point of stripping threads. If you’re using a heavy microphone, consider adding a counterweight or placing a small sandbag over a tripod leg on the opposite side of the boom extension. These small safety habits protect both the microphone and anyone nearby.
Angle and reach influence sound as much as safety. For voice, aim for a position that encourages an upright posture: the mic should come to you, not force you to lean. For standing vocals, set the boom so the mic is at mouth level or slightly above, angled down, which can help reduce plosives and keep the singer from “eating” the mic unintentionally. For instruments, the boom should allow fine adjustments without moving the base repeatedly; a stable base with a well-locked pivot lets you make micro-changes in angle and distance. Always check cable slack after repositioning. A cable that is too tight can pull the mic out of alignment or stress the connector, while a cable that drags on the floor can become a trip hazard. If children, pets, or busy bandmates share the space, prioritize stands with robust bases and predictable locking mechanisms. A microphone boom stand is a piece of hardware you’ll touch constantly, so setting it up for safe, repeatable movement pays off in fewer interruptions and more confident sessions.
Materials, Build Quality, and Longevity in Daily Use
The materials used in a microphone boom stand affect not only durability but also how the stand feels during adjustments. Steel tubing tends to be heavier and more stable, which is beneficial for supporting large microphones and long booms. Aluminum can be lighter and easier to transport, but it may require thicker sections or better joint design to avoid flex. Plastic knobs and clamps can work fine on budget stands, yet they are often the first parts to crack under repeated tightening. Metal hardware usually lasts longer, especially in environments where the stand is adjusted multiple times per day. The finish matters too: powder-coated surfaces resist scratches and corrosion better than thin paint, and they tend to look cleaner over time. For desk arms, the internal mechanism is a major longevity factor; cheap springs can lose tension, while better designs maintain consistent holding power after months of use.
Thread standards and adapters also influence long-term satisfaction. Many microphones and shock mounts use common thread sizes, but adapters are frequently involved, and poorly made adapters can wobble or seize. A stand with a well-machined threaded mount reduces the chance of cross-threading, which can ruin the top of the stand or the mic mount. Another durability consideration is the boom pivot joint: if it uses a simple friction clamp, it may wear and start slipping, while a toothed joint can hold better but may limit angle granularity. For mobile use—gigging musicians, event hosts, or field recording—transport durability matters. Folding mechanisms should feel solid, and the stand should collapse without forcing parts. A microphone boom stand that lasts is typically one with fewer weak points: strong joints, solid hardware, and a base that doesn’t deform. Investing in better build quality often saves money over time because a stand is a foundational tool; when it fails, it can cause mic damage, interrupt sessions, or force last-minute replacements that are more costly than buying a reliable model in the first place.
Accessories That Improve a Boom Stand Setup: Shock Mounts, Pop Filters, and Cable Management
Accessories can transform a basic microphone boom stand into a professional, low-noise system. A shock mount is one of the most impactful upgrades, especially for condensers and for any desk-mounted setup. It suspends the microphone in elastic or silicone bands, reducing vibration from the stand, floor, or desk. This is valuable even if you’re careful, because subtle bumps happen naturally during recording. Pop filters and wind screens are equally important for voice recording. A pop filter placed a few inches in front of the mic reduces plosives from “p” and “b” sounds and encourages consistent mic distance. Many pop filters clamp directly to the boom or stand shaft; choosing a clamp that doesn’t slip avoids constant readjustment. For camera-facing setups, slimmer pop filters can be less visually intrusive while still controlling bursts of air.
Cable management is often overlooked, yet it affects both noise and convenience. Securing the XLR cable along the boom with reusable hook-and-loop ties prevents it from swinging, tapping the stand, or tugging on the mic when you move the arm. Leave a small loop near the mic mount so the cable doesn’t pull when the boom changes angle. If you use an audio interface on the desk, route the cable so it doesn’t cross walkways or chair wheels. For desk arms, some models include internal cable channels; if yours doesn’t, using soft ties keeps everything neat without pinching. Additional accessories include boom counterweights, which help with heavy microphones, and quick-release adapters, which make it faster to swap between a vocal mic and an instrument mic without rethreading hardware each time. Even small add-ons like rubberized clips or isolation pads can reduce mechanical noise. With the right accessories, a microphone boom stand becomes more than a holder; it becomes a stable platform that supports consistent sound, faster setup, and fewer distractions during recording.
Common Mistakes and How to Avoid Them
One of the most common mistakes with a microphone boom stand is extending the boom fully and then mounting a heavy microphone without counterbalancing. This creates maximum leverage and often leads to droop or tipping, especially on lightweight tripod bases. A better approach is to keep the boom as short as practical and move the base closer, or choose a heavier base designed for long reach. Another frequent issue is under-tightening or over-tightening knobs. Under-tightening causes slow sagging during a take, while over-tightening can strip threads or crack plastic knobs. Developing a habit of tightening firmly and checking joints before recording prevents surprises. People also forget to check the mic clip or shock mount connection; a slightly loose mount can rattle or rotate, producing subtle noises that are hard to diagnose later.
Placement mistakes are equally common. Positioning the mic too far away often leads to turning up gain, which increases room noise and reduces clarity. Placing it too close without a pop filter can create plosives and excessive bass due to proximity effect, especially on directional microphones. A microphone boom stand makes it easy to experiment, so take advantage of it: record short samples at different distances and angles and choose the most natural sound. Another mistake is poor cable routing. A cable that dangles can transmit movement to the mic, and a cable stretched tight can pull the boom out of position. Use ties, leave slack, and avoid running cables where chairs roll. Finally, many setups ignore the environment: a stand placed near a loud PC fan or air vent can pick up more noise than necessary. Repositioning the boom so the mic faces away from noise sources can improve recordings immediately. Avoiding these mistakes doesn’t require advanced engineering—just a little attention to balance, tightening, placement, and cable discipline so the microphone boom stand can do its job consistently.
Maintenance, Storage, and Getting Consistent Results Over Time
Maintaining a microphone boom stand is straightforward, but it has a big impact on reliability. Periodically check all fasteners, pivot points, and threaded connections for looseness, especially if the stand is moved often or used in shared spaces. Dust and grime can build up in joints and clamps, making adjustments feel rough and leading people to apply extra force that accelerates wear. Wiping down the stand with a soft cloth and keeping threads clean helps knobs tighten smoothly. If a joint starts slipping, inspect washers and friction surfaces; sometimes a worn washer is the entire problem. For desk arms with tension springs, follow the manufacturer’s guidance for tension adjustment and avoid overloading the arm beyond its intended range. If you notice creaking, identify whether it’s coming from a spring, a pivot, or a clamp, and address it before it becomes a recording-time distraction.
Storage habits also affect longevity. Floor stands should be collapsed carefully, avoiding forced angles that stress the boom joint. If you transport stands, use a bag to protect threads and knobs from impact. For round-base stands, be mindful of how the base is carried; dropping a heavy base can deform it or damage floors. If your setup stays assembled, consider how the stand lives in the room: avoid leaving a boom extended in a walkway where it can be bumped, and keep it away from direct heat sources that can degrade rubber feet or elastic shock mount bands. Consistency over time is partly mechanical and partly procedural. Marking preferred boom heights with small, removable tape indicators can help you recreate the same mic position session after session. If you record voice regularly, keeping notes on boom angle and distance can save time and keep your sound signature stable. With simple maintenance and thoughtful storage, a microphone boom stand remains a dependable part of your audio chain, helping you capture repeatable, clean recordings without constant troubleshooting.
Watch the demonstration video
In this video, you’ll learn how to choose and set up a microphone boom stand for stable, noise-free recording. It covers key features like arm length, counterweights, and clamp vs. tripod bases, plus tips for positioning your mic for clear sound while keeping your workspace comfortable and clutter-free.
Summary
In summary, “microphone boom stand” is a crucial topic that deserves thoughtful consideration. We hope this article has provided you with a comprehensive understanding to help you make better decisions.
Frequently Asked Questions
What is a microphone boom stand?
A **microphone boom stand** is a type of mic stand with an adjustable horizontal arm that extends out from the base, letting you place the microphone exactly where you need it—without the stand getting in the way.
When should I use a boom stand instead of a straight stand?
Use a boom stand when you need to reach over a desk, instrument, or drum kit, or when you want the stand base out of the way while keeping the mic close. If you’re looking for microphone boom stand, this is your best choice.
How do I choose the right boom length and height?
Choose a boom length that comfortably reaches your mic’s ideal spot without having to stretch it to the limit, and make sure the height range suits both your seated and standing setups. With a **microphone boom stand**, keep in mind that longer arms usually need a sturdier, heavier base for stable support.
How do I prevent a boom stand from tipping over?
Keep the microphone boom stand as compact as you can, with the base centered directly under the mic for solid balance. Tighten every joint so nothing slips, and if you’re using a heavier microphone, add a counterweight or switch to a sturdier base—ideally with a sandbag for extra stability.
Will my microphone fit on any boom stand?
Most stands come with the standard 5/8″-27 thread, but some microphones or clips may require an adapter—often converting 3/8″ to 5/8″. Before setting up your **microphone boom stand**, double-check the threading on your mic clip or shock mount to ensure everything fits securely.
What’s the best way to manage cables on a boom stand?
Route the cable neatly along the boom arm and down the stand, securing it with Velcro ties or clips on your **microphone boom stand**. Leave a small service loop at each joint so the cable has a bit of slack, preventing strain, rattles, and unwanted noise.
📢 Looking for more info about microphone boom stand? Follow Our Site for updates and tips!

Trusted External Sources
- Boom Mic Stand – Amazon.com
Discover mic stands with weighted bases, reinforced poles, and smooth, easy height adjustments—built to stay steady through demanding studio sessions and high-energy performances. For maximum flexibility and rock-solid support, consider a **microphone boom stand** designed to handle intense stage and recording use.
- MK10 – Samson
The MK10 Lightweight Microphone Boom Microphone Stand combines the essential elements of lightweight durability with an attractive and functional design.
- Microphone Stands – Sweetwater
Looking for the most popular options on Sweetwater.com? Some top picks include the Gator Frameworks Tripod Mic Stand with a telescoping **microphone boom stand** design, along with trusted favorites like the K&M 210/9 and other best-selling models.
- Best bang-for-buck (in terms of durability) boom mic stands for vocals?
Sep 17, 2026 … K&M is a solid choice, but I’ve had great results with the On-Stage Stands MS9701TB. It’s a bit more affordable, yet still feels sturdy and dependable—exactly what I want in a **microphone boom stand**.
- Professional Broadcast Boom Mic Stand W/ Led Light – Gator Cases
Professional desktop broadcast/podcast microphone boom stand with on-air indicator light. Includes removable 10’/3048mm XLR mic cable to accommodate most …