A blue yeti mic stand can make the difference between audio that sounds improvised and audio that feels intentional, controlled, and professional. The Blue Yeti microphone is popular because it delivers strong sound quality without requiring a complicated interface, but the mic’s weight, shape, and side-address pickup style mean placement matters more than many people expect. A stand is not just a way to keep the microphone off the desk; it’s a tool for positioning the capsule at the correct height and distance, managing vibrations, and keeping your workflow comfortable during long recording sessions. When the mic is too low, you tend to hunch and speak downward, which can introduce tonal inconsistencies and fatigue. When it’s too close to the keyboard or a resonant tabletop, the mic can pick up thumps, clicks, and low-end rumble that distract from vocals. A purposeful stand helps you keep the mic stable and aligned with your mouth, usually slightly off-axis to reduce plosives, while also leaving space for your monitor and notes.
Table of Contents
- My Personal Experience
- Choosing the Right Blue Yeti Mic Stand for Your Setup
- Understanding Mounting Standards: Threads, Adapters, and Compatibility
- Desk Boom Arm vs. Desktop Stand: Choosing the Best Form Factor
- Stability and Weight Capacity: Preventing Sag, Drift, and Tipping
- Height, Reach, and Ergonomics: Positioning for Better Sound and Comfort
- Vibration Control: Reducing Desk Noise, Rumble, and Handling Sounds
- Pop Filters, Windscreens, and the Stand’s Role in Clean Vocal Capture
- Expert Insight
- Cable Management and Desk Aesthetics: Keeping the Setup Tidy and Functional
- Best Stand Features for Streaming, Podcasting, Voiceover, and Music Demos
- Installation Tips: Clamping Safely, Adjusting Tension, and Protecting Your Desk
- Care, Maintenance, and Long-Term Reliability
- Putting It All Together: A Practical Buying Checklist and Final Setup Thoughts
- Watch the demonstration video
- Frequently Asked Questions
- Trusted External Sources
My Personal Experience
I bought a Blue Yeti a while back and didn’t realize how much the mic stand would matter until I started recording regularly. The stock desk stand picked up every little bump—keyboard taps, mouse clicks, even me setting my phone down—so my audio always had these dull thuds I couldn’t unhear. I finally switched to a simple boom arm with a proper clamp and it immediately felt cleaner and more comfortable, especially because I could keep the mic closer without hunching over. The biggest difference was how much quieter my recordings got once the mic wasn’t sitting directly on the desk. I wish I’d upgraded the stand sooner, because it made the Yeti sound like the mic I thought I was buying in the first place. If you’re looking for blue yeti mic stand, this is your best choice.
Choosing the Right Blue Yeti Mic Stand for Your Setup
A blue yeti mic stand can make the difference between audio that sounds improvised and audio that feels intentional, controlled, and professional. The Blue Yeti microphone is popular because it delivers strong sound quality without requiring a complicated interface, but the mic’s weight, shape, and side-address pickup style mean placement matters more than many people expect. A stand is not just a way to keep the microphone off the desk; it’s a tool for positioning the capsule at the correct height and distance, managing vibrations, and keeping your workflow comfortable during long recording sessions. When the mic is too low, you tend to hunch and speak downward, which can introduce tonal inconsistencies and fatigue. When it’s too close to the keyboard or a resonant tabletop, the mic can pick up thumps, clicks, and low-end rumble that distract from vocals. A purposeful stand helps you keep the mic stable and aligned with your mouth, usually slightly off-axis to reduce plosives, while also leaving space for your monitor and notes.
Before picking a specific blue yeti mic stand, it helps to understand the core decision points: mounting style, reach, stability, and how the stand fits your desk and recording habits. Some users prefer a desk clamp boom arm that swings in and out, while others want a heavy desktop base that stays put and requires no clamping. If you record podcasts with guests, a boom arm offers flexible positioning and quick adjustments, but it can transmit vibrations if the desk is shaky. If you stream games and constantly move a keyboard and mouse, a boom arm can keep the microphone off the desk surface and reduce mechanical noise. If you record voiceover and want the mic locked in one ideal spot, a weighted base can be simple and reliable. The key is to match the stand to your environment: desk thickness, available edge space for a clamp, cable routing needs, and whether you need the mic to move frequently or remain fixed. Once those constraints are clear, choosing a stand becomes a practical, confidence-building upgrade rather than a gamble.
Understanding Mounting Standards: Threads, Adapters, and Compatibility
Compatibility is the first technical hurdle when shopping for a blue yeti mic stand, because microphone stands rely on thread sizes that vary by region and by product category. The Blue Yeti typically ships with a yoke mount that can attach to a stand using a standard microphone stand thread, but many desk arms and compact stands use different thread sizes. Common sizes include 5/8″-27 (typical in the United States for mic stands) and 3/8″ (common in parts of Europe). Many accessories include adapters, but not all do, and a missing adapter can turn an exciting purchase into a frustrating delay. It’s also important to consider the direction and clearance of the yoke mount. The Yeti is a side-address microphone, so the front faces you, and the yoke’s tightening knobs can bump against certain mounts if the stand’s top plate is narrow or if the arm’s pivot point is bulky.
When evaluating a blue yeti mic stand, check whether it explicitly lists Blue Yeti support or at least mentions 5/8″ threading and includes a 3/8″ adapter. If you plan to use a shock mount, verify the shock mount’s threading and weight capacity too, because the Blue Yeti is heavier than many USB mics. A stand that holds a light dynamic microphone might sag or slowly drift downward under the Yeti’s load. Also pay attention to how the stand’s top mount connects: some use a fixed stud, others use a removable stud, and some use a flat plate with screws. A removable stud can be helpful if you want to swap between different microphones or mounts later. Finally, think about cable management. Some boom arms include internal or external channels for routing the USB cable, which can reduce tugging and accidental movement. Good cable routing also reduces handling noise because the cable isn’t rubbing against the arm with every adjustment. Compatibility isn’t glamorous, but it’s the foundation for a stand that feels secure and works smoothly every day.
Desk Boom Arm vs. Desktop Stand: Choosing the Best Form Factor
The most common debate around a blue yeti mic stand is whether to use a boom arm clamped to the desk or a desktop stand with a weighted base. A boom arm shines when you need flexibility. It can place the microphone close to your mouth for clear, intimate sound while keeping the mic away from the keyboard and mouse. That distance from the desk surface often reduces transmitted vibrations and the “desk echo” that happens when a mic sits on a resonant tabletop. A boom arm also helps with camera framing for streamers because you can position the mic just out of frame or deliberately in frame for a broadcast look. Another advantage is reclaiming desk space: the mic doesn’t occupy the center of your workspace, so you have room for notes, controllers, or a MIDI keyboard. However, not every desk is friendly to clamps. Some desks have thick edges, beveled lips, or fragile composite surfaces that don’t clamp well. If the desk wobbles, the boom arm can magnify that movement, especially if you type aggressively.
A desktop base stand can be the better choice when you want simplicity and stability without relying on a clamp. A heavy base resists tipping, and setup is straightforward: place it on the desk, screw in the mic, and record. If you frequently move your setup between rooms, a compact base stand is easy to pack. For voice calls and casual streaming, a base stand can work nicely, especially when paired with a vibration-damping pad under the base. The tradeoff is that the microphone may sit closer to the desk surface, which can increase keyboard noise and low-frequency rumble unless you manage distance and isolation carefully. Many users also find that base stands encourage poor posture because the mic sits too low, leading to a downward speaking angle. A tall desktop stand can solve this, but height and stability become more critical as the center of gravity rises. Ultimately, the best blue yeti mic stand form factor depends on how often you reposition the mic, how sensitive your desk is to vibration, and how much space you want to keep clear for your workflow.
Stability and Weight Capacity: Preventing Sag, Drift, and Tipping
The Blue Yeti is relatively heavy for a USB microphone, and that weight can expose weaknesses in a stand quickly. A blue yeti mic stand should feel solid at every joint: the clamp should bite securely without slipping, the arm springs should counterbalance the microphone without forcing you to overtighten, and the pivot points should not creak or loosen over time. Sag is the most common problem with budget boom arms. You set the mic at mouth level, start recording, and ten minutes later the mic has drooped by an inch or two. That shift changes tone and volume because your mouth-to-mic distance changes, and it can ruin consistency across takes. Drift can also happen horizontally if the arm’s joints aren’t firm, causing the mic to wander into your monitor space or out of your ideal speaking position. With a desktop base, the equivalent problem is tipping or sliding, especially if the base is light and the mic is angled forward.
To judge stability, look at the stand’s rated load capacity and compare it to the combined weight of the Blue Yeti, any shock mount, and any pop filter. Even if you don’t know the exact numbers, assume accessories add meaningful weight and leverage. A stand that is “just barely” strong enough often becomes annoying because you have to tighten knobs aggressively, which can wear threads and make adjustments tedious. For clamp arms, also consider the clamp’s contact area and padding. A wider clamp spreads pressure and reduces desk damage while improving grip. For desktop stands, a heavier base and a non-slip bottom are important, but so is the diameter of the base. A tall stand with a narrow base can wobble. If you plan to angle the microphone significantly, make sure the stand can handle off-center torque. A reliable blue yeti mic stand should hold position without constant retightening and should feel safe when you bump the desk lightly. Stability isn’t only about preventing accidents; it’s about keeping your sound consistent and your recording sessions stress-free.
Height, Reach, and Ergonomics: Positioning for Better Sound and Comfort
Ergonomics is an overlooked reason to upgrade a blue yeti mic stand. The Blue Yeti sounds best when you can keep a consistent distance—often around 4 to 8 inches depending on your voice, gain settings, and room acoustics—and when you can align the mic capsule near mouth level without craning your neck. If your stand forces you to lean forward, you’ll hear posture changes in your voice: breath support shifts, sibilance changes, and fatigue can creep into longer sessions. A stand with adequate height and reach helps you sit naturally, keep your shoulders relaxed, and maintain a steady speaking angle. For many people, a boom arm is the easiest way to achieve this because it can bring the mic in from the side at mouth height, leaving your chest open and your head upright. You can also angle the mic slightly off-axis to reduce plosives without needing to move your whole body.
Reach matters just as much as height. If the arm can’t reach far enough, you’ll end up with the mic too far away, which encourages turning up gain and picking up more room noise. If it reaches too far but lacks control, it may bounce or drift when you adjust it. A good blue yeti mic stand should allow small, precise movements: a few centimeters closer for a softer passage, slightly higher to reduce nasal tone, or slightly to the side to manage plosive consonants. Desktop stands can be ergonomic too, but they often require choosing the right height and pairing with a chair and monitor arrangement that keeps the mic near your mouth. Consider your typical posture: do you sit upright, recline slightly, or stand while recording? If you stand, you’ll need significantly more height or a floor stand; if you sit, you’ll want a stand that can clear your keyboard and place the mic where your voice is strongest. Ergonomics is not a luxury feature; it directly affects performance quality and the repeatability of your recordings.
Vibration Control: Reducing Desk Noise, Rumble, and Handling Sounds
One of the biggest practical benefits of a blue yeti mic stand upgrade is reducing mechanical noise. The Blue Yeti is sensitive enough to capture subtle room details, but that also means it can pick up taps on the desk, mouse clicks, keyboard clatter, and cable bumps. When the microphone is mounted on a stand that sits on the same surface as your typing and hand movements, vibrations can travel through the base and into the mic body. A boom arm can reduce this by decoupling the microphone from the desk surface, but it can also introduce its own vibration paths if the clamp is attached to a shaky desk. The best results come from combining the right stand with smart isolation choices, such as using a shock mount, adding a soft pad under a desktop base, or using a clamp arm with sturdy joints and good damping.
Shock mounts are especially helpful when paired with a blue yeti mic stand because they suspend the microphone in elastic bands, reducing transmitted vibrations. Not all shock mounts fit the Blue Yeti perfectly, so verify compatibility before buying. Another strategy is cable discipline: if the USB cable is taut or draped in a way that rubs against the stand, it can transmit noise. Route the cable with gentle loops and secure it with soft ties so movement doesn’t pull the mic. If you use a boom arm, consider adding a small amount of slack near the microphone so adjustments don’t tug the cable. For desktop stands, consider positioning the stand on a separate surface or a thick desk mat that dampens vibrations. Also consider the physical act of adjusting the mic: cheap stands often creak or squeak at the joints, and that noise can be captured if you adjust while recording. A well-built stand feels smooth and quiet. Vibration control is not about chasing perfection; it’s about removing the most common distractions so your voice stays front and center in the recording.
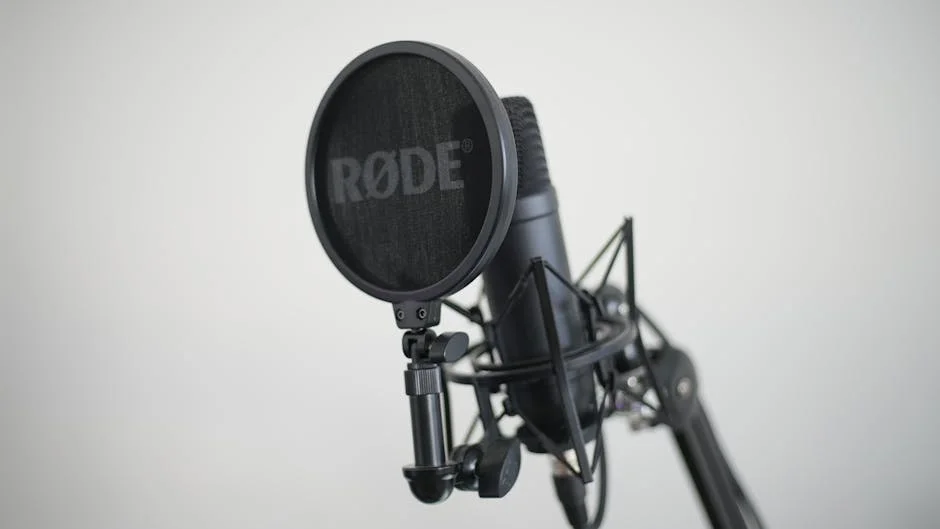
Pop Filters, Windscreens, and the Stand’s Role in Clean Vocal Capture
A blue yeti mic stand isn’t just a support; it’s the anchor point for accessories that improve vocal clarity. Plosive sounds like “P” and “B” can overload the mic capsule with bursts of air, creating thumps that are hard to fix later. A pop filter—usually a mesh screen—helps diffuse that air before it hits the mic. Windscreens can also help, especially in rooms with fans or air conditioning. The stand determines how easily you can place these accessories at the right distance and angle. With a boom arm, you can mount a pop filter to the arm or to the desk, placing it consistently between your mouth and the mic. With a desktop stand, you may need a clamp-on pop filter that attaches to the stand’s pole or base. If the stand is too short or the mic sits too low, the pop filter may end up at an awkward angle, leading you to lean in and compromise posture.
| Option | Best for | Key advantages | Watch-outs |
|---|---|---|---|
| Desktop tripod (stock-style) | Simple desk setups with minimal movement | Fast to set up, stable on flat surfaces, compact | Takes desk space; limited height/positioning; can transmit desk vibrations |
| Boom arm (desk clamp) | Streaming, podcasting, and frequent repositioning | Frees desk space, flexible placement, easier mic-to-mouth positioning | Needs sturdy desk edge; may require a shock mount; check arm load rating for Blue Yeti weight |
| Floor stand / tall boom stand | Standing desks, shared workspaces, or keeping the desk uncluttered | No desk clamp needed, wide height range, can place mic off-desk | Larger footprint; cable management can be messier; stability varies—use a weighted base if needed |
Expert Insight
Choose a stand that matches your recording style: a low-profile desktop stand reduces keyboard bumps, while a boom arm frees desk space and lets you position the mic closer for a fuller sound. Look for a sturdy base, smooth joints, and a standard 5/8″ mount (or include a 3/8″ adapter) to ensure the Blue Yeti sits securely without wobble. If you’re looking for blue yeti mic stand, this is your best choice.
Dial in placement before tightening everything down: set the mic 6–10 inches from your mouth, slightly off-axis to reduce plosives, and keep it at mouth level to avoid a thin, distant tone. Add a shock mount or use a stand with vibration isolation, and route the USB cable along the arm with Velcro ties to prevent cable tug from transferring noise into your recordings. If you’re looking for blue yeti mic stand, this is your best choice.
Accessory placement affects tone. A pop filter too close to the mic can create reflections or slightly dull high frequencies, while too far from the mic can be less effective. Many people find a sweet spot where the pop filter is a couple of inches from the mic and you speak a few inches from the filter, keeping overall distance consistent. A stable blue yeti mic stand makes it easy to maintain that spacing. Another consideration is the Blue Yeti’s side-address design: you should speak into the front of the mic, not the top. A stand that allows you to rotate and lock the microphone so the front faces you correctly is important, especially if you frequently move the mic out of the way. If you add a ring light or camera, the stand’s reach can help keep the pop filter from blocking your face. Clean vocal capture is the result of many small choices, and the stand is the central piece that keeps those choices consistent session after session.
Cable Management and Desk Aesthetics: Keeping the Setup Tidy and Functional
Even the best microphone can feel annoying if the desk is tangled with cables, and a blue yeti mic stand can either help or worsen the situation. The Blue Yeti uses USB, which is convenient, but USB cables are often stiff and can pull on the microphone if routed poorly. A boom arm with built-in cable channels or clips can keep the cable aligned with the arm’s movement, preventing snagging when you swing the mic away. External clips can work just as well if they’re placed thoughtfully: one near the mic to prevent tugging, another near the arm’s base to guide the cable toward your computer. A desktop stand can also benefit from cable management, especially if the cable drapes across your workspace and catches on your hands or keyboard. Routing the cable behind the monitor or along the desk edge can reduce accidental bumps that transmit noise.
Aesthetics matter more than vanity; they affect how pleasant the workspace feels and how quickly you can start recording. A cluttered setup can create friction, making you less likely to record spontaneously. A blue yeti mic stand that matches your style—black, white, or metal finishes—can visually integrate with your keyboard, monitor arms, and lighting. Some stands look industrial and prominent, which can be a positive for streaming, while others are minimalist and disappear into the background for a cleaner on-camera look. Consider the clamp footprint too: some clamps are bulky and interfere with drawers or desk shelves. Also consider whether the stand blocks access to ports or the ability to slide a laptop stand. A tidy cable run reduces wear on the USB connector and can prevent intermittent disconnections caused by strain. When the microphone can move freely without pulling the cable, adjustments become effortless, and you can focus on performance rather than troubleshooting. A neat workspace also makes it easier to maintain consistent mic placement because you’re not constantly moving objects around to make room for the stand.
Best Stand Features for Streaming, Podcasting, Voiceover, and Music Demos
Different recording scenarios benefit from different blue yeti mic stand features. For streaming, quick repositioning is valuable. You may want to swing the mic closer during quiet commentary and move it away when you’re not speaking. A boom arm with smooth articulation and reliable tension makes that easy. Streamers also often need the mic to stay out of the way of the keyboard and mouse, so an arm with good horizontal reach and a strong clamp can be ideal. For podcasting, consistency and comfort are key. If you record long conversations, a stand that holds position without drifting helps maintain a steady sound throughout the session. If you have multiple speakers, you might use multiple stands, and matching arms can help keep a uniform look and consistent mic technique. For voiceover, precision matters: you’ll likely dial in a specific mic distance and angle and keep it there. A stable arm or a sturdy floor stand can work, but many voiceover setups prefer a stand that minimizes vibrations and allows fine adjustments without noise.
For music demos, the Blue Yeti is not a traditional studio condenser with XLR, but it can still capture vocals, acoustic guitar, and room ideas. In that context, a blue yeti mic stand with greater height range can be helpful so you can position the mic at chest height for guitar or slightly above mouth level for vocals. You might also want a stand that can rotate and lock securely if you switch between cardioid and other pickup patterns. Another feature to consider is how the stand interacts with your monitoring setup. If you use headphones, you’ll want the stand to avoid interfering with cable runs and to keep the mic from blocking your view of lyrics or a screen. If you use speakers, you may want the stand to help place the mic in a spot that reduces feedback and room reflections. The “best” stand is not universal; it’s the one that supports your specific workflow with minimal friction. Prioritizing features that match your use case will lead to better recordings than simply buying the most expensive option.
Installation Tips: Clamping Safely, Adjusting Tension, and Protecting Your Desk
Proper installation is crucial to getting the most from a blue yeti mic stand, especially with clamp-based boom arms. Start by choosing a solid section of desk edge with enough depth for the clamp to grip fully. Avoid clamping to thin, hollow, or damaged sections where pressure might cause cracking. Many clamps include protective pads, but adding a thin piece of rubber or felt can further protect the surface and improve grip. Tighten the clamp gradually and evenly; overtightening can dent softer desks and may not actually improve stability. Once clamped, test the arm’s movement without the microphone attached to ensure the joints feel smooth and secure. If the arm uses springs, keep fingers clear of moving parts during adjustments. When mounting the Blue Yeti, support the microphone with one hand while tightening the mount with the other to avoid sudden drops or thread crossovers.
Adjusting tension is where many people get frustrated, but it’s straightforward with patience. If the arm droops, increase tension slightly at the relevant joint rather than cranking every screw. If the arm is too stiff, loosen gradually so you can reposition without jerky movement. A blue yeti mic stand should allow controlled movement and then hold its place. After you set the mic position, do a gentle “bump test” by tapping the desk lightly and listening through headphones to gauge vibration transfer. If you hear a lot of rumble, consider adding a shock mount, repositioning the clamp, or using a desk mat to dampen vibrations. For desktop stands, ensure the base is on a clean surface so the non-slip pad can grip. If the stand slides, a rubber pad can help. Also plan your cable route before you finalize the mic position. If the cable is pulling, it can slowly change the mic angle and introduce noise. Installation isn’t just assembly; it’s optimizing the stand so it becomes invisible in use—stable, quiet, and always where you need it.
Care, Maintenance, and Long-Term Reliability
A blue yeti mic stand is a mechanical tool, and like any tool with joints and threads, it benefits from basic care. Over time, screws can loosen due to repeated adjustments, and springs can settle. Make it a habit to check key joints occasionally, especially if you notice slight drift or new noises when moving the arm. If your stand uses exposed springs, keep them free of dust and avoid spilling drinks nearby, as sticky residue can make movement uneven. For stands with threaded connections, avoid overtightening, which can strip threads or crack plastic components. If you frequently detach the mic, consider leaving an adapter on the stand to reduce wear on the microphone mount threads. Also inspect the clamp padding periodically; worn padding can reduce grip and increase the chance of desk damage.
Noise is another maintenance signal. If your blue yeti mic stand starts squeaking, it may need a small amount of appropriate lubricant at the pivot points, but apply cautiously and avoid anything that could drip onto the desk or microphone. Some stands use nylon washers that can wear; replacing washers can restore smooth motion and reduce creaks. Cable clips can also wear out; replacing them keeps cable management effective and reduces tugging on the mic’s USB port. If you move your setup often, pack the stand carefully to avoid bending joints or stressing springs. For desktop stands, check the base’s non-slip material; if it hardens or peels, the stand may slide more easily. Long-term reliability is about preserving the stand’s ability to hold position and move smoothly without noise. A well-maintained stand can last for years and can even outlive the microphone itself, making it a smart investment in the overall quality and convenience of your recording environment.
Putting It All Together: A Practical Buying Checklist and Final Setup Thoughts
When narrowing down options, it helps to use a practical checklist that reflects how you actually record. Start with compatibility: confirm thread size support and included adapters, and ensure the mount style works with the Blue Yeti’s yoke or with a compatible shock mount. Next evaluate stability and capacity: choose a stand rated comfortably above the combined weight of the mic and accessories, and prioritize joints that hold position without constant retightening. Then consider ergonomics: make sure the stand can place the mic at mouth level with enough reach to avoid leaning forward, and plan for an off-axis angle to reduce plosives. Factor in vibration control: decide whether a boom arm or a desktop base makes more sense for your desk, and consider adding isolation if your environment is noisy or your desk is resonant. Finally, consider cable routing and desk layout so the microphone can move without pulling on the USB cable or cluttering your workspace. If you’re looking for blue yeti mic stand, this is your best choice.
The best outcome is a setup where the microphone is easy to position, comfortable to use, and consistent from session to session. A blue yeti mic stand that matches your space and recording habits will make your voice sound more controlled because you’ll naturally maintain a steady distance and angle, and it will make your workflow smoother because you won’t fight sagging joints or a sliding base. Small details—like a clamp that fits your desk, an arm that doesn’t squeak, or a base that doesn’t transmit every keystroke—add up to a recording experience that feels dependable. If you stream, podcast, or record voiceovers regularly, a stand is one of the most noticeable quality-of-life upgrades you can make because it reduces friction every time you sit down to record. With the right choice and a careful setup, a blue yeti mic stand becomes an invisible support system: stable, quiet, and always ready when you are.
Watch the demonstration video
In this video, you’ll learn how to choose and set up a mic stand for the Blue Yeti, including compatible stand types, mounting options, and simple adjustments for better positioning. It also covers stability tips, cable management, and how proper placement can improve comfort and sound quality for streaming, podcasting, or calls. If you’re looking for blue yeti mic stand, this is your best choice.
Summary
In summary, “blue yeti mic stand” is a crucial topic that deserves thoughtful consideration. We hope this article has provided you with a comprehensive understanding to help you make better decisions.
Frequently Asked Questions
What type of mic stand works best with a Blue Yeti?
A desk boom arm or a sturdy desktop stand with a 5/8″-27 mic thread works well; the Blue Yeti’s mount typically adapts from 3/8″ to 5/8″ with an included or added adapter. If you’re looking for blue yeti mic stand, this is your best choice.
Does the Blue Yeti fit on standard boom arms?
Most standard boom arms will work with a **blue yeti mic stand** as long as they use a 5/8″-27 threaded stud—or you add a simple 3/8″↔5/8″ adapter—and they’re sturdy enough to support the Yeti’s weight.
How much weight capacity should a boom arm have for a Blue Yeti?
Choose a **blue yeti mic stand** arm that’s rated for at least 2.5 lb (1.1 kg) to prevent sagging and keep your setup steady—especially if you plan to add a shock mount.
Do I need a shock mount for the Blue Yeti on a stand?
A shock mount isn’t strictly necessary, but using one that fits your **blue yeti mic stand** can noticeably cut down on vibrations and accidental bumps from your desk—especially if you’re mounting the mic on a boom arm.
Why does my Blue Yeti droop or rotate on the stand?
If your mic keeps drooping, it’s usually because the boom arm isn’t rated for the weight, the pivot/hinge tension has worked loose, or the mounting hardware wasn’t tightened enough. For a stable **blue yeti mic stand**, snug up every joint and fastener, then switch to a boom arm with a higher load capacity if it still sags.
How can I reduce noise and improve positioning with a Blue Yeti mic stand?
Use a boom arm to place the mic 6–12 inches from your mouth, add a pop filter, route the USB cable to avoid pulling, and use a shock mount or isolation to cut vibrations. If you’re looking for blue yeti mic stand, this is your best choice.
📢 Looking for more info about blue yeti mic stand? Follow Our Site for updates and tips!

Trusted External Sources
- Blue Yeti owners, can you lead me to the mic arm you are using?
As of Nov 11, 2026, there are a couple of solid accessories worth considering for your setup—starting with the Knox Studio Boom Microphone Arm Stand for Yeti and Snowball mics, priced around $29.99. If you’re also looking to reduce vibrations and handling noise, the Auphonix aluminum shock mount for the Blue Yeti comes in at about $29.97, making it an easy add-on alongside a reliable **blue yeti mic stand**.
- Amazon.com: Youshares Blue Yeti Mic Stand with Pop Filter
Stability is built in: this heavy-duty microphone boom arm supports mics up to 1.4 kg (3 lbs), with strong springs that keep everything steady and secure during recording or streaming. It’s a reliable choice if you’re looking for a **blue yeti mic stand** that won’t sag, wobble, or drift out of position.
- blue yeti accessories – Best Buy
Blue Microphones’ Blackout Blue Yeti bundle comes with everything you need to upgrade your setup, including a **blue yeti mic stand** with a boom arm, plus a pop filter and shock mount for cleaner, more professional-sounding audio. It also features convenient mute and volume controls, and the kit includes Knox Gear accessories to round out the package.
- Microphone Stand for Blue Yeti, Quadcast Boom Arm Scissor Mic …
Designed to work seamlessly with the Blue Yeti and Snowball—and compatible with most standard-sized microphones—this **blue yeti mic stand** includes an industry-standard 3/8″ to 5/8″ screw adapter for an easy, secure fit and reliable support.
- Blue Yeti Low-profile Microphone Stand – Etsy
Explore more from this shop, including Blue Yeti replacement mounting hardware, an original-style **blue yeti mic stand**, and a low-profile Blue Snowball microphone stand—all starting at $12.99.