A reliable 3d print bed is the quiet foundation behind nearly every successful part, yet it’s often treated like a simple platform rather than a tuned system. The bed is where the first layer is formed, and that first layer determines whether the print stays stable for hours or turns into a warped, stringy failure that drags across the nozzle. The earliest moments of a job are dominated by bed temperature, surface texture, cleanliness, and leveling accuracy. If the surface is inconsistent, oily, scratched in the wrong way, or not flat relative to the nozzle path, the filament can’t create uniform contact. That lack of contact becomes a chain reaction: poor adhesion causes corners to lift, lifted corners collide with the nozzle, collisions cause layer shifts or broken supports, and the entire print can fail long after the root cause occurred. A good build surface doesn’t just “stick”; it sticks in a controlled way, releasing the part without damage once the print cools or the surface is flexed. That balance between grip and release is what separates a frustrating setup from a predictable workflow.
Table of Contents
- My Personal Experience
- Understanding the 3d print bed and why it matters
- Common 3d print bed types and surface materials
- Leveling, tramming, and flatness: getting the first layer right
- Temperature control and heat distribution on the 3d print bed
- Adhesion methods: when the surface alone isn’t enough
- Cleaning and maintenance habits that keep the 3d print bed consistent
- Material-specific bed strategies for PLA, PETG, ABS/ASA, and nylon
- Expert Insight
- Print removal techniques that protect the 3d print bed
- Troubleshooting 3d print bed problems: warping, poor adhesion, and first-layer defects
- Upgrades and accessories that improve 3d print bed performance
- Workflow habits for repeatable results on the 3d print bed
- Choosing the right 3d print bed setup for your printer and goals
- Frequently Asked Questions
My Personal Experience
I used to think my 3D printer was just “finicky,” but it turned out most of my problems came from the print bed. My first few prints would start fine and then peel up at the corners halfway through, especially on longer parts. After a lot of trial and error, I finally slowed down and actually leveled the bed properly, cleaned it with isopropyl alcohol, and stopped touching it with my fingers. I also bumped the bed temperature up a few degrees and added a small brim for anything with sharp corners. The difference was immediate—better first layers, fewer failed prints, and way less time babysitting the machine. Now I treat the bed like the foundation of the whole process, because if that first layer isn’t right, nothing else really matters. If you’re looking for 3d print bed, this is your best choice.
Understanding the 3d print bed and why it matters
A reliable 3d print bed is the quiet foundation behind nearly every successful part, yet it’s often treated like a simple platform rather than a tuned system. The bed is where the first layer is formed, and that first layer determines whether the print stays stable for hours or turns into a warped, stringy failure that drags across the nozzle. The earliest moments of a job are dominated by bed temperature, surface texture, cleanliness, and leveling accuracy. If the surface is inconsistent, oily, scratched in the wrong way, or not flat relative to the nozzle path, the filament can’t create uniform contact. That lack of contact becomes a chain reaction: poor adhesion causes corners to lift, lifted corners collide with the nozzle, collisions cause layer shifts or broken supports, and the entire print can fail long after the root cause occurred. A good build surface doesn’t just “stick”; it sticks in a controlled way, releasing the part without damage once the print cools or the surface is flexed. That balance between grip and release is what separates a frustrating setup from a predictable workflow.
The 3d print bed also influences dimensional accuracy, surface finish, and even mechanical strength. If the first layer is too squished, the base can elephant-foot outward, throwing off tight tolerances and making parts hard to assemble. If it’s too high, the extruded lines don’t fuse well to each other or to the surface, leaving gaps that weaken the base and let air drafts creep underneath. Bed temperature affects crystallization and shrink behavior for materials like ABS, ASA, PETG, and nylon; it can also change how glossy or matte a bottom surface looks. The bed’s mechanical rigidity matters too: a thin or poorly supported plate can sag slightly when heated, creating a center-low or center-high profile that makes calibration feel inconsistent. Even the way the bed is mounted—on springs, silicone spacers, or a fixed kinematic setup—changes how often it drifts out of alignment. Treating the build plate as a system with thermal, mechanical, and chemical variables makes troubleshooting faster and results more repeatable.
Common 3d print bed types and surface materials
Choosing the right 3d print bed surface is often the fastest way to improve adhesion without overcomplicating slicer settings. The most common modern option is a spring steel sheet with a PEI coating. PEI provides strong adhesion for PLA, PETG, and many engineering filaments when clean, and spring steel allows easy part removal by flexing. Smooth PEI yields a glossy bottom finish and is great for accurate dimensions, while textured PEI hides minor first-layer artifacts and can reduce the “too-sticky” effect with PETG by lowering contact area. Glass beds are still popular because they’re flat, inexpensive, and produce a very smooth underside; many users pair glass with a thin adhesive layer (glue stick, hairspray, or specialized bed adhesive) to tune grip and release. Another option is a PC (polycarbonate) sheet or Garolite (G10/FR4), which can be excellent for nylon and some composites. Each surface has a personality: some prioritize adhesion, others prioritize easy release or durability, and the best choice depends on what you print most and how much maintenance you’re willing to do.
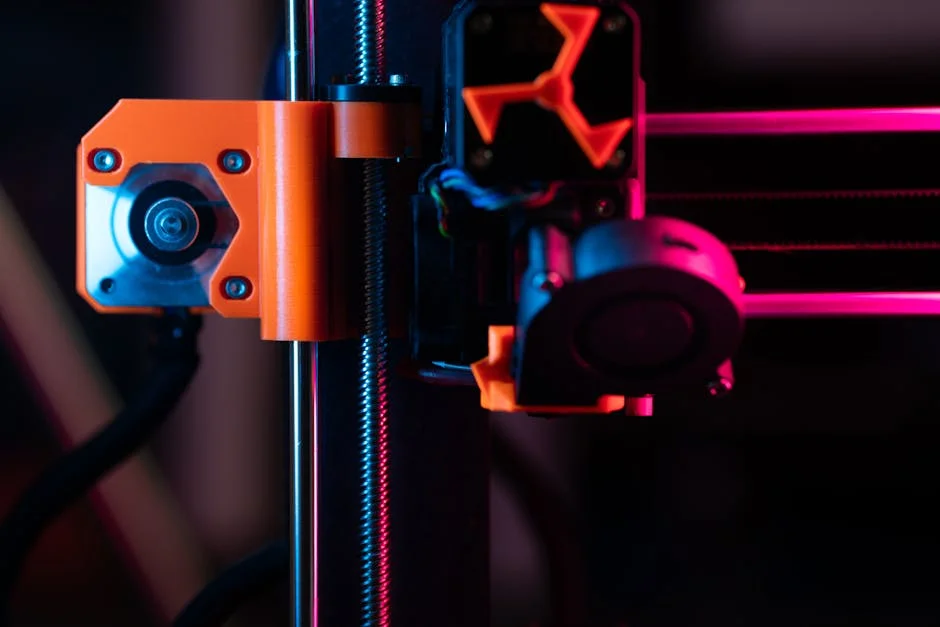
Beyond the plate itself, the heater and mounting style shape performance. An aluminum heated plate with a bonded heater spreads heat more evenly than a small PCB heater, especially on larger machines. Silicone heaters adhered to a thick aluminum tooling plate can deliver excellent uniformity, which matters for ABS/ASA where corner lift is common. Magnetic beds add convenience, but magnets lose strength at higher temperatures, so high-temp materials may require a magnet rated for heat or a different mounting approach. Some printers use removable build plates with indexing features to maintain alignment, while others rely on manual repositioning that can introduce slight shifts. When selecting a 3d print bed configuration, it helps to think about the entire stack: heater, substrate, surface coating, and any removable sheet. A well-matched stack reduces the need for aggressive adhesives, minimizes warping from thermal gradients, and makes first-layer tuning less sensitive to small environmental changes.
Leveling, tramming, and flatness: getting the first layer right
Many first-layer problems blamed on filament or slicer settings are actually 3d print bed alignment issues. “Leveling” is often used as a catch-all term, but there are distinct concepts: tramming (making the bed plane parallel to the nozzle’s XY motion), mesh compensation (mapping local height variations), and true flatness (the bed being physically flat). Tramming can be done manually with screws, knobs, or fixed spacers, and it sets the baseline. A mesh system then measures deviations so the printer can slightly adjust Z during the first layers. Mesh compensation is helpful, but it is not a substitute for a badly trammed bed; if the bed is significantly tilted, the mesh corrections become large and can cause inconsistent extrusion as Z constantly changes. True flatness depends on the bed material, thickness, and how it’s mounted. Even a high-quality plate can warp slightly when heated, and clamps or uneven mounting pressure can introduce a subtle bow. Understanding which of these factors is causing trouble speeds up correction and avoids the endless loop of adjusting Z offset without solving the real problem.
Good tramming and Z offset tuning create a first layer that is uniform across the entire 3d print bed. Visually, you want first-layer lines that touch and slightly flatten without being gouged. If you see gaps between lines, the nozzle is too high or the bed is too low in that region. If the surface looks rough, overly thin, or the nozzle is scraping, the nozzle is too low. The most reliable approach is to heat the bed to printing temperature before calibrating, because thermal expansion changes geometry. On printers with springs, consider upgrading to silicone spacers or stiffer springs to reduce drift. For machines that use a probe, ensure the probe is mounted rigidly and that the nozzle is clean; a blob of plastic on the nozzle can throw off probing by fractions of a millimeter—enough to ruin adhesion. When you treat the first layer as a measurable outcome rather than a guess, the build surface becomes predictable, and prints become repeatable across different materials and jobs.
Temperature control and heat distribution on the 3d print bed
Bed temperature is not just about making plastic stick; it’s about managing shrink forces and keeping the bottom layers stable while the rest of the part grows. A 3d print bed that runs too cool for the material allows edges to contract and lift, especially on large footprints. ABS and ASA typically need a hotter plate than PLA, and they benefit from stable ambient conditions as well. PETG often adheres strongly even at moderate temperatures, but it can fuse too aggressively to some surfaces if the bed is too hot or the first layer is over-squished. Nylon and polycarbonate generally demand higher temperatures and a surface that can hold them without peeling. The correct bed temperature is also influenced by the printer’s environment: drafts from an open window, a ceiling fan, or an air conditioner can cool the edges of the bed and create uneven adhesion. Even the height of the part matters; tall prints increase the time the base is exposed to airflow, increasing the chance of lifting at corners if the bottom layers cool too quickly.
Uniform heat distribution across the 3d print bed is a common hidden variable. Many printers read bed temperature from a thermistor near the center, but the corners can be significantly cooler, especially on large beds or with underpowered heaters. That temperature gradient is why some prints look perfect in the middle but lift at the edges. Thick aluminum tooling plates help spread heat, and insulating the underside of the bed can reduce heat loss and improve stability. A simple silicone foam or cork insulation layer can make the bed reach target temperature faster and maintain it with less fluctuation. For advanced setups, running a PID tune for the bed (if firmware supports it) can reduce overshoot and oscillation that might cause inconsistent first-layer behavior. When evaluating temperature, consider using an infrared thermometer or a thermal camera to spot cold zones; it’s often eye-opening to see how much variation exists. Better thermal management reduces the need for adhesives and makes the same settings work more consistently across seasons.
Adhesion methods: when the surface alone isn’t enough
Even with a quality 3d print bed surface, there are times when an adhesion aid is the most practical tool. Glue stick is popular because it’s cheap, easy to apply, and acts as both an adhesive and a release layer—particularly useful for PETG, which can bond too strongly to bare PEI or glass. Hairspray can work, but it tends to overspray and build up residue in the printer’s mechanics, so controlled application is important. Specialized bed adhesives, often water-based, provide more consistent performance and are easier to clean than some household products. For ABS and ASA, a slurry or dedicated adhesive can help prevent corner lift, especially on larger parts, though an enclosure and stable heat often matter more than any glue. For nylon, Garolite or a nylon-specific adhesive is often a better approach than trying to force adhesion on a surface that doesn’t match the polymer’s behavior. The key is to use adhesion aids as a tuning layer rather than a permanent crutch for poor leveling or dirty surfaces.
Application technique affects results as much as the product itself. A thin, even layer on the 3d print bed usually performs better than a thick, patchy coat that creates lumps and inconsistent Z height. If you’re using glue stick, dampening a paper towel and spreading the glue into a uniform film reduces ridges. For liquid adhesives, apply while the bed is cool if recommended, then let it dry before heating to print temperature. Pay attention to where you need extra hold: corners and thin contact areas benefit from slightly more adhesion, while large flat areas often need less to avoid difficult removal. Consider also the release behavior: some adhesives hold strongly when hot and release when cool, which can be ideal for large prints that would otherwise warp during cooling. Cleaning cycles matter; letting layers of adhesive build up can cause uneven first layers. Regularly resetting the surface—by washing with warm water for water-soluble adhesives or using isopropyl alcohol for lighter residue—keeps adhesion consistent and reduces surprises from one print to the next.
Cleaning and maintenance habits that keep the 3d print bed consistent
A clean 3d print bed is one of the most cost-effective upgrades you can make, because contamination is a leading cause of “random” adhesion failures. Finger oils are especially problematic; they can form invisible patches that repel molten plastic, causing corners to lift or parts to detach mid-print. Dust, filament debris, and leftover adhesive also interfere with the first layer, creating localized high spots or slick areas. For PEI surfaces, isopropyl alcohol (IPA) is a common daily cleaner, but it doesn’t remove all contaminants equally well; sometimes it simply smears oils around. Periodically washing the plate with warm water and dish soap can restore surface energy far better than repeated IPA wiping. For glass, a thorough wash and a final wipe with IPA can remove residue and improve consistency. The right routine depends on your materials and environment, but the goal is the same: keep the surface chemistry stable so the same Z offset and temperature produce the same adhesion every time.
Maintenance also includes inspecting the 3d print bed for wear and mechanical issues. Textured coatings can get polished smooth in the areas you print most, reducing grip over time. Smooth PEI can develop micro-scratches that trap debris or create uneven adhesion patterns. If you use a scraper aggressively, you may gouge the surface, creating permanent low spots that show up as first-layer inconsistencies. Spring steel sheets can become slightly bent if handled roughly, and magnets can accumulate dust or iron particles that create bumps under the sheet. It’s worth checking the underside of removable plates and wiping the magnet surface clean. For printers with manual leveling screws, verify that knobs haven’t loosened due to vibration; a dab of thread locker or switching to lock nuts can help. If you notice repeating adhesion issues in the same location, rotate the sheet occasionally to distribute wear. Consistent results come from treating the bed as a precision surface rather than a disposable platform.
Material-specific bed strategies for PLA, PETG, ABS/ASA, and nylon
Different filaments behave differently on the 3d print bed, and using one universal approach can lead to avoidable failures. PLA generally prints easily on PEI, textured plates, and even bare glass, but it can lose adhesion if the surface is oily or if cooling is too aggressive on the first few layers. Many users find that a modest bed temperature improves reliability, especially for larger parts, but excessive heat can soften the base and cause edge deformation. PETG is often the opposite: it adheres strongly, sometimes too strongly, and can damage certain surfaces if printed directly on them with a tight first layer. A release layer like glue stick can protect the surface and make removal safer. ABS and ASA shrink more, so they demand a warmer bed and controlled ambient temperature; without an enclosure or draft protection, even a perfect first layer may lift hours into a print. Nylon is hygroscopic and can warp; it benefits from high bed temperatures, a compatible surface like Garolite, and careful drying, because wet nylon can curl and detach more easily.
| Print Bed Type | Best For | Pros | Cons / Watch Outs |
|---|---|---|---|
| PEI Spring Steel (flex plate, smooth/textured) | Everyday printing (PLA, PETG, ABS/ASA with enclosure) | Excellent first-layer adhesion; easy part removal by flexing; durable; quick surface swaps | Can scratch if using metal tools; PETG can bond too strongly on smooth PEI (use release agent); needs occasional cleaning |
| Glass Bed (borosilicate / coated glass) | Flatness-focused prints; glossy bottom finish (PLA) | Very flat; consistent surface; easy to clean; smooth underside finish | Heavier/slower heat-up; adhesion can be inconsistent without glue; parts may stick too hard when hot or pop off when cooling |
| BuildTak / Textured Sticker Sheet | Strong grip for tricky first layers (PLA, some PETG) | High adhesion; inexpensive; simple to apply; good for small/warpy parts | Surface wears and can tear; can over-grip PETG/TPU; removal can damage sheet; needs careful nozzle height |
Expert Insight
Level the 3D print bed with the nozzle and bed at printing temperature, then verify with a first-layer test pattern. Adjust in small increments until lines are slightly squished and continuous, with no gaps or ridges.
Keep the bed surface consistent: clean it with isopropyl alcohol before each print, and refresh adhesion only as needed (glue stick, PEI scuff, or a light recoat). If corners lift, increase first-layer height slightly and add a brim to stabilize the part. If you’re looking for 3d print bed, this is your best choice.
Fine-tuning per material often means adjusting not only temperature but also first-layer speed, fan behavior, and Z offset relative to the 3d print bed. PLA likes a clean surface and usually tolerates a bit more squish, but too much can create elephant-foot. PETG prefers slightly less squish and slower first-layer speed to avoid over-bonding and to reduce nozzle dragging through sticky lines. ABS/ASA often benefits from a thicker first layer and reduced cooling fan, letting the base stay warm and flexible as the part grows. For nylon, slow first layers, strong adhesion, and a stable heat field matter more than aggressive squish, which can create internal stress. If you print many materials, consider keeping multiple build surfaces and swapping them: a textured PEI sheet for PLA and PETG, a dedicated smooth sheet with a release layer for PETG-heavy work, and a Garolite plate for nylon. Matching the surface to the polymer reduces trial-and-error and helps each material behave predictably across different part geometries.
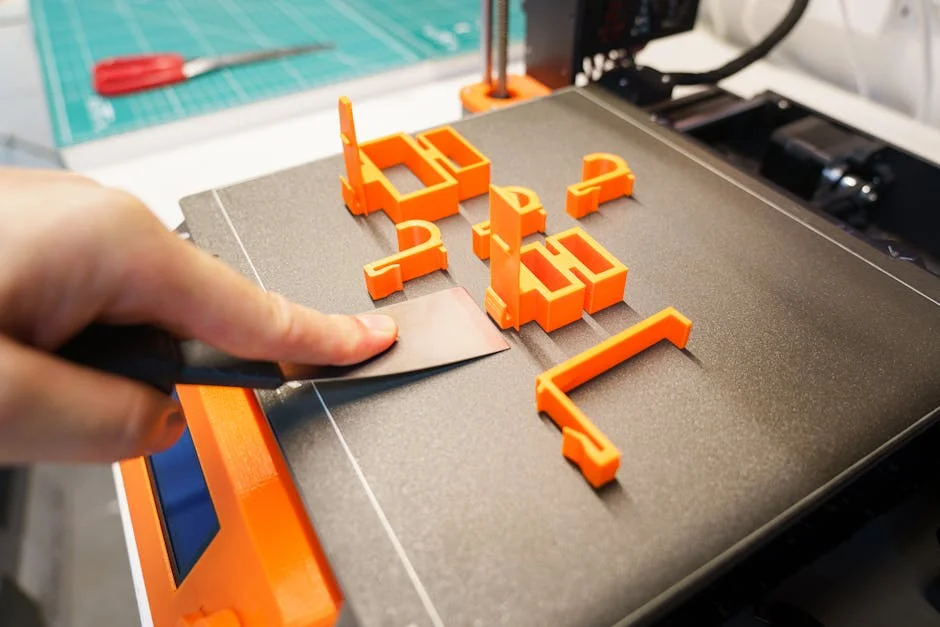
Print removal techniques that protect the 3d print bed
Removing parts safely is as important as getting them to stick, because damage during removal shortens the life of the 3d print bed and introduces future first-layer problems. The most reliable technique is patience: many materials release more easily once the bed cools. As the plate contracts, the part often loosens on its own, especially on PEI and glass. For flexible spring steel sheets, removing the sheet and gently flexing it is usually safer than prying at the part while the plate is still mounted. Avoid using sharp metal tools that can gouge coatings or chip glass; if you need a tool, a plastic scraper or a thin, blunt spatula is less likely to cause permanent damage. For prints with large footprints, cooling to room temperature can make a dramatic difference. In some cases, a short time in a cool environment helps, but rapid thermal shocks should be avoided on glass to prevent cracking.
When a print is truly stuck, the best approach is to change the interface rather than increase force. A small amount of isopropyl alcohol wicked around the base can seep under some materials and reduce adhesion on certain surfaces, though results vary. Warm water can dissolve water-soluble adhesives used on the 3d print bed, allowing the part to release without prying. For PETG that has bonded too hard to smooth PEI, a release layer on future prints is the safer fix; forcing removal can tear chunks of coating. If you frequently print parts that must be extremely flat and wide, consider adding a small chamfer to the model’s bottom edges or using a brim that is easier to peel, reducing the chance of corner damage during removal. Good removal habits preserve surface uniformity, keep the bed flatter, and reduce the need for re-leveling caused by accidental knocks or prying pressure.
Troubleshooting 3d print bed problems: warping, poor adhesion, and first-layer defects
Warping is one of the most common bed-related failures, and it usually results from uneven cooling and internal stress rather than a single setting. If corners lift despite good initial adhesion, the 3d print bed might be too cool at the edges, the room might be drafty, or the part geometry might concentrate stress at sharp corners. Solutions include increasing bed temperature slightly, reducing part cooling fan on early layers, using an enclosure, adding a brim, and rounding corners in the design. Poor adhesion across the whole surface often points to contamination or incorrect Z offset. If adhesion is excellent in one area and poor in another, suspect tramming, mesh issues, a bent plate, debris under a removable sheet, or uneven heating. First-layer defects like ripples, ridges, or rough patches can come from over-squish, a nozzle that’s too close, or a bed surface with built-up adhesive lumps. It’s also worth checking extrusion consistency; under-extrusion can mimic a nozzle-too-high problem even when the gap is correct.
A structured diagnostic approach prevents endless guessing. Start by cleaning the 3d print bed thoroughly, then confirm nozzle cleanliness, then verify tramming at printing temperature, and finally tune Z offset with a large first-layer test pattern that covers multiple regions. If your printer uses a probe, check that the probe triggers reliably and that the mount is tight; wobble can cause height variation that looks like a warped bed. If you suspect thermal gradients, test with a large single-layer square and observe whether corners look under-adhered compared to the center, which can indicate cooler edges. If prints detach mid-print, examine whether the nozzle is colliding with curled edges or whether the part is being knocked due to insufficient Z hop or travel settings. Remember that adhesives can mask underlying issues; if you need more and more glue over time, the surface may be contaminated, worn, or the bed may have drifted out of alignment. Consistent troubleshooting turns bed issues from mysterious failures into predictable, fixable variables.
Upgrades and accessories that improve 3d print bed performance
Strategic upgrades can make a 3d print bed more stable and reduce daily calibration. One of the most popular improvements is switching from weak springs to silicone spacers, which resist vibration and hold tram settings longer. A thicker aluminum tooling plate can improve flatness and heat spread, especially on larger printers where thin plates tend to bow. Removable spring steel sheets with PEI coatings improve convenience and reduce the temptation to pry parts off the bed while it’s mounted. Insulating the underside of the bed reduces heat loss, improves warm-up time, and can reduce temperature gradients that cause edge lift. If your printer’s bed is slow to heat or struggles to maintain temperature, a higher-power heater (within safe electrical limits) can improve stability, though it should be paired with proper wiring, strain relief, and firmware safety settings. Cable chains or better bed wiring management can also reduce intermittent faults caused by repeated flexing of heater wires.
Auto bed leveling systems can be transformative, but only when paired with a mechanically sound 3d print bed. A probe helps compensate for minor unevenness, but it can’t fix a loose bed, a warped sheet, or inconsistent mounting. If you add a probe, calibrate probe offsets carefully and re-check after any hotend changes. For high-temperature materials, consider an enclosure to stabilize ambient temperature; many warping issues attributed to the bed are actually caused by the part cooling too fast above the bed. Another practical accessory is a set of bed clamps or alignment pins that keep removable plates seated consistently, reducing the need to re-tune Z offset after each removal. For users printing abrasive composites, protecting the surface with a replaceable sheet can extend bed life. The best upgrades are those that reduce variables: more uniform heat, more stable mechanics, and more repeatable plate positioning.
Workflow habits for repeatable results on the 3d print bed
Repeatability is less about finding a magical setting and more about controlling small variables that add up. A consistent pre-print routine helps: heat the bed to target temperature, allow a few minutes for the entire 3d print bed to reach equilibrium, wipe the surface if needed, and run a quick first-layer purge line to confirm extrusion. Keeping notes for each filament brand—bed temperature, preferred surface, whether a release layer is needed—saves time and prevents re-learning the same lessons. Environmental control matters as well; if your printer sits near a draft, even a simple barrier can reduce edge cooling. Storage and handling of build plates also affects consistency. Avoid touching the print area with bare fingers, and store removable sheets where they won’t collect dust or get bent. If you use multiple plates, label them by material and keep their Z offsets documented, because different sheet thicknesses can shift the nozzle gap.
Consistency also comes from designing and slicing with the 3d print bed in mind. For parts prone to warping, adding a brim, increasing first-layer width slightly, or orienting the model to reduce sharp corners on the bed can improve stability. Slower first-layer speeds allow the filament to wet the surface and form a stronger bond, while a slightly higher first-layer temperature can improve flow and contact. Avoid excessive first-layer cooling; many materials benefit from minimal fan for the first few layers, then normal cooling afterward. When you change a variable—new filament, new nozzle, new surface—change only one thing at a time and validate with a small test. Over time, these habits turn bed adhesion into a predictable step rather than a recurring obstacle, and the printer becomes a tool you can trust for long jobs and tight tolerances.
Choosing the right 3d print bed setup for your printer and goals
The best 3d print bed setup depends on what you value most: maximum adhesion, easy release, high-temperature capability, or a particular bottom-surface finish. If you mainly print PLA and PETG, a spring steel PEI system offers a strong balance of convenience and performance, especially if you keep it clean and use a release layer for PETG when needed. If you want the flattest possible surface for dimensionally critical parts, glass or a thick tooling plate can be attractive, though removal may require more patience and occasional adhesive. For engineering materials like ABS, ASA, nylon, or polycarbonate, prioritize stable heat and environmental control; a bed that reaches and holds higher temperatures, plus an enclosure, often matters more than the exact surface coating. Also consider how often you want to swap surfaces: removable sheets make experimentation easy, while fixed plates can be simpler and more rigid if you don’t need frequent changes.
Budget and maintenance tolerance play a role as well. A premium 3d print bed surface can save time, but only if you maintain it properly and match it to your materials. If you prefer minimal upkeep, choose a durable surface that cleans easily and doesn’t require constant adhesive. If you print a wide variety of filaments, keeping multiple plates and rotating them can be more efficient than trying to force one surface to do everything. Finally, consider safety and reliability: ensure wiring is secure, connectors are rated for the current, and firmware thermal protections are enabled. A well-chosen bed configuration reduces failed prints, protects your parts and hardware, and makes the entire printing process calmer and more predictable. With a tuned 3d print bed, the first layer becomes a dependable starting point rather than a recurring source of uncertainty.
Summary
In summary, “3d print bed” is a crucial topic that deserves thoughtful consideration. We hope this article has provided you with a comprehensive understanding to help you make better decisions.
Frequently Asked Questions
What is a 3D print bed?
The print bed is the build surface where the first layer adheres and the part is formed during printing.
Why is first-layer adhesion on the print bed so important?
Good adhesion prevents warping and shifting, improving print quality and reducing failed prints.
How do I level (tram) a 3D print bed?
Level your **3d print bed** so the nozzle maintains the same small, even gap across the entire surface—either by sliding a sheet of paper under the nozzle to feel for consistent resistance or by using an auto bed leveling probe to dial it in automatically.
What print bed surfaces are common, and how do I choose?
Popular choices for a **3d print bed** include PEI-coated spring steel, glass, and textured build plates—pick the one that best matches your filament type, the surface finish you want, and how easily you’d like prints to release.
How do I clean a 3D print bed?
Wipe away oils and residue with isopropyl alcohol, and if you’re dealing with stubborn buildup, remove the plate and wash it with warm water and mild dish soap. Dry it completely before putting it back on your **3d print bed** for the best adhesion and consistent results.
What bed temperature should I use?
The right temperature for your **3d print bed** depends on the filament you’re using: PLA typically sticks best around 50–65°C, PETG around 70–90°C, and ABS/ASA often needs 90–110°C. For the most reliable results, start with the filament manufacturer’s recommendation, then fine-tune the setting based on how well your first layer adheres.
📢 Looking for more info about 3d print bed? Follow Our Site for updates and tips!