Level 2 charger installation is often the single most impactful upgrade an EV owner can make at home or at a workplace because it turns charging into a predictable, overnight routine rather than a constant search for public stations. Unlike a standard 120V outlet that can take a long time to add meaningful range, a 240V Level 2 setup typically delivers a far higher charging rate, making it practical to replenish daily driving in a few hours. That convenience, however, depends heavily on the quality of the electrical work, the suitability of the circuit, and the compatibility between the charging equipment and the vehicle. A properly planned project also reduces nuisance trips, avoids overheating issues, and helps ensure the equipment runs efficiently for years. Many buyers focus on the charger’s amperage rating and smart features, but the most important “feature” is a safe, code-compliant electrical foundation that supports the load consistently. When the circuit is undersized, when terminations are loose, or when the panel is already near capacity, the experience can shift from convenient to frustrating or unsafe.
Table of Contents
- My Personal Experience
- Understanding Level 2 Charging and Why Installation Quality Matters
- Evaluating Your Electrical Service Panel and Available Capacity
- Choosing the Right Charger: Amperage, Features, and Vehicle Compatibility
- Hardwired vs Plug-In: Which Installation Method Fits Best?
- Circuit Sizing, Breakers, and Wire: Designing for Continuous Load
- Permits, Inspections, and Code Compliance: Avoiding Costly Mistakes
- Placement and Mounting: Practical Decisions That Affect Daily Convenience
- Indoor vs Outdoor Installations: Weatherproofing and Durability
- Expert Insight
- Load Management, Time-of-Use Rates, and Smart Charging Strategies
- Cost Factors and What Drives Installation Pricing
- Working With an Electrician: What to Ask Before Signing Off
- Safety, Testing, and Long-Term Maintenance for Reliable Charging
- Planning for the Future: Two EVs, Higher Power, and Home Resale Value
- Troubleshooting Common Charging Issues After Installation
- Making the Most of Your Setup: Daily Habits That Improve Convenience and Efficiency
- Watch the demonstration video
- Frequently Asked Questions
- Trusted External Sources
My Personal Experience
I finally decided to install a Level 2 charger at home after a few months of juggling public stations and a slow trickle from a regular outlet. I had an electrician come out to check my panel capacity and measure the run to the garage, and that’s when I learned the install cost wasn’t just the charger—it was the wiring, a new 240V breaker, and a permit. The actual installation only took a few hours, but the scheduling and inspection added about a week. Once it was up, the difference was immediate: instead of planning my day around charging, I just plug in after dinner and wake up to a full battery. The only thing I wish I’d done sooner was mount it closer to where I normally park, because cable reach matters more than you think. If you’re looking for level 2 charger installation, this is your best choice.
Understanding Level 2 Charging and Why Installation Quality Matters
Level 2 charger installation is often the single most impactful upgrade an EV owner can make at home or at a workplace because it turns charging into a predictable, overnight routine rather than a constant search for public stations. Unlike a standard 120V outlet that can take a long time to add meaningful range, a 240V Level 2 setup typically delivers a far higher charging rate, making it practical to replenish daily driving in a few hours. That convenience, however, depends heavily on the quality of the electrical work, the suitability of the circuit, and the compatibility between the charging equipment and the vehicle. A properly planned project also reduces nuisance trips, avoids overheating issues, and helps ensure the equipment runs efficiently for years. Many buyers focus on the charger’s amperage rating and smart features, but the most important “feature” is a safe, code-compliant electrical foundation that supports the load consistently. When the circuit is undersized, when terminations are loose, or when the panel is already near capacity, the experience can shift from convenient to frustrating or unsafe.
Because EV charging is a continuous load, the electrical rules are different from plugging in a temporary tool or a small appliance. Continuous loads require additional headroom, and that requirement affects wire size, breaker sizing, and the maximum charging current that should be configured on the EVSE (Electric Vehicle Supply Equipment). Level 2 charger installation is also influenced by the distance from the electrical panel to the mounting location, whether the charger is hardwired or plugged into a receptacle, and whether the charger will be used indoors or outdoors. Each decision changes costs, performance, and long-term reliability. A thoughtful approach balances the charger’s output with the home’s electrical service, considers future vehicles with larger batteries, and accounts for local permitting rules. The result is a charging setup that feels seamless: plug in, walk away, and wake up with the range you need, without worrying about whether your electrical system is being pushed beyond what it can safely handle.
Evaluating Your Electrical Service Panel and Available Capacity
Before choosing hardware, the most important step is understanding what your electrical service can support. Many homes have 100A, 150A, or 200A service, and the “spare capacity” is not simply the difference between your main breaker rating and the sum of breaker handles. A proper assessment considers demand load calculations, existing major appliances (HVAC, electric range, dryer, water heater), and typical usage patterns. For level 2 charger installation, this evaluation determines whether you can add a dedicated 240V circuit without upgrades, whether you should select a lower-amperage charger setting, or whether you need a service panel upgrade. A panel that is physically full may still have capacity if tandem breakers are allowed, but physical space does not equal electrical capacity. Conversely, a panel with open slots might already be near its safe limit depending on the home’s loads and the service size.
Electricians typically perform a load calculation based on local code, factoring in square footage, fixed appliances, heating and cooling equipment, and sometimes demand factors that reduce the theoretical maximum. That calculation informs the maximum continuous load that can be added. Since EV charging can run for hours, it must be treated as continuous; this often leads to selecting a charging current that fits comfortably rather than aiming for the highest number on the charger label. If the panel is older, there may also be concerns about the condition of bus bars, breaker compatibility, or outdated brands with known issues. In those cases, level 2 charger installation can be the trigger for broader electrical modernization that improves safety beyond EV charging. If an upgrade is needed, options include a larger main panel, a subpanel, or advanced load management devices that dynamically limit charging when other loads peak. The best path depends on budget, future expansion plans, and the layout of the home.
Choosing the Right Charger: Amperage, Features, and Vehicle Compatibility
Charger selection is not just about buying the highest amperage model. The vehicle’s onboard charger sets an upper limit on how much AC power it can accept, so a 48A EVSE may not charge faster than a 32A unit if the car is limited to 7.2 kW or similar. That said, choosing a higher-capacity unit can be useful for future-proofing, especially if you plan to buy a second EV or upgrade to a model with a higher onboard charging capacity. For level 2 charger installation, the charger’s maximum output must match the circuit and breaker size, and many smart chargers allow you to configure the maximum current to comply with the electrical design. This configurability is valuable when you install a robust unit now but set it to a lower output until an electrical upgrade is completed later.
Features also influence real-world satisfaction. Wi‑Fi connectivity can enable scheduled charging to take advantage of time-of-use rates, track energy consumption, and receive firmware updates. Some chargers integrate with solar systems or home energy management platforms, while others provide RFID access control for shared parking areas. Cable length and flexibility matter more than many people expect; a longer cable can make daily use easier, but it must be managed to avoid tripping hazards and connector strain. Outdoor-rated enclosures (NEMA ratings) are essential when mounted on exterior walls, and cold-weather performance can vary across models. When comparing units, look for recognized safety certifications and strong warranty support. A level 2 charger installation is a long-term infrastructure addition, and a well-supported product reduces the risk of dealing with compatibility issues, intermittent faults, or replacement hassles a few years down the road.
Hardwired vs Plug-In: Which Installation Method Fits Best?
One of the biggest design choices is whether to hardwire the EVSE or use a plug-in connection such as a NEMA 14‑50 or 6‑50 receptacle. Hardwired setups are often preferred for higher amperage charging because they eliminate one connection point that can loosen over time and generate heat. They can also look cleaner, reduce the chance of accidental unplugging, and sometimes meet local code requirements more easily for outdoor installations. For level 2 charger installation, hardwiring can be especially attractive when you want 48A charging, since that commonly requires a 60A circuit and many jurisdictions prefer hardwired equipment at those loads. A hardwired approach also tends to simplify weatherproofing because there is no receptacle face that must remain protected while in use.
Plug-in installations can be convenient when renters need portability, when the homeowner wants the option to swap chargers without an electrician, or when the charger is occasionally taken on trips. A receptacle-based setup also allows the circuit to serve other equipment if needed, though in practice a dedicated EV circuit is recommended. The tradeoff is that receptacles, plugs, and cord caps must be high quality and properly torqued, and they should be periodically checked for heat or discoloration. Some low-cost receptacles are not built for repeated high-current continuous use. If you go the plug-in route, using an industrial-grade receptacle and ensuring the breaker and wiring are correctly sized is crucial. A well-executed level 2 charger installation can be either hardwired or plug-in, but the best choice depends on charging current targets, environmental exposure, and how permanent you want the solution to be.
Circuit Sizing, Breakers, and Wire: Designing for Continuous Load
The electrical design behind EV charging is where safety and performance are determined. EV charging is considered a continuous load because it can run for three hours or more, and that means the circuit must be sized with headroom. A common rule is that continuous load should not exceed 80% of the circuit rating. For level 2 charger installation, this translates into pairings such as 32A charging on a 40A breaker, 40A charging on a 50A breaker, and 48A charging on a 60A breaker. The charger may allow configuration of maximum current, and setting it correctly is essential. Oversizing the breaker without appropriately sized conductors is unsafe, and undersizing the breaker can lead to nuisance trips. The conductor size is determined by code, insulation temperature rating, conduit fill, ambient conditions, and run length, and a licensed electrician will choose the correct gauge and type (e.g., copper THHN in conduit, or cable assemblies where permitted).
Wire length and voltage drop also matter. If the charger is far from the panel—such as a detached garage or a long run to an exterior wall—voltage drop can reduce charging efficiency and increase heat. In many cases, upsizing the conductor can be a smart decision even if it is not strictly required. The installation method also affects material choice: conduit runs can be more flexible for future upgrades but may be more labor-intensive, while certain cable types can simplify installation in finished walls where allowed. Grounding and bonding must be correct, and in some jurisdictions GFCI protection requirements differ depending on whether the EVSE is hardwired or plug-in. These details are why level 2 charger installation is best treated as an electrical project rather than a simple accessory purchase. When the circuit is designed thoughtfully, the charger operates within its ideal range, the breaker stays cool, and the system remains reliable through seasonal temperature changes and years of daily use.
Permits, Inspections, and Code Compliance: Avoiding Costly Mistakes
Permits can feel like a hassle, but they provide a structured way to ensure the work meets safety standards. Many municipalities require a permit for adding a new 240V circuit, installing a new receptacle for EV charging, or hardwiring an EVSE. For level 2 charger installation, permits also protect homeowners when selling the property, since unpermitted electrical work can trigger issues during inspection or insurance claims. The inspection process typically checks that the breaker size matches the conductor size, that the wiring method is appropriate, that terminations are properly made, and that the EVSE is installed according to the manufacturer’s instructions. Inspectors may also verify that the charger is mounted at an appropriate height and that clearances are maintained around the panel and other equipment.
Local code variations can influence key decisions. Some areas require GFCI protection for certain receptacles, while others have specific rules about outdoor disconnects, labeling, conduit types, or protection against physical damage. Multi-unit dwellings may require additional considerations such as load calculations for shared services, dedicated metering, or coordination with a building’s electrical room. If your utility offers rebates, they may require proof of a permitted and inspected level 2 charger installation, along with documentation of the charger model and electrician invoice. Following the formal process also reduces the chance of having to redo work later, which can be more expensive than doing it right the first time. When you combine code compliance with a reputable product and experienced labor, the installation becomes a durable improvement that adds value and peace of mind.
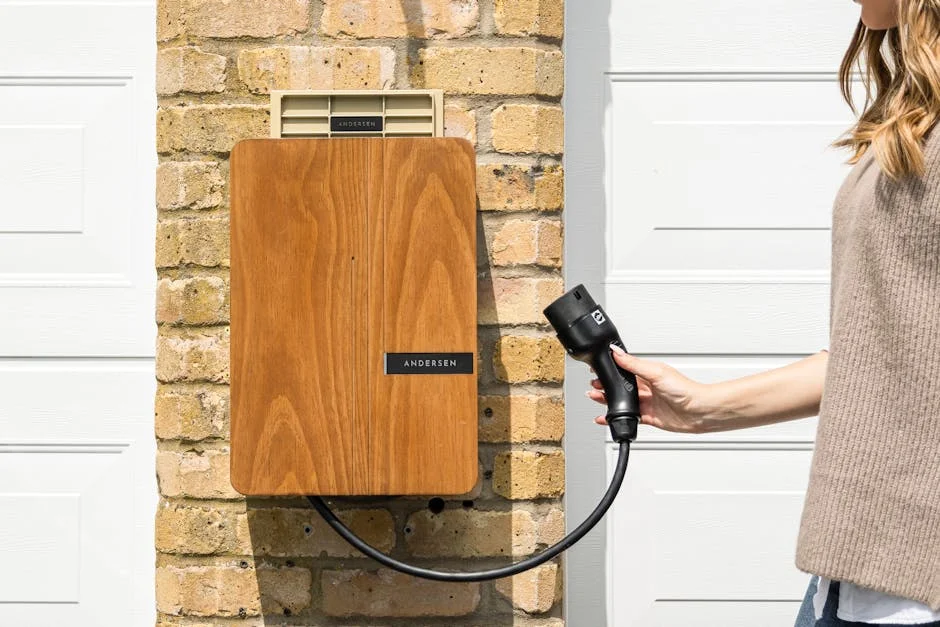
Placement and Mounting: Practical Decisions That Affect Daily Convenience
Where the charger goes matters as much as how it is wired. The ideal location allows the cable to reach the vehicle’s charge port without stretching, avoids crossing walkways, and keeps the connector protected from being driven over or slammed in a door. For level 2 charger installation in a garage, mounting near the front corner where the car typically parks can minimize cable management issues. In a driveway installation, the charger should be positioned to reduce exposure to direct rain and sun when possible, while still providing an easy cable route. Lighting, visibility, and proximity to the panel can influence cost and usability, but the cheapest location is not always the best if it forces awkward parking habits or cable strain every day.
Mounting height and surface integrity are also important. Chargers should be attached to studs, masonry, or a properly reinforced backboard, not just drywall. Outdoor installations should consider water intrusion pathways; sealing penetrations, using proper fittings, and maintaining drip loops can prevent moisture from traveling along conductors into enclosures. Cable holsters and hooks are not just cosmetic; they reduce wear on the connector pins and keep the cable from kinking. In shared spaces, access control and signage can prevent unauthorized use and help manage expectations. A well-planned level 2 charger installation is one you barely think about once it’s done: the connector is easy to grab, the cable stores neatly, and the charging routine fits naturally into daily life without creating clutter, hazards, or parking conflicts.
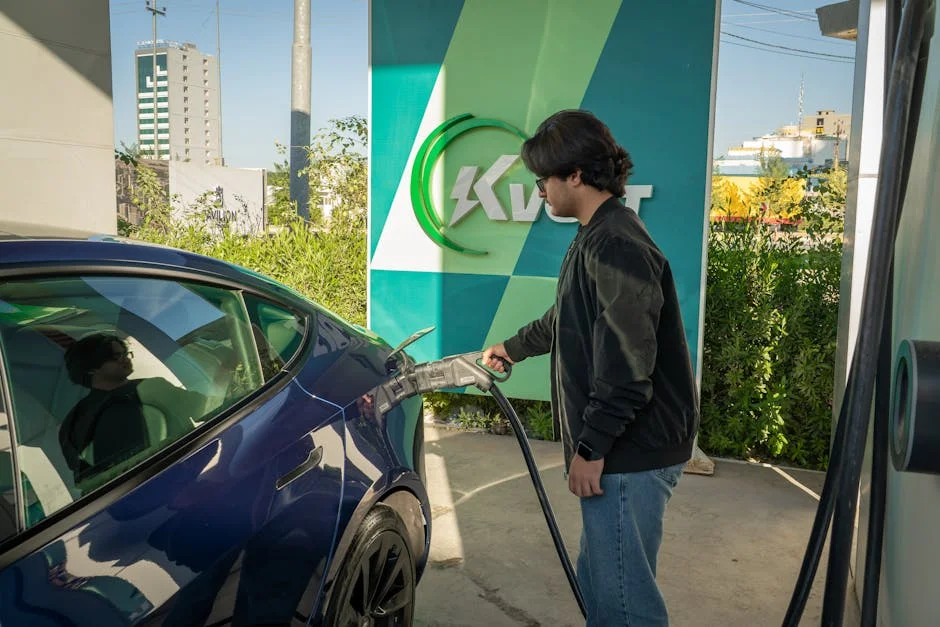
Indoor vs Outdoor Installations: Weatherproofing and Durability
Installing an EVSE outdoors is common, especially when garages are full or homes have no enclosed parking. Outdoor environments introduce challenges: UV exposure can degrade plastics, temperature swings can affect cable flexibility, and moisture can find its way into poorly sealed fittings. For level 2 charger installation outdoors, selecting an EVSE with the appropriate enclosure rating and using fittings designed for wet locations is critical. The wiring method may require conduit, and the choice of conduit (PVC vs metal) can depend on local rules, physical protection needs, and aesthetics. Chargers should be mounted to a stable surface that won’t shift or crack, and the installation should avoid low points where water pools or snow piles up against the unit.
Expert Insight
Before scheduling a Level 2 charger installation, confirm your panel capacity and available breaker space, then choose a charger amperage that fits your electrical service (and future vehicle needs). If an upgrade is likely, ask for a load calculation and consider a smart charger with load management to avoid costly service changes.
Plan the installation location to minimize conduit runs and keep the cable reach practical for daily parking, then verify the unit’s NEMA rating matches the environment (garage vs. outdoors). Request a permitted installation with a dedicated circuit, proper GFCI protection as required, and a clear plan for inspection to ensure safety and warranty compliance. If you’re looking for level 2 charger installation, this is your best choice.
Cold climates add another layer. Charging cables can become stiff, and repeated bending in freezing temperatures can shorten cable life if not handled carefully. In hot climates, direct sun can heat the EVSE enclosure and reduce long-term component life; shading or placement under an overhang can help. If the charger is installed in a carport or on an exterior wall, consider physical protection against impact, such as bollards or placement away from vehicle paths. Outdoor electrical connections should be periodically inspected for corrosion or gasket deterioration. A robust level 2 charger installation anticipates these environmental stresses and addresses them through appropriate equipment selection, careful sealing, and practical placement, resulting in a setup that remains safe and reliable through storms, heat waves, and years of daily use.
Load Management, Time-of-Use Rates, and Smart Charging Strategies
Many households can avoid expensive service upgrades by managing when and how charging occurs. Smart chargers can schedule charging during off-peak utility hours, which may significantly reduce energy costs in areas with time-of-use pricing. For level 2 charger installation, integrating scheduling is often as simple as setting a charging window in the charger app or in the vehicle’s settings. More advanced systems can coordinate with home energy monitors to reduce charging current when the home’s demand spikes, such as when the oven and HVAC run simultaneously. This approach can keep the installation within the limits of an existing service panel while still delivering enough energy overnight for daily driving.
| Option | Best for | What’s included / key notes |
|---|---|---|
| Standard Level 2 install (existing capacity) | Homes with an available 240V breaker space and a short cable run | New 240V circuit, breaker, wiring, mounting, and basic testing; typically fastest/lowest cost when the panel is ready. |
| Panel/circuit upgrade + Level 2 install | Older panels, limited capacity, or no open breaker slots | Load calculation, new breaker(s), possible panel/service upgrade, permitting/inspection; higher cost but improves safety and future capacity. |
| Hardwired vs. NEMA 14-50 outlet install | Hardwired: maximum reliability & higher amperage; Outlet: flexibility to unplug | Hardwired supports higher continuous loads and fewer failure points; outlet installs require a proper EV-rated receptacle, GFCI considerations, and correct breaker sizing. |
Load sharing becomes especially valuable in households with two EVs. Some charger brands support paired units that communicate and split a single circuit’s capacity, dynamically allocating current to whichever vehicle needs it most. This can allow two charging stations without doubling the electrical infrastructure. Solar integration is another strategy: certain systems can prioritize charging when solar production is high, effectively turning excess generation into vehicle miles. Even without dedicated solar features, a homeowner can schedule charging during midday if solar output is strongest and the vehicle is home. A carefully planned level 2 charger installation can therefore be both a convenience upgrade and a cost-control measure, aligning charging behavior with utility pricing and household electrical limits rather than forcing an immediate and expensive panel expansion.
Cost Factors and What Drives Installation Pricing
Pricing varies widely because every property is different. The charger itself is only part of the budget; electrical labor, permitting, conduit or cable, breaker upgrades, and panel work often represent the larger share. For level 2 charger installation, the distance from the panel to the charger location is one of the biggest cost drivers, especially when running through finished walls or across a basement ceiling with obstacles. A straightforward install with a short run and ample panel capacity is typically far less expensive than a long run to a detached garage requiring trenching, conduit, and possibly a subpanel. The decision to hardwire versus install a receptacle can also change costs depending on local requirements and the complexity of weatherproofing.
Panel upgrades can be a major variable. If the home has limited capacity, a service upgrade to 200A, a new main panel, or the addition of a subpanel can add significant cost but may also increase overall property value and improve safety. Alternatively, load management devices can sometimes reduce the need for a full upgrade, but they add equipment cost and require careful setup. Rebates and incentives can offset expenses; utilities and local governments may offer credits for purchasing qualified chargers or for installing them with permits. When collecting quotes, ask for a clear scope: circuit amperage, wiring method, breaker type, whether drywall repair is included, and whether permit fees and inspection coordination are covered. Transparent quoting helps ensure your level 2 charger installation meets expectations without surprise add-ons.
Working With an Electrician: What to Ask Before Signing Off
Choosing the right professional is about more than finding the lowest bid. A qualified electrician should be comfortable discussing load calculations, circuit sizing, and the specific requirements of EV charging equipment. For level 2 charger installation, ask whether they will pull the permit, how they will route the wiring, and what brand and type of breaker and receptacle (if used) they plan to install. Request confirmation that the EVSE will be configured to match the circuit rating, especially if the charger is capable of higher output than the circuit supports. It’s also reasonable to ask how they will label the breaker, whether they will torque terminations to manufacturer specifications, and whether they will test the system under load after installation.
Experience with EVSE projects matters because the details are different from general-purpose circuits. For example, receptacle quality, continuous load rules, and proper strain relief for cables are frequent failure points when corners are cut. Ask how they handle outdoor penetrations and sealing, and whether they will install physical protection if the charger is exposed to vehicle impact. Also ask about warranty: some electricians warranty labor for a period, and reputable charger manufacturers may require installation to follow specific guidelines to keep the product warranty intact. A professional level 2 charger installation should come with documentation: permit sign-off, a clear invoice listing materials, and the charger’s configuration settings. This paperwork can be valuable for rebates, resale, and troubleshooting years later.
Safety, Testing, and Long-Term Maintenance for Reliable Charging
Once the charger is installed, a few checks help ensure it remains safe and reliable. Initial commissioning should include verifying that the charger is set to the correct maximum current, confirming that the breaker does not run unusually hot, and ensuring that the vehicle charges without errors. For level 2 charger installation using a receptacle, it’s wise to periodically feel for excessive warmth at the plug after an hour of charging; warmth can be normal, but noticeable heat or a burning smell is not. Cable and connector condition should be monitored as well. Dropping the connector, driving over the cable, or repeatedly yanking it from a tight angle can damage internal conductors and create intermittent faults that are hard to diagnose.
Long-term maintenance is mostly about observation and keeping things clean and dry. Make sure the cable is stored properly on a hook or holster to prevent kinks, and keep the connector free of dirt and moisture. If the charger is outdoors, inspect seals and conduit fittings annually, especially after extreme weather. If you ever notice repeated breaker trips, charging interruptions, or error lights, stop using the unit and have the system evaluated rather than repeatedly resetting it. Firmware updates for smart chargers can improve reliability and security, so enabling updates can be beneficial when the manufacturer has a good track record. A level 2 charger installation is meant to be a set-and-forget upgrade, but a small amount of periodic attention helps ensure years of safe charging, stable performance, and confidence every time you plug in.
Planning for the Future: Two EVs, Higher Power, and Home Resale Value
EV ownership trends suggest that many households eventually add a second electric vehicle, and that possibility should influence today’s choices. Even if you only need modest charging now, selecting a charger that can be power-limited and later increased can reduce future rework. For level 2 charger installation, future-proofing might mean running conduit that can accommodate larger conductors later, choosing a panel location that can support an additional breaker, or installing a subpanel in the garage. It can also mean selecting a charger ecosystem that supports load sharing so two stations can operate on a single circuit without exceeding electrical limits. These decisions are often inexpensive during the initial project but costly to retrofit later.
Resale value is another consideration. A clean, permitted, code-compliant installation is more appealing to future buyers, especially as EV adoption grows. Buyers may not know the details of wire gauge and breaker sizing, but they do notice professional workmanship, neat conduit runs, labeled breakers, and a charger placed in a logical spot. Documentation showing a permitted level 2 charger installation can reduce buyer concerns about hidden electrical issues. If you anticipate moving, consider whether a plug-in charger that can be taken with you makes sense, or whether leaving a hardwired unit adds value. In many cases, the best approach is a durable, neatly mounted EVSE that complements the property, supports common charging needs, and demonstrates that the home’s electrical system was upgraded responsibly.
Troubleshooting Common Charging Issues After Installation
When problems occur, they often stem from a small mismatch between settings, equipment, and the electrical circuit. A common issue is charging at a lower rate than expected because the vehicle, the charger, or both are set to a reduced current limit. For level 2 charger installation, the charger’s configuration must match the breaker size, but the vehicle may also have a separate charging limit set by the driver. Another frequent issue is intermittent charging due to Wi‑Fi instability on smart chargers, which can affect scheduling or remote control features even if basic charging still works. Checking the charger’s indicator lights, app logs, and the vehicle’s charging screen can help isolate whether the issue is related to power delivery, communication, or scheduling.
Breaker trips should be treated seriously. Occasional trips might occur if the circuit is undersized for the configured charging current or if a termination is loose and heating up under load. Receptacle-based installations can develop contact resistance over time if the receptacle is not high quality or if the plug is frequently inserted and removed. If you notice discoloration on a plug, a melted faceplate, buzzing, or a hot smell, stop charging and call a professional. Another issue can be ground-fault interruptions; some chargers have built-in protection, and code may require additional GFCI protection in certain configurations, which can sometimes lead to nuisance trips if not coordinated properly. A properly executed level 2 charger installation minimizes these problems, but when symptoms appear, the safest path is prompt evaluation rather than repeated resets that mask an underlying electrical fault.
Making the Most of Your Setup: Daily Habits That Improve Convenience and Efficiency
Even a perfect electrical build benefits from good day-to-day habits. Plugging in consistently, rather than letting the battery run low, reduces stress and keeps the vehicle ready for unexpected trips. If your utility offers cheaper overnight pricing, scheduling charging to start after the off-peak window begins can reduce cost without changing your routine. For level 2 charger installation at home, many drivers find that setting a target state of charge—often below 100% for daily use, depending on the vehicle manufacturer’s guidance—helps optimize battery longevity while still providing ample range. Pairing that target with a predictable charging window creates a system that feels automatic and low-effort.
Cable management also matters for long-term satisfaction. Taking a few seconds to hang the cable properly prevents damage, keeps the garage tidy, and reduces the chance of tripping. If the charger is outdoors, keeping the connector seated in its holster protects it from rain and debris. If multiple drivers share the charger, agree on basic etiquette—such as plugging in after parking and not leaving the cable stretched across a walkway. Over time, these small habits make the infrastructure feel like a natural part of the property rather than a gadget that needs constant attention. Most importantly, the value of level 2 charger installation shows up in the final routine: the car is charged when you need it, the electrical system runs cool and stable, and the charging experience stays reliable season after season.
Watch the demonstration video
In this video, you’ll learn the key steps for installing a Level 2 EV charger at home, from choosing the right charger and location to understanding electrical requirements, permits, and safety considerations. It also covers typical installation costs, what to expect from an electrician, and how to ensure your setup delivers fast, reliable charging. If you’re looking for level 2 charger installation, this is your best choice.
Summary
In summary, “level 2 charger installation” is a crucial topic that deserves thoughtful consideration. We hope this article has provided you with a comprehensive understanding to help you make better decisions.
Frequently Asked Questions
What is a Level 2 EV charger, and how fast is it?
A Level 2 charger runs on a 240V circuit (typically 16–60 amps) and can add roughly 15–40 miles of driving range per hour, depending on your EV and the charger’s power—making **level 2 charger installation** a smart upgrade for faster, more convenient charging at home or work.
Do I need a permit to install a Level 2 charger?
In most areas, yes—an electrical permit and inspection are commonly required. Check local building/electrical codes or ask your electrician/municipality.
Can I install a Level 2 charger myself?
Hardwired setups almost always call for a licensed electrician, since they’re permanently connected and must meet strict electrical codes. Plug-in models can feel more straightforward, but you’ll still usually need a pro to install a proper 240V outlet and dedicated circuit—especially if you want your **level 2 charger installation** to stay code-compliant and protect your warranty.
What electrical panel capacity do I need?
It depends on your home’s existing load and the charger size (often 32–48A). An electrician can perform a load calculation; some homes may need a panel upgrade or load management device. If you’re looking for level 2 charger installation, this is your best choice.
Should I choose a hardwired or plug-in Level 2 charger?
A hardwired setup is usually the more durable choice and can handle higher amperage, making it ideal for many **level 2 charger installation** projects. A plug-in option, on the other hand, is easier to swap out or replace later, but it depends on having a properly rated 240V outlet and may be constrained by the receptacle and circuit’s capacity.
How much does Level 2 charger installation cost?
Costs vary widely based on distance to the panel, circuit capacity, trenching/drywall work, and permits. Many installs fall in the hundreds to a few thousand dollars, plus the charger cost. If you’re looking for level 2 charger installation, this is your best choice.
📢 Looking for more info about level 2 charger installation? Follow Our Site for updates and tips!

Trusted External Sources
- Level 2 charger installation : r/electricvehicles – Reddit
Dec 18, 2026 … It cost me about $600 to install a 14-50. I only had about a 20′ run. New 50amp breaker installed. I installed a Wallbox and expect to charge at about 9.6KW. If you’re looking for level 2 charger installation, this is your best choice.
- Level 2 Charger Installation – County of San Diego
Installing a Level 2 EV charger in the San Diego area isn’t just a plug-and-play upgrade—**level 2 charger installation** typically requires a building permit and must pass an inspection before the charger can be used.
- Level 2 Charger Install Possibility : r/evcharging – Reddit
Mar 26, 2026 … Get a charger with a matching plug type or (better) hardwire. If the circuit was wired with 6 gauge you could possibly put in a 14-50 socket or … If you’re looking for level 2 charger installation, this is your best choice.
- Understanding Your EV Home Charging Station Costs for Installation
Apr 18, 2026 … Many Level 2 EV chargers deliver between 16 to 80 amps of power to the vehicle, but in order to ensure the chargers are safely installed the … If you’re looking for level 2 charger installation, this is your best choice.
- Anyone recently installed a Level 2 EV Charger at their home and …
Feb 20, 2026 … The EV charger installation was $1200. We also needed a subpanel upgrade ($3k) and a controller ($500 installed) to limit charging if the house was using too … If you’re looking for level 2 charger installation, this is your best choice.