A dslr quality webcam is less about chasing vanity and more about controlling how your video is perceived. When people see a clean image with natural skin tones, smooth gradients in the background, and crisp focus on the eyes, they read it as “professional,” even if the actual subject is casual. Standard webcams are designed to be small, cheap, and easy; those constraints often lead to tiny sensors, aggressive noise reduction, and over-sharpening that creates a harsh, brittle look. A DSLR-style setup—whether it’s a true DSLR, a mirrorless camera, or a dedicated webcam that mimics that output—lets you decide what the viewer sees. Instead of the camera guessing exposure and color every time you move, you can set consistent brightness, lock white balance to your room’s lighting, and keep your face properly exposed without a distracting background. That stability matters for meetings, streaming, teaching, and coaching, because it reduces visual “pumping” and flicker that can subconsciously fatigue an audience.
Table of Contents
- My Personal Experience
- Why a DSLR Quality Webcam Changes the Way You Look on Camera
- Sensor Size, Lenses, and the “DSLR Look” Explained
- What “DSLR Quality” Means for Streaming, Meetings, and Online Teaching
- DSLR vs Mirrorless vs Dedicated “DSLR-Like” Webcams
- Essential Hardware: Capture Cards, Cables, and Power for Long Sessions
- Lighting for DSLR-Level Results: The Fastest Upgrade After the Camera
- Camera Settings That Make Your Video Look Like a Real Camera
- Expert Insight
- Audio and Framing: Completing the DSLR-Style Webcam Presence
- Software and Workflow: OBS, Virtual Cameras, and Color Consistency
- Common Problems and Fixes: Overheating, Soft Focus, and Flicker
- Choosing the Right Setup for Your Budget and Space
- Practical Tips to Keep Your Image Professional Every Time
- Final Thoughts on Getting DSLR Quality Webcam Results Without the Hassle
- Watch the demonstration video
- Frequently Asked Questions
- Trusted External Sources
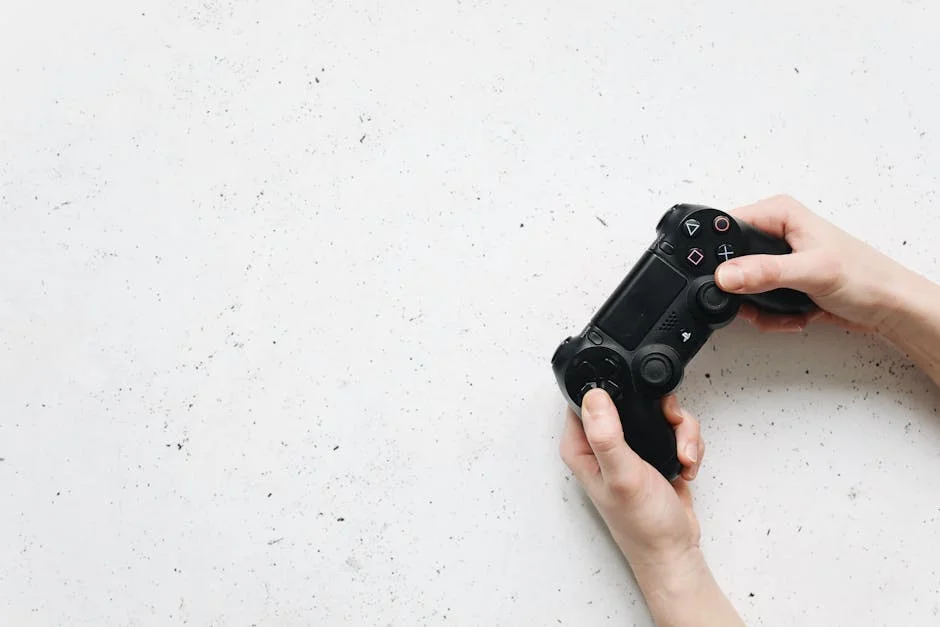
My Personal Experience
I got tired of how grainy my laptop camera looked on Zoom, so I tried using my DSLR as a webcam for a few meetings. The difference was immediate—my face looked sharper, the background blur was natural, and the colors didn’t wash out under my desk lamp. It wasn’t totally plug-and-play, though: I had to pick up a cheap capture card, set the camera to clean HDMI, and keep it plugged into power because the battery died fast. After a week I also realized the autofocus could “hunt” if I moved too much, so I switched to manual focus and marked the spot where my chair should be. It’s a bit more setup than a normal webcam, but for interviews and client calls it made me look noticeably more professional. If you’re looking for dslr quality webcam, this is your best choice.
Why a DSLR Quality Webcam Changes the Way You Look on Camera
A dslr quality webcam is less about chasing vanity and more about controlling how your video is perceived. When people see a clean image with natural skin tones, smooth gradients in the background, and crisp focus on the eyes, they read it as “professional,” even if the actual subject is casual. Standard webcams are designed to be small, cheap, and easy; those constraints often lead to tiny sensors, aggressive noise reduction, and over-sharpening that creates a harsh, brittle look. A DSLR-style setup—whether it’s a true DSLR, a mirrorless camera, or a dedicated webcam that mimics that output—lets you decide what the viewer sees. Instead of the camera guessing exposure and color every time you move, you can set consistent brightness, lock white balance to your room’s lighting, and keep your face properly exposed without a distracting background. That stability matters for meetings, streaming, teaching, and coaching, because it reduces visual “pumping” and flicker that can subconsciously fatigue an audience.
Another reason a dslr quality webcam stands out is depth and separation. The cinematic look people associate with “DSLR” comes from a larger sensor paired with a lens that can produce shallow depth of field. That gentle background blur makes the subject pop, which is especially helpful in home offices where you may not have a studio backdrop. It also improves low-light performance: larger sensors gather more light, so you get less grain and fewer muddy shadows. Beyond aesthetics, there’s a practical benefit: a better camera plus a good lens can stay sharp even when you lean in, gesture, or shift in your chair. Many built-in webcams struggle with focus hunting or smearing during motion, which can make screen sharing and face-to-camera explanations feel less clear. If your work depends on trust, clarity, and attention—sales calls, interviews, webinars, telehealth, content creation—upgrading to a DSLR-level video presence can deliver returns that a basic webcam simply can’t match.
Sensor Size, Lenses, and the “DSLR Look” Explained
The core difference between a typical webcam and a dslr quality webcam approach is sensor size and optics. Webcams usually use very small sensors, which forces everything into deep focus and requires heavy processing to compensate for noise. That processing can introduce waxy skin textures, crushed blacks, and strange color shifts under mixed lighting. DSLR and mirrorless cameras often use APS-C, Micro Four Thirds, or full-frame sensors. Even many modern “DSLR-like” webcams use larger sensors than traditional models. A larger sensor generally captures more light per pixel, producing cleaner images and smoother transitions in highlights and shadows. When you pair that with a lens designed for photography—especially a prime lens—you get more control over the image character. You can choose focal length, aperture, and rendering style. A 35mm or 50mm equivalent can give flattering perspective, while a wider lens can show more of a workspace without distorting facial features as much as ultra-wide webcam lenses often do.
Lenses are the secret weapon in any dslr quality webcam setup. A fixed lens on a webcam is typically optimized for “good enough” at arm’s length, but it can’t compete with glass designed to resolve detail across a larger sensor. With an interchangeable lens camera, you can select an aperture that balances sharpness and background separation. You can also manage focus behavior: set continuous autofocus with face/eye tracking for movement, or lock manual focus if you sit at a consistent distance. The “DSLR look” is not only blur; it’s also accurate color, pleasing highlight roll-off, and natural contrast. These qualities help you look more lifelike on video calls and make product demos clearer. If you often show objects—tools, samples, artwork—lens choice matters even more because you can pick a macro-capable lens or a zoom that frames tightly without digital cropping. The end result is a more intentional image, which is exactly what people mean when they say they want DSLR-level webcam quality.
What “DSLR Quality” Means for Streaming, Meetings, and Online Teaching
When someone asks for a dslr quality webcam, they usually want three outcomes: consistency, clarity, and control. Consistency means your exposure and color don’t jump around when your monitor changes brightness, when a slide deck flips from dark to light, or when a cloud passes by the window. Clarity means the image holds up when compressed by Zoom, Teams, Google Meet, or streaming platforms. Even if the service reduces bitrate, a cleaner source image tends to survive compression better because there’s less noise and fewer artifacts for the encoder to struggle with. Control means you can shape your image to match your environment. For example, you can keep the background slightly darker and your face properly lit, or maintain accurate color for teaching art, makeup, cooking, or hardware repair. This type of control helps you build a recognizable on-camera identity that looks the same day to day.
Different use cases benefit in different ways from a dslr quality webcam. For business meetings, the biggest win is credibility: a sharp, well-lit face with natural color can make your communication feel more confident and easier to follow. For streaming, DSLR-level quality helps with motion and detail—fast hand movements, gameplay overlays, and dynamic lighting are handled more gracefully. For online teaching and coaching, the improvement can be dramatic because students rely on visual cues: facial expressions, hand placement, and small details of what you’re demonstrating. If you’ve ever tried to show a circuit board or a craft technique on a basic webcam, you’ve likely seen it blur, smear, or overexpose. A better camera paired with the right lens and lighting keeps the scene readable. Even when you don’t need cinematic blur, the overall “cleanliness” of the image—less noise, better dynamic range, fewer weird color casts—reduces distractions and keeps attention on the message.
DSLR vs Mirrorless vs Dedicated “DSLR-Like” Webcams
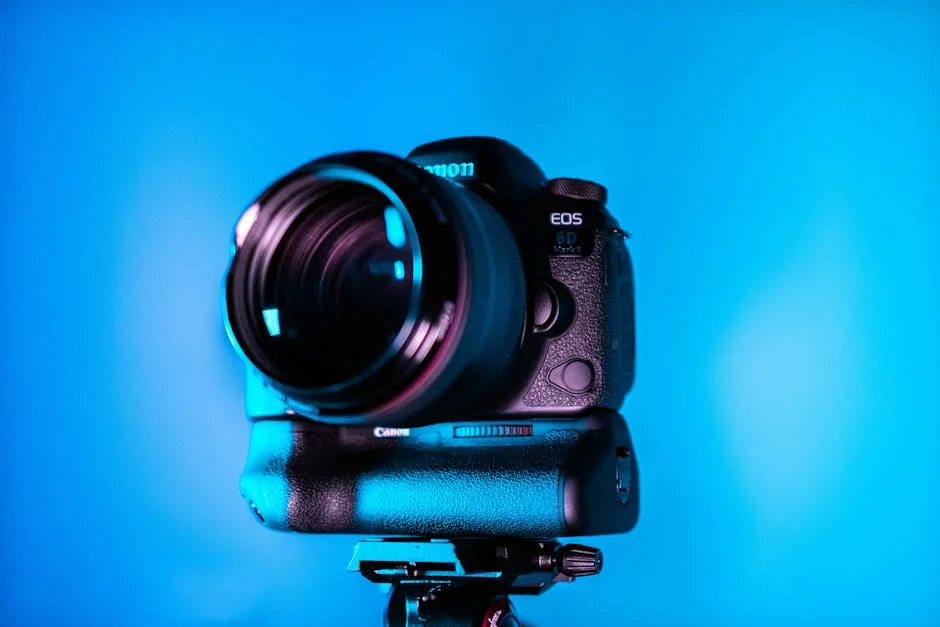
A dslr quality webcam can be achieved with several categories of hardware, and each has tradeoffs. Traditional DSLRs can work well, but some models have limitations like older autofocus in video, potential overheating in long sessions, and the need for clean HDMI output. Mirrorless cameras are often the most popular option today because many support excellent continuous autofocus, face/eye tracking, and clean HDMI with minimal fuss. They also tend to be lighter and quieter, and many can be powered continuously via USB-C or a dummy battery. Dedicated “DSLR-like” webcams—models that use larger sensors and better lenses than typical webcams—offer a simpler path. They usually connect via USB and behave like a standard webcam while delivering a more natural image than budget models. This category is attractive if you want DSLR-style quality without managing capture cards, battery solutions, and camera menus.
Choosing between these options depends on how much flexibility you want. A mirrorless camera can be a true long-term investment: you can change lenses, use it for photography, and upgrade pieces over time. That’s ideal if you want the most authentic dslr quality webcam look and you’re willing to learn basic camera settings. A dedicated premium webcam is often the “set it and forget it” choice: fewer accessories, fewer cables, and fewer points of failure. The compromise is usually less lens flexibility and sometimes smaller sensors than an interchangeable-lens camera. DSLRs can still be excellent if you already own one, but it’s worth checking whether your model has clean HDMI, unlimited recording/streaming without auto shutoff, and reliable video autofocus. In practice, many creators start with a premium webcam for convenience and later move to a mirrorless camera when they want more creative control. Either way, the goal is the same: a stable, clean, flattering video feed that looks like it came from a real camera rather than a laptop lid.
Essential Hardware: Capture Cards, Cables, and Power for Long Sessions
Building a dslr quality webcam setup is not only about the camera body; the supporting hardware determines how reliable your feed will be during long calls or streams. If you use a camera’s HDMI output, you typically need a capture card to convert that signal into a webcam-like input for your computer. Many capture cards connect via USB and appear as a standard video source in conferencing apps and streaming software. The quality and stability of the capture card matters: a poor one can introduce lag, color shifts, or random disconnects. Cable choice matters too. HDMI cables should be the right length and quality to avoid signal dropouts, and micro-HDMI ports on cameras can be fragile, so strain relief or a cable clamp is helpful if the setup stays on a desk. If your camera supports USB webcam mode with official software or UVC output, you may not need a capture card, but you should confirm the maximum resolution and frame rate and whether the camera remains stable for hours.
Power is the most common failure point in a dslr quality webcam build. A camera that runs on battery will die mid-meeting, and some models may dim the display or shut off to save power unless configured correctly. The typical solution is a dummy battery (a battery-shaped adapter) connected to an AC power supply, allowing continuous operation. Some modern cameras can run indefinitely via USB-C Power Delivery, which can be cleaner than a dummy battery, but it depends on the model. Heat management also matters. Long sessions at high resolution can warm the camera; a stable setup may involve using 1080p instead of 4K for conferencing, turning off internal recording, and ensuring airflow. Audio should be considered alongside video: many people pair DSLR-level video with a USB microphone or an XLR interface for professional sound. While audio is separate, the overall impression of a “DSLR webcam” experience improves dramatically when the image and voice both feel intentional and free of glitches.
Lighting for DSLR-Level Results: The Fastest Upgrade After the Camera
Even the best dslr quality webcam will look disappointing in poor lighting. Light is what shapes your face, determines how clean your image appears, and influences color accuracy. The advantage of a larger sensor is that it handles low light better, but that doesn’t mean you should rely on darkness. A simple key light placed slightly above eye level and off to one side can create a flattering look with gentle shadows that add depth. Many people start with a ring light because it’s easy, but a softbox or LED panel often looks more natural because it creates softer highlights and reduces the “flat” appearance ring lights can produce. If your background is visible, adding a small background light can separate you from the wall and make the scene feel more dimensional, which complements the DSLR aesthetic without needing extreme blur.
Color temperature and consistency are critical for a dslr quality webcam look. Mixed lighting—like daylight from a window plus warm indoor bulbs—can confuse auto white balance and cause your skin tone to drift. The fix is to choose a primary light source and match the rest of the room to it, either by using daylight-balanced LEDs or by setting your camera’s white balance to match your bulbs. Once you lock white balance, your image stops shifting between yellow and blue. Exposure should be set so your face is bright but not blown out; slightly underexposed highlights can be recovered better than clipped skin tones. If you wear glasses, adjusting light angle helps reduce glare. Good lighting also lets you use a lower ISO, which reduces noise and compression artifacts in video calls. Many people chase a “DSLR webcam” by buying a camera first, but lighting often delivers the biggest visible improvement per dollar, and it makes every camera—webcam, phone, or mirrorless—perform closer to its best.
Camera Settings That Make Your Video Look Like a Real Camera
Dialing in settings is where a dslr quality webcam truly separates itself from a default webcam feed. Start by turning off automatic behavior that causes visible fluctuations. Set your exposure manually when possible: choose a shutter speed that matches your frame rate (for example, 1/50 for 25 fps or 1/60 for 30 fps), then choose an aperture that gives you the depth of field you want, and finally adjust ISO to reach proper brightness. If you can’t run full manual, at least lock exposure and white balance. Auto exposure can brighten and darken your face every time you move a hand or hold up an object, and auto white balance can shift your skin tone when a slide changes from white to dark. A stable image feels more “broadcast” and less like a phone trying to guess what’s happening. Picture profiles matter too; overly flat profiles can look gray and noisy in conferencing apps, while overly contrasty profiles can crush detail. A neutral profile with moderate contrast and saturation is often best for live video.
Expert Insight
Use a clean HDMI output from your DSLR (or mirrorless) into a reliable capture card, then set the camera to 1080p, manual exposure, and a fixed white balance to prevent brightness and color shifts mid-call. Pair it with a fast prime lens (around f/1.8–f/2.8) and place the camera at eye level for a natural, flattering perspective. If you’re looking for dslr quality webcam, this is your best choice.
Prioritize lighting and stability: position a soft key light at a 45-degree angle, add a small fill or bounce to reduce harsh shadows, and keep ISO low to avoid noise. Lock focus (or use face-detect with minimal hunting), disable auto power-off, and run continuous power via a dummy battery so the feed stays sharp and uninterrupted. If you’re looking for dslr quality webcam, this is your best choice.
Focus behavior is another major part of the dslr quality webcam experience. If your camera has reliable face/eye autofocus, use it and set the tracking sensitivity so it doesn’t jump to the background. If autofocus hunts, consider manual focus: sit at a consistent distance, zoom in to focus precisely, then don’t change that distance much. Depth of field should be chosen thoughtfully. Extremely shallow blur can look impressive, but it can also cause your ears or hands to fall out of focus in a way that feels distracting for teaching or presenting. Many creators aim for a balance: enough separation to soften the background, but enough depth to keep natural movement sharp. Frame rate and resolution should match your platform. Many video conferencing tools prioritize stability at 1080p, and some compress heavily at higher resolutions. A clean 1080p feed from a real camera often looks better than a noisy 4K feed that gets crushed by compression. These small choices add up to a consistent, polished image that people recognize as DSLR-level quality.
Audio and Framing: Completing the DSLR-Style Webcam Presence
A dslr quality webcam setup is judged as a whole, and audio plus framing can either elevate or undermine the visual upgrade. Even with stunning video, poor audio makes the experience feel cheap. A dedicated USB microphone, a headset mic, or an XLR mic with an interface can deliver clear speech and reduce room echo. Placement matters more than price: a modest mic close to your mouth generally beats an expensive mic across the room. If your room is echoey, soft furnishings, curtains, rugs, or acoustic panels can reduce reflections. The goal is intelligibility and a consistent tone, especially for long meetings or lessons. When the voice is clear, the viewer perceives the entire production as more professional, reinforcing the benefits of DSLR-level video.
| Option | Image Quality | Setup & Reliability | Approx. Cost | Best For |
|---|---|---|---|---|
| DSLR/Mirrorless + Capture Card | Excellent (large sensor, real lenses, strong low-light, shallow depth of field) | Most complex; needs HDMI out, clean feed, power solution; very reliable once configured | High (camera + lens + capture card) | Creators who want the closest “DSLR quality webcam” look for streaming/recording |
| DSLR/Mirrorless + USB Webcam Utility | Very good (often compressed vs HDMI; still better than most webcams) | Easiest DSLR route; relies on drivers/software; can be less stable and higher latency | Low–Medium (camera + cable; no capture card) | Video calls and casual streaming with a DSLR-like upgrade on a budget |
| Premium 4K Webcam (Large Sensor) | Good–Very good (sharp, consistent; less cinematic than interchangeable-lens cameras) | Simplest plug-and-play; strong reliability; fewer parts to manage | Medium | Users who want high quality with minimal setup and maintenance |
Framing is the visual side of presence. A dslr quality webcam should be positioned at or slightly above eye level, with the lens aligned so you’re not looking down or up dramatically. The distance from the camera affects perspective: too close with a wide lens can exaggerate facial features, while too far can make you look small and disconnected. Many people get the best results by placing the camera a bit farther back and using a slightly longer focal length (or a mild zoom) for a more flattering look. Background composition matters too. A clean background, a plant, a bookshelf, or a subtle light can create depth without clutter. If you use background blur, keep it tasteful; if your background is important (whiteboard, tools, studio), use deeper focus so it remains readable. The combination of good framing, consistent lighting, and clear audio turns “nice camera” into a cohesive DSLR webcam experience that feels intentional and comfortable to watch.
Software and Workflow: OBS, Virtual Cameras, and Color Consistency
Software can help you get more from a dslr quality webcam, especially when you need overlays, scene switching, or consistent color across apps. OBS Studio is a common tool because it can ingest a capture card feed, apply basic color correction, add sharpening carefully, and output a virtual camera to Zoom or Teams. This can be helpful if your camera’s internal settings are limited or if you want to maintain the same look across different platforms. The key is subtlety: heavy filters can create artifacts, especially once conferencing apps compress the video. Small adjustments—slight exposure correction, mild contrast, and a touch of saturation—are usually enough. If your camera already looks great, the best workflow may be minimal processing to reduce CPU load and potential sync issues. Stability is part of “DSLR quality,” and an overloaded system can cause dropped frames that negate the visual benefits.
Color consistency is a practical concern when you’re using a dslr quality webcam for professional work. Different apps handle color spaces and levels differently, and capture cards may output limited or full range depending on settings. If blacks look washed out or crushed, you may need to adjust video levels in your capture utility or OBS. Matching your monitor’s brightness and your room lighting also helps prevent exposure shifts. Another workflow consideration is audio-video sync. Capture cards can introduce a small delay, which may require adding an audio delay in OBS or your streaming software. For meetings, many people keep it simple: direct camera feed into the conferencing app, microphone connected separately, and minimal processing. For streaming and courses, a more advanced workflow makes sense: scenes, lower-thirds, screen capture, and controlled recording settings. The goal is not complexity for its own sake; it’s repeatability. When you can turn everything on and get the same clean, flattering image every time, you’ve achieved the practical version of DSLR-level webcam quality.
Common Problems and Fixes: Overheating, Soft Focus, and Flicker
People often expect a dslr quality webcam to be flawless, but real-camera setups can introduce issues that basic webcams hide. Overheating is one of the most common problems, especially with smaller bodies running high-resolution video for long periods. Solutions include lowering output resolution to 1080p, disabling internal recording, turning off the rear screen if possible, and ensuring the camera has airflow. Some cameras have “auto power off temperature” settings that can be adjusted, but you should balance that with safe operating limits. Soft focus is another frequent complaint. It can come from using too wide an aperture, sitting too close, or relying on autofocus that hunts in low light. Adding light, stopping down the lens slightly, or switching to manual focus often fixes it. If your capture looks sharp in the camera screen but soft on the computer, the issue may be the capture card, the USB bandwidth, or the conferencing app reducing resolution due to network conditions.
Flicker is a subtle issue that can ruin a dslr quality webcam look. It usually comes from LED lights flickering at a frequency that clashes with your shutter speed and local power frequency (50Hz or 60Hz). The fix is to match shutter speed to the power frequency—1/50 or 1/100 for 50Hz regions, 1/60 or 1/120 for 60Hz regions—or to use lights designed for video that offer flicker-free dimming. Another problem is color casts from mixed lighting; locking white balance and standardizing your room lighting helps. If the image looks overly sharp or “crunchy,” reduce in-camera sharpening and avoid stacking sharpening in software. If your video feed has black bars or doesn’t fill the frame, check output settings and aspect ratio. A DSLR-level webcam is a system, and most issues are solvable with a few targeted adjustments. Once solved, the setup tends to remain stable for months, delivering a consistent professional look with minimal daily effort.
Choosing the Right Setup for Your Budget and Space
Getting dslr quality webcam results doesn’t require the most expensive camera on the market; it requires matching the solution to your space and needs. If you have a small desk and want simplicity, a premium USB webcam with a larger sensor and good optics can be the best choice because it avoids capture cards and complex power setups. If you already own a DSLR or mirrorless camera, repurposing it can be cost-effective, but you should budget for the missing pieces: capture card (if needed), dummy battery or USB-C power, a stable tripod or desk mount, and proper lighting. Lens selection is also part of the budget. A moderately priced prime lens often delivers a bigger visual upgrade than jumping to a higher-end camera body. For example, a decent 35mm or 50mm equivalent lens with good sharpness can make your image look truly camera-like, especially when paired with a soft key light.
Space constraints influence lens choice and camera placement, which in turn affect whether you achieve a dslr quality webcam look without awkward distortion. In tight spaces, you may need a wider lens, but ultra-wide angles can exaggerate facial features if the camera is close. A practical solution is to move the camera slightly farther away and crop in, or use a lens that’s wide enough for your room but not extreme. Background matters too: if your wall is right behind you, heavy blur can look unnatural and may create edge artifacts if the camera’s autofocus struggles. Creating a bit of distance between you and the background—even two or three feet—can improve separation dramatically. If your environment is visually busy, a simple background strategy helps: tidy the frame, add one or two intentional elements, and avoid bright windows behind you. The best setup is the one you can use daily without frustration. When the camera turns on reliably, the lighting is consistent, and your framing looks good without constant tweaking, you’ve built a sustainable DSLR-style webcam workflow.
Practical Tips to Keep Your Image Professional Every Time
Consistency is the real hallmark of a dslr quality webcam. Start with a repeatable checklist: camera power, lens cap removed, correct scene lighting, white balance locked, and focus confirmed. If you use manual exposure, keep your settings noted so you can return to them easily. Consider marking your chair position or camera distance so you stay in the focus plane. If you share your space with others or move the camera, a quick test recording can catch problems before a live call. Keeping your camera on a sturdy mount reduces micro-shake and makes the image feel more stable. If your camera has a tendency to time out, ensure any power-saving settings are disabled for live output. For conferencing, set the camera as the default input in your OS and in each app to avoid last-minute scrambling.
Presentation details also matter for a dslr quality webcam look. Keep the lens clean; a smudge can reduce contrast and make an expensive setup look soft. Avoid sitting with a bright window behind you, or use curtains and add a key light so your face remains the brightest part of the frame. If you wear glasses, tilt the lights or raise them slightly to reduce reflections. Dress with the camera in mind: fine patterns can cause moiré, and very bright whites can clip highlights. For streaming or recorded lessons, consider using a slightly higher frame rate if you demonstrate motion, but prioritize stable lighting and exposure. Finally, don’t overdo background blur just because you can. A natural amount of separation looks premium; extreme blur can become distracting in professional contexts. When everything is balanced—light, color, focus, framing, and sound—the result is the dependable, polished appearance people expect when they ask for DSLR-level webcam quality.
Final Thoughts on Getting DSLR Quality Webcam Results Without the Hassle
A dslr quality webcam is ultimately a combination of camera capability, reliable connectivity, controlled lighting, and repeatable settings. You can reach that look with an interchangeable-lens camera and capture card, or with a high-end USB webcam designed to emulate DSLR rendering, and both approaches can look excellent when set up thoughtfully. The most important factors are the ones that stay consistent: stable exposure, locked white balance, flattering light placement, and audio that matches the visual polish. If you focus on those fundamentals, the “DSLR look” becomes less of a gimmick and more of a dependable tool that makes your calls, streams, and lessons easier to watch and easier to trust. A well-tuned dslr quality webcam setup doesn’t just make you look better; it makes your communication feel clearer, calmer, and more professional in every setting where video matters.
Watch the demonstration video
Learn how to turn a DSLR into a high-quality webcam for sharper video, better low-light performance, and professional background blur. The video covers the gear and software you need, setup steps, recommended settings, and tips to avoid common issues like overheating, lag, and poor audio—so your calls and streams look polished. If you’re looking for dslr quality webcam, this is your best choice.
Summary
In summary, “dslr quality webcam” is a crucial topic that deserves thoughtful consideration. We hope this article has provided you with a comprehensive understanding to help you make better decisions.
Frequently Asked Questions
Can a DSLR be used as a high-quality webcam?
Absolutely. With the right setup—whether that’s a USB webcam utility, an HDMI capture card, or a UVC adapter—you can turn your DSLR into a **dslr quality webcam** that delivers noticeably sharper video and stronger low-light performance than most built-in webcams.
What’s the easiest way to get DSLR quality as a webcam?
For an easy, no-fuss setup, use a camera that offers an official USB webcam utility (or supports UVC) and plug it straight into your computer via USB. This approach usually needs little to no extra hardware while still delivering **dslr quality webcam** results.
Do I need a capture card to use a DSLR as a webcam?
If your camera supports HDMI output, you’ll typically need a capture card to use it as a **dslr quality webcam**. USB webcam modes, on the other hand, usually work without any extra hardware—though HDMI capture often provides a more stable connection and can deliver higher resolution and smoother performance.
What settings make a DSLR webcam look professional?
Use 1080p (or higher if supported), set shutter around 1/50–1/60 for natural motion, keep ISO low, choose a flattering aperture (often f/2–f/4), lock white balance, and use continuous autofocus or manual focus. If you’re looking for dslr quality webcam, this is your best choice.
How do I prevent overheating or auto shutoff during long calls?
To get a smooth, reliable setup for a **dslr quality webcam**, enable clean HDMI/USB output, turn off any power-saving or auto-shutoff timers, and power the camera with a dummy battery or AC adapter. If possible, minimize internal processing by disabling features like in-camera recording, and make sure the camera has plenty of airflow around it to prevent overheating during longer sessions.
What else matters besides the camera for DSLR-quality webcam results?
Lighting and audio. A soft key light (or window light) improves image quality more than most camera upgrades, and a dedicated mic or audio interface will dramatically improve perceived professionalism. If you’re looking for dslr quality webcam, this is your best choice.
📢 Looking for more info about dslr quality webcam? Follow Our Site for updates and tips!

Trusted External Sources
- What is the best high quality camera to use as a webcam? : r/Twitch
As of Feb 18, 2026, I’m still learning the ropes, but I’ve noticed that some of my favorite streamers don’t rely on standard webcams—they use DSLR cameras instead. That’s a big reason their video looks so crisp and cinematic, almost like a **dslr quality webcam** setup, with sharper detail, better low-light performance, and a more professional feel overall.
- Opal C1 — The first professional camera
Meet the Opal C1, a truly professional webcam designed to make you look your best on every call. With a 4K Sony sensor and the Composer companion app for fine-tuned control, it delivers the sharp, natural look you’d expect from a **dslr quality webcam**—and more.
- LPT: if you have a DSLR, use it as a high quality webcam for free : r …
Jan 20, 2026 … Free webcam software to easily use your DSLR as a webcam. All you need is a USB-to-mini-HDMI cable or USB-to-mini-USB cord, depending on your camera’s port. If you’re looking for dslr quality webcam, this is your best choice.
- Video call quality: webcam vs iPhone vs DSLR – Jeff Carlson …
On Jun 4, 2026, I published two new articles for @reincubate comparing webcams, iPhones, and DSLR/mirrorless cameras—and sharing practical tips to level up your video calls, including how to get a **dslr quality webcam** look.
- Using a dSLR as a Webcam for Live Streaming
To use an SLR as a webcam, you’ll need a **clean HDMI output**—meaning the camera sends a video signal without any on-screen text or setting overlays. That clutter-free feed is what helps you get a **dslr quality webcam** look when you connect it to your computer.