Custom 3d printing has moved from a niche prototyping tool into a practical way to create parts, products, and personalized items with a level of flexibility that traditional manufacturing struggles to match. The main idea is simple: instead of carving material away or relying on a fixed mold, a digital model is transformed into a physical object by building it layer by layer. What makes it “custom” is not only the ability to change dimensions or add names and logos, but also the freedom to tailor geometry, performance, and aesthetics to a specific use case. A replacement knob that fits an older machine, a bracket designed around a tight installation space, or a medical device accessory shaped to someone’s anatomy are all realistic outcomes. Even when the starting point is a standard model, custom work often includes changes to tolerances, wall thickness, mounting patterns, surface finish, and material selection so the final print behaves correctly in real-world conditions.
Table of Contents
- My Personal Experience
- Understanding Custom 3D Printing and Why It Matters
- From Idea to Object: The Custom 3D Printing Workflow
- Choosing the Right Technology: FDM, SLA, SLS, and More
- Materials That Make a Difference in Custom 3D Printing
- Design for Additive Manufacturing: Getting Better Results the First Time
- Customization for Businesses: Prototypes, Fixtures, and Low-Volume Production
- Customization for Individuals: Personalized Products and Creative Projects
- Expert Insight
- Precision, Tolerances, and Quality Control in Custom 3D Printing
- Post-Processing and Finishing Options for Professional Results
- Cost Drivers and How to Optimize a Custom 3D Printing Project
- Common Pitfalls and How to Avoid Them
- Where Custom 3D Printing Is Headed: Trends and Practical Takeaways
- Watch the demonstration video
- Frequently Asked Questions
- Trusted External Sources
My Personal Experience
I got into custom 3D printing after a small plastic bracket in my kitchen drawer snapped and the manufacturer didn’t sell replacements. I measured the broken piece with a cheap caliper, sketched it in Fusion 360, and printed a few versions in PLA until the fit was right—my first attempt was too tight and the drawer wouldn’t slide. Once it worked, I reprinted it in PETG for a bit more durability and it’s held up for months. The best part wasn’t just fixing the drawer, but realizing I could tweak the design for my own needs, like adding a little finger tab so it’s easier to remove next time.
Understanding Custom 3D Printing and Why It Matters
Custom 3d printing has moved from a niche prototyping tool into a practical way to create parts, products, and personalized items with a level of flexibility that traditional manufacturing struggles to match. The main idea is simple: instead of carving material away or relying on a fixed mold, a digital model is transformed into a physical object by building it layer by layer. What makes it “custom” is not only the ability to change dimensions or add names and logos, but also the freedom to tailor geometry, performance, and aesthetics to a specific use case. A replacement knob that fits an older machine, a bracket designed around a tight installation space, or a medical device accessory shaped to someone’s anatomy are all realistic outcomes. Even when the starting point is a standard model, custom work often includes changes to tolerances, wall thickness, mounting patterns, surface finish, and material selection so the final print behaves correctly in real-world conditions.
Many people first encounter custom 3d printing through consumer-facing products like personalized gifts, cosplay props, or custom phone stands, but the deeper value shows up when requirements are unique or quantities are small. Conventional manufacturing can be very efficient at scale, yet it often demands expensive tooling and long lead times. Custom additive manufacturing shifts the cost structure: setup is mostly digital, and revisions can be made quickly without rebuilding an entire production line. That agility is important for startups iterating on product design, maintenance teams needing end-of-life parts, educators producing classroom models, and artists exploring complex forms. The technology also supports mass customization, where each unit can be different without a huge penalty. When handled professionally, the process includes design validation, material testing, print orientation planning, and post-processing choices that align the final part with functional, visual, and durability goals.
From Idea to Object: The Custom 3D Printing Workflow
A successful custom 3d printing project typically begins with a clear definition of requirements rather than jumping straight into printing. The basic questions include: What will the part do, what forces will it experience, what environment will it live in, and how precise does it need to be? A decorative model may tolerate looser tolerances and lighter infill, while a functional bracket may need thicker walls, stronger materials, and careful orientation to avoid layer-line weakness in critical directions. Once requirements are understood, the next step is obtaining or creating a 3D model. Some projects start from scratch in CAD, others use a scan, and some use an existing file that gets modified. Regardless of origin, the model must be prepared for additive manufacturing: watertight geometry, appropriate clearances for mating parts, and features sized for the chosen process. Small details that look good on screen can disappear in a real print if they are below the printer’s resolution or the material’s minimum feature size.
After modeling, slicing software converts the design into toolpaths and parameters: layer height, wall count, infill pattern, supports, print speed, and temperatures. This stage heavily influences the outcome of custom 3d printing because it determines strength, surface finish, and print time. Orientation is especially important; a part printed upright might look cleaner on one face but become weaker along the direction of stress. Supports may be needed for overhangs, yet supports can scar surfaces when removed, so designers often tweak geometry to reduce support contact. Once printed, post-processing begins: support removal, sanding, vapor smoothing, bead blasting, dyeing, painting, or sealing. Some parts require heat-set inserts, tapping, or assembly with hardware. Quality checks are often overlooked in hobby contexts, but professional work includes measurement of critical dimensions, test fitting, and sometimes destructive testing for load-bearing parts. When each stage is planned, the final object is less about trial-and-error and more about a controlled manufacturing process.
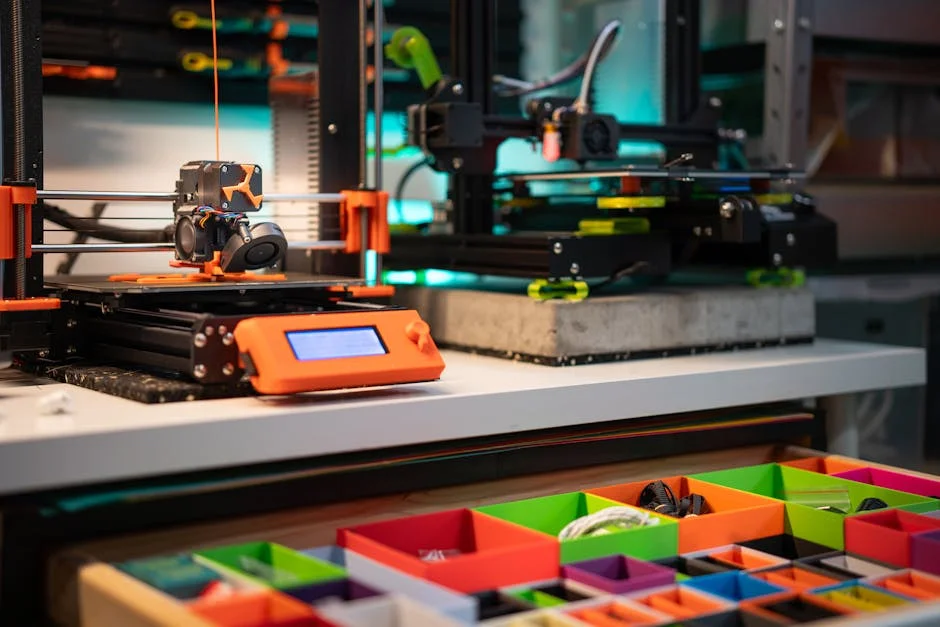
Choosing the Right Technology: FDM, SLA, SLS, and More
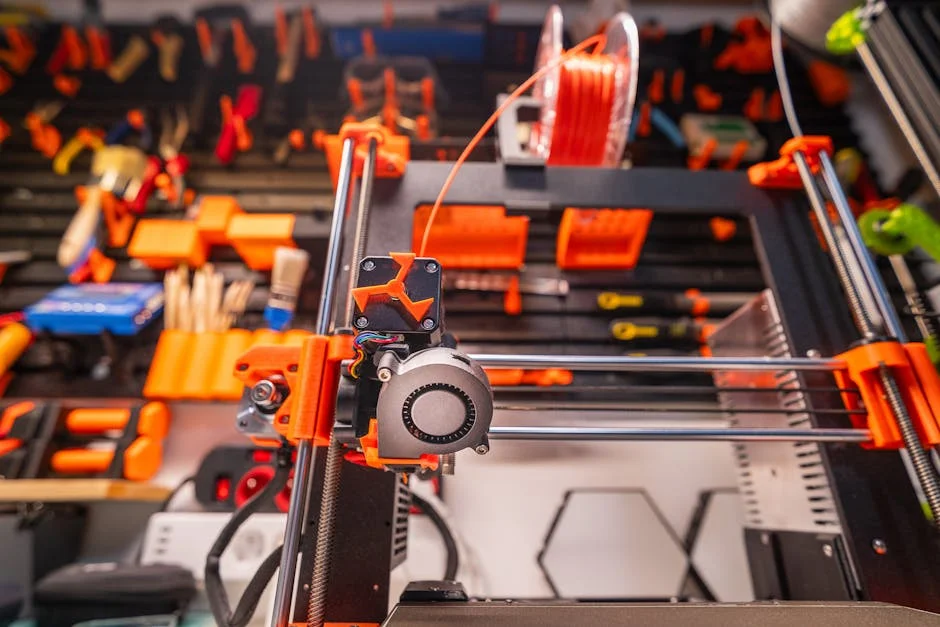
Different printing methods serve different goals, and selecting the right one is a major decision in custom 3d printing. Fused Deposition Modeling (FDM) is widely available and cost-effective, making it popular for prototypes, jigs, and large parts where slight layer lines are acceptable. Materials such as PLA, PETG, ABS, ASA, nylon, and carbon-fiber blends provide a range of stiffness, heat resistance, and toughness. FDM shines when you need quick iteration and can design around the process, but it can struggle with fine details, watertightness, and perfectly smooth surfaces without additional finishing. Stereolithography (SLA) and related resin processes excel at high detail and smooth surfaces, which is ideal for miniatures, dental models, and intricate aesthetic components. Resin prints, however, often require careful handling, washing, curing, and consideration of long-term UV stability.
Selective Laser Sintering (SLS) and Multi Jet Fusion (MJF) are often used for functional parts in nylon powders, delivering excellent durability and no need for support structures in the same way as FDM or SLA. That makes them powerful options for complex geometries, internal channels, and batch production of small components. The surface finish is typically slightly grainy, but it can be dyed, tumbled, or coated. For metal needs, processes like DMLS/SLM create strong metal parts, though costs and lead times are higher and design constraints differ due to support requirements and thermal stresses. The best custom 3d printing choice depends on the part’s job: cosmetic display pieces might favor resin; rugged housings might favor SLS nylon; quick fixtures might favor FDM. Thinking in terms of end-use requirements—strength direction, temperature exposure, chemical contact, and visual expectations—helps avoid selecting a process solely because it is familiar.
Materials That Make a Difference in Custom 3D Printing
Material selection is where custom 3d printing becomes truly tailored, because the same geometry can behave very differently depending on what it is made from. PLA is easy to print and dimensionally stable, but it can deform under heat and may be too brittle for impact-prone applications. PETG offers a balanced mix of toughness and printability, making it common for enclosures and functional prototypes. ABS and ASA bring better heat resistance, with ASA adding improved UV resistance for outdoor use. Nylon is valued for strength and abrasion resistance, but it can absorb moisture and may require controlled printing conditions. TPU and other flexible materials enable gaskets, grips, vibration dampers, and wearable components, though they demand careful tuning and often print more slowly. Resin families vary widely, including standard resins for detail, tough resins for impact resistance, flexible resins for elasticity, and high-temperature resins for heat exposure.
Beyond the base polymer, additives and reinforcements can change performance significantly. Carbon-fiber-filled filaments can increase stiffness and reduce warping, though they may be more brittle and can wear nozzles. Glass-filled nylons improve stability and strength. For SLS and MJF, nylon 12 is a common default, while nylon 11 can provide better ductility for snap fits and living hinges. When planning custom 3d printing for functional parts, it helps to think about the entire lifecycle: will it sit near a motor, experience sunlight, contact oils, or face repeated bending? Even the same material can perform differently based on print settings—wall thickness, infill, and orientation influence how loads travel across layers. The “best” material is the one that meets requirements with the least risk, not necessarily the strongest on paper. A smart approach is to prototype in a cheaper material, validate fit and function, then switch to the final material once the design is stable.
Design for Additive Manufacturing: Getting Better Results the First Time
Good outcomes in custom 3d printing often come down to designing with the process in mind. A common mistake is to model a part as if it will be injection molded or machined, then simply export it for printing. Additive manufacturing has its own strengths: complex internal structures, organic shapes, lattice infill, and consolidation of multiple components into one. It also has constraints: minimum wall thickness, overhang angles, support removal access, and anisotropic strength where layers can split under certain loads. When designing functional parts, adding fillets at stress points, increasing wall counts, and aligning layer direction with expected forces can dramatically improve durability. For assemblies, proper clearances matter; a pin that fits perfectly in CAD may fuse in a real print if tolerances are too tight. Designers often build in allowances that match the chosen process, such as slightly larger holes for FDM or accounting for resin shrinkage in SLA.
Another key practice is simplifying post-processing. Supports can be unavoidable, but you can reduce scars by orienting critical faces away from supports or splitting the model into parts that print cleanly and assemble afterward. Threading is another area where design choices matter. Printed threads can work for low-load applications, but for repeated use, heat-set inserts or embedded nuts provide better longevity. Snap fits are popular in custom 3d printing, yet they require careful material choice and geometry so clips flex without cracking. Text and logos should be sized to remain readable; embossed features typically print cleaner than engraved ones in FDM, while resin can handle finer engraving. Finally, consider dimensional control: if a component must align with a metal rail or fit into an existing housing, adding datum surfaces and measuring printed prototypes can guide small revisions. A few thoughtful design adjustments can turn a frustrating print cycle into a predictable, repeatable workflow.
Customization for Businesses: Prototypes, Fixtures, and Low-Volume Production
For businesses, custom 3d printing often begins with prototyping, but it rarely ends there. Rapid prototypes help teams evaluate ergonomics, assembly, and product appearance without waiting weeks for tooling. Because revisions are digital, designers can test multiple versions quickly, then converge on a final design with fewer surprises. Beyond prototypes, additive manufacturing is effective for jigs, fixtures, and tooling aids that support production lines. A custom drill guide, alignment jig, or protective cap can reduce errors and speed up assembly, and these tools can be tailored to the exact parts used on a specific line. When a fixture wears out or a product variant is introduced, updating the design and reprinting is straightforward. This flexibility can be particularly valuable for manufacturers dealing with frequent changeovers or limited runs.
Low-volume production is another strong use case for custom 3d printing. When demand is uncertain or the market is specialized, investing in molds can be risky. Additive manufacturing allows companies to produce small batches economically and adjust designs based on customer feedback. This is also where mass customization becomes practical: individualized nameplates, custom-fit accessories, or product variants with different mounting patterns can be produced without separate tooling. For replacement parts, especially for older equipment, printing can restore functionality when original suppliers no longer stock components. The key is to treat additive manufacturing as a manufacturing process, not a novelty. That means setting material standards, documenting print settings, verifying dimensions, and ensuring post-processing is consistent. When those controls are in place, custom 3d printing can deliver reliable parts that integrate smoothly into real operations.
Customization for Individuals: Personalized Products and Creative Projects
For individuals, custom 3d printing opens the door to personalization that feels genuinely tailored rather than mass-produced. A simple example is a desk accessory designed around a specific workflow: a stand that holds a particular microphone, a mount that fits a unique monitor arm, or a cable organizer sized to your exact devices. Hobbyists and makers use additive manufacturing to create cosplay armor, prop replicas, tabletop miniatures, camera accessories, and custom storage solutions. The ability to iterate is especially empowering; if a part is close but not perfect, the model can be adjusted and reprinted without discarding expensive materials. Personalization can be aesthetic—colors, textures, engraved names—or functional, such as reshaping grips to fit a hand more comfortably. Even small changes, like adding a chamfer for easier insertion or increasing a clip’s flexibility, can make an object feel purpose-built.
| Option | Best for | Pros | Considerations |
|---|---|---|---|
| FDM (Filament) Custom 3D Printing | Functional prototypes, jigs/fixtures, larger parts on a budget | Low cost, fast turnaround, wide material/color choices, strong enough for many use-cases | Visible layer lines; fine details and tight tolerances may need post-processing |
| SLA/DLP (Resin) Custom 3D Printing | High-detail parts, miniatures, cosmetic prototypes, small precision components | Excellent surface finish, sharp details, accurate small features | Resin parts can be more brittle; requires washing/curing; UV/heat sensitivity varies by resin |
| SLS/MJF (Powder) Custom 3D Printing | Durable end-use parts, complex geometries, small-batch production | No support structures, strong nylon parts, good dimensional stability, efficient for batches | Higher cost; surface is slightly grainy; lead times can be longer than desktop methods |
Expert Insight
Start with clear requirements: define the part’s function, load direction, and environment (heat, UV, chemicals), then choose a material and process that match. Before printing, add practical design tweaks—fillets on inside corners, consistent wall thickness, and proper tolerances for fits—to reduce warping and prevent weak points. If you’re looking for custom 3d printing, this is your best choice.
Validate early with a low-cost prototype: print a quick draft at lower infill or larger layer height to check ergonomics, assembly, and clearances, then iterate. Once the geometry is locked, run a final print with orientation optimized for strength and surface finish, and plan post-processing (sanding, vapor smoothing, inserts) to meet the end-use requirements. If you’re looking for custom 3d printing, this is your best choice.
Creative projects also benefit from the geometric freedom of custom 3d printing. Designers can explore complex surfaces, internal voids, and interlocking structures that would be difficult to create by hand. Artists use additive manufacturing for sculptural pieces, lampshades with intricate patterns, and mixed-media installations where printed components become structural elements. For home improvement, printing can solve annoying problems: missing plastic brackets, custom spacers, replacement knobs, or adapters between mismatched components. The main caution is to match the material to the environment. A part left in a hot car may deform if made from a low-heat plastic, and outdoor exposure can degrade certain materials over time. With thoughtful planning—choosing the right polymer, adding sufficient thickness, and considering load direction—custom 3d printing can produce objects that are not just personalized, but truly useful and durable.
Precision, Tolerances, and Quality Control in Custom 3D Printing
Precision is a common expectation, but achieving it consistently in custom 3d printing requires understanding what affects dimensional accuracy. Shrinkage, warping, and layer adhesion vary by material and process. FDM parts can show slight dimensional drift depending on cooling, nozzle diameter, and extrusion calibration. SLA parts can be extremely detailed, but resin shrinkage and post-cure behavior may shift critical dimensions. Powder-based processes like SLS and MJF can provide stable results for many geometries, though surface texture and powder removal considerations remain. Because these variables exist, professional workflows treat tolerances as part of the design brief. Critical features—holes, press-fit areas, mating surfaces—may be intentionally modeled with allowances, and test coupons are sometimes printed to dial in fit. Measuring with calipers, checking against gauges, and performing test assemblies can quickly reveal whether adjustments are needed.
Quality control is more than checking if a part “looks right.” A functional custom 3d printing job may require verifying wall thickness, ensuring no internal voids compromise strength, and confirming that threads and inserts meet expected torque requirements. For parts that must seal, surface finish and layer bonding become important, and coatings or smoothing methods may be used to reduce porosity. Visual inspection helps catch layer shifts, under-extrusion, resin cure issues, or powder-sintering defects. When parts are produced in small batches, maintaining consistency involves documenting the exact print settings, orientation, support strategy, and post-processing steps. Even seemingly minor variations—different humidity levels for nylon filament, a slightly worn nozzle, or a change in resin temperature—can affect results. A disciplined approach reduces reprints, improves reliability, and makes it easier to scale from a single custom piece to a repeatable production run.
Post-Processing and Finishing Options for Professional Results
Post-processing is where custom 3d printing can shift from a “printed” look to a refined, product-like finish. For FDM, common steps include removing supports, sanding layer lines, filling small gaps, and applying primer before painting. When aesthetics matter, multiple cycles of sanding and priming can produce a smooth surface, while careful painting and clear coating can match brand colors or achieve realistic effects. Vapor smoothing is another technique, often used with ABS-like materials, that can reduce visible layer lines and improve surface uniformity, though it requires controlled handling and safety precautions. For resin prints, post-processing typically involves washing, curing, removing supports, and sanding support marks. Resin can capture fine detail, so careful support placement and removal are important to preserve surfaces. Powder-based prints may be bead blasted for a consistent texture, dyed for color, or coated to change appearance and feel.
Functional finishing is just as important as cosmetic finishing in custom 3d printing. Heat-set threaded inserts can transform a plastic part into something that can be assembled and disassembled repeatedly without stripping. Tapping printed holes can work for light-duty applications, but inserts provide better long-term performance. Sealing and coating can improve chemical resistance or reduce porosity for parts that need to hold liquids or resist oils. For wear surfaces, adding metal bushings or using self-lubricating materials may extend life. Assembly steps may include bonding printed parts with adhesives, using mechanical fasteners, or designing interlocking joints. The best finishing plan is chosen early, because it affects design: surfaces that will be sanded may need extra thickness, and areas meant to accept inserts need sufficient material around the hole. When finishing is aligned with the design intent, custom 3d printing can produce parts that look polished and perform reliably.
Cost Drivers and How to Optimize a Custom 3D Printing Project
The cost of custom 3d printing is influenced by more than the size of an object. Print time is a major driver, especially for high-detail or high-infill parts, because longer prints tie up machines and increase labor risk. Material choice also matters; specialty polymers, flexible materials, and engineering-grade resins cost more than basic plastics. Post-processing can become a significant portion of total cost when a smooth cosmetic finish, tight tolerances, or complex support removal is required. Geometry plays a role too: designs with many overhangs, thin walls, or delicate features may need slower settings, more supports, and higher failure risk. Shipping and handling can add costs for large or fragile prints, and if a part must meet specific requirements, additional steps like test prints and measurement checks may be necessary.
Optimizing a custom 3d printing project starts with clarity about what truly matters. If the part is a fit-check prototype, it may not need premium materials or perfect surface finish. Reducing infill, increasing layer height, and simplifying supports can cut time dramatically while preserving the purpose of the prototype. If the part is an end-use component, it may be worth paying for a stronger process like SLS or a more durable material rather than reprinting weaker parts repeatedly. Design optimization can also lower cost: hollowing thick solids, adding ribs instead of bulk, and reducing unnecessary detail can shorten print time and reduce material use. Splitting a large model into smaller pieces can improve success rates and reduce support complexity, though it adds assembly steps. When the goal is repeatability, documenting settings and standardizing orientations helps reduce waste. Thoughtful decisions at the beginning often save more money than trying to “cheap out” at the end.
Common Pitfalls and How to Avoid Them
Many disappointments in custom 3d printing come from mismatched expectations rather than bad technology. One frequent issue is assuming that a printed part will be as strong as an injection-molded part without accounting for layer-based construction. Strength can be excellent when designed properly, but it is directional, and thin features can snap if loads pull layers apart. Another pitfall is ignoring the environment: a part printed in a low-heat plastic may warp near a heat source, and some materials degrade under UV exposure. Poor tolerance planning can lead to assemblies that don’t fit, especially when multiple printed parts must align with metal components. Overly fine details can vanish in FDM, while resin can capture them but may be too brittle if the wrong resin is chosen. Support placement can also ruin visible surfaces, so planning which faces matter most is critical.
To avoid these problems, treat custom 3d printing as a design-and-manufacture partnership. Start by identifying critical dimensions and functional requirements, then choose a process and material that naturally meets them. Print small test sections for tight-fit areas instead of printing an entire complex object just to discover a tolerance issue. Consider using inserts, bushings, or hybrid assemblies where printed parts work alongside standard hardware. For outdoor or high-temperature applications, choose materials designed for those conditions and consider coatings when appropriate. If aesthetics are important, plan for finishing and design surfaces that can be sanded or coated without losing important geometry. Finally, build in iteration time; even with strong planning, the first version is often a learning step. With a structured approach, custom 3d printing becomes predictable and rewarding rather than a cycle of reprints and compromises.
Where Custom 3D Printing Is Headed: Trends and Practical Takeaways
Custom 3d printing continues to evolve in ways that make tailored manufacturing more accessible and more reliable. Materials are expanding rapidly, with more options that balance toughness, heat resistance, flexibility, and long-term stability. Printers and software are improving in calibration, monitoring, and repeatability, which helps reduce failures and makes production runs more consistent. Another trend is the integration of scanning and generative design, enabling parts that are shaped around real-world constraints and optimized for weight and strength. As workflows mature, more organizations treat additive manufacturing as part of their supply chain rather than a side experiment. That shift supports localized production, faster replacement parts, and reduced dependence on long tooling cycles. At the same time, finishing and quality processes are becoming more standardized, helping printed parts meet higher expectations for fit, appearance, and performance.
The most practical takeaway is that custom 3d printing delivers the best results when it is approached with intention: define requirements, choose the right process, design for the technology, and plan finishing from the start. Whether the goal is a one-off personalized item or a small batch of functional components, success comes from aligning geometry, material, and print settings with how the part will actually be used. When you treat the work as a real manufacturing workflow—complete with tolerance planning, test fitting, and documented settings—you can achieve parts that look professional and perform reliably. Done well, custom 3d printing is not just a way to make objects; it is a way to solve unique problems with speed, creativity, and control, and it remains one of the most adaptable options for turning specific needs into physical, usable results.
Watch the demonstration video
Discover how custom 3D printing turns your ideas into real, functional parts. This video explains the full process—from choosing materials and dialing in design details to preparing files, printing, and finishing—so you can create prototypes, replacements, or one-of-a-kind products with better fit, strength, and accuracy.
Summary
In summary, “custom 3d printing” is a crucial topic that deserves thoughtful consideration. We hope this article has provided you with a comprehensive understanding to help you make better decisions.
Frequently Asked Questions
What is custom 3D printing?
Custom 3D printing is producing parts made to your exact design, dimensions, and requirements, rather than using pre-made models.
What file formats do you accept for custom 3D printing?
Most services accept STL and 3MF; STEP/IGES are often preferred for highest accuracy because they preserve CAD geometry.
Which 3D printing process should I choose (FDM, SLA, SLS, MJF)?
FDM is cost-effective for prototypes, SLA for smooth/detail, SLS/MJF for strong functional parts and complex shapes without supports.
What materials can be used for custom 3D printed parts?
Common options include PLA, PETG, ABS/ASA, TPU, nylon (PA12), resin, and some metals—availability depends on the process.
How much does custom 3D printing cost?
Pricing typically depends on material, print volume, part complexity, required accuracy, post-processing, and quantity.
How long does custom 3D printing take?
Turnaround times vary based on the printing method, our current queue, any required post-processing, and shipping, so your **custom 3d printing** order could be ready as soon as the same day or take up to a couple of weeks—though most orders ship within 2–7 business days.
📢 Looking for more info about custom 3d printing? Follow Our Site for updates and tips!

Trusted External Sources
- Where can I find a service that 3D prints custom things and ships it to …
Jun 18, 2026 … I really want to custom print something called a hydralisk skull for him, but I have no idea what sites to look for or which ones aren’t complete scams. If you’re looking for custom 3d printing, this is your best choice.
- Custom 3d Printing – Etsy
Check out our custom 3d printing selection for the very best in unique or custom, handmade pieces from our 3d printing & machining shops.
- Which program is best for creating custom 3D models specifically for …
Dec 27, 2026 … However, lately I have friends and family asking me to create custom designs for 3D printing and I have been having some issues. I just cant … If you’re looking for custom 3d printing, this is your best choice.
- Custom 3D Printing Service from Print a Thing
Print a Thing is a crowd-sourced custom 3D printing service that provides low-cost, quick-turn, and high-quality results for hobbyists, experimenters and …
- Joyseat 3.0 | 3D Printed Bike Saddle | Customized For You – Posedla
Introducing the world’s first **custom 3d printing** saddle—engineered from carbon fiber and TPU and shaped using your unique butt imprint data and riding style. Expertly handmade in Europe for a fit that feels truly personal.