An sla 3d printer is a resin-based additive manufacturing machine that builds parts by curing liquid photopolymer resin with light, typically using a laser or a projected UV image. Unlike filament systems that melt plastic and lay down strands, stereolithography creates solid layers by triggering a chemical reaction in resin, delivering exceptionally smooth surfaces and crisp detail. That difference in how material becomes solid is the reason many designers, dentists, jewelers, and engineers reach for resin printing when they need fine features, sharp edges, or highly accurate small components. The term “SLA” historically refers to laser-based stereolithography, but many people use it as a catch-all for resin technologies that cure photopolymer in a vat. Even when the machine uses a masked LCD or a DLP projector instead of a laser, the user experience overlaps: you manage resin, tune exposure settings, wash and cure parts, and handle safety considerations around chemicals and UV light.
Table of Contents
- My Personal Experience
- Understanding What an SLA 3D Printer Is and Why It Matters
- How SLA Printing Works: Core Components and the Layer-by-Layer Process
- SLA vs. Other 3D Printing Technologies: Where Resin Printing Excels
- Resolution, Accuracy, and Surface Finish: What to Expect from an SLA 3D Printer
- Materials and Resin Types: Choosing the Right Photopolymer for the Job
- Workflow and Post-Processing: Washing, Curing, and Finishing for Best Results
- Supports, Orientation, and Design Considerations for Resin Printing
- Common Print Failures and Troubleshooting Methods
- Expert Insight
- Safety, Ventilation, and Handling: Responsible Resin Printing Practices
- Choosing an SLA 3D Printer: Key Specs, Hidden Costs, and Practical Priorities
- Applications and Use Cases: Where Resin Printing Delivers Real Value
- Maintenance and Long-Term Reliability: Keeping a Resin Printer Performing Well
- Building a Repeatable Process: Calibration, Profiles, and Production Planning
- Final Thoughts on Getting the Most from an SLA 3D Printer
- Watch the demonstration video
- Frequently Asked Questions
- Trusted External Sources
My Personal Experience
I bought a small SLA 3D printer thinking it would be a cleaner, “set it and forget it” upgrade from my old FDM machine, and I learned pretty quickly that resin printing is its own routine. The first weekend I got gorgeous detail on a tabletop mini, but I also tore a print off the build plate too aggressively and gouged the surface, then spent an hour re-leveling and re-running exposure tests. The smell surprised me, so I ended up moving the printer to a spare room with a cheap vent fan and got serious about gloves, paper towels, and keeping a dedicated “mess zone” for IPA and curing. Once I dialed in supports and stopped rushing the wash-and-cure steps, the results became consistently impressive—especially for small parts—but it definitely feels more like a careful lab process than a casual hobby printer.
Understanding What an SLA 3D Printer Is and Why It Matters
An sla 3d printer is a resin-based additive manufacturing machine that builds parts by curing liquid photopolymer resin with light, typically using a laser or a projected UV image. Unlike filament systems that melt plastic and lay down strands, stereolithography creates solid layers by triggering a chemical reaction in resin, delivering exceptionally smooth surfaces and crisp detail. That difference in how material becomes solid is the reason many designers, dentists, jewelers, and engineers reach for resin printing when they need fine features, sharp edges, or highly accurate small components. The term “SLA” historically refers to laser-based stereolithography, but many people use it as a catch-all for resin technologies that cure photopolymer in a vat. Even when the machine uses a masked LCD or a DLP projector instead of a laser, the user experience overlaps: you manage resin, tune exposure settings, wash and cure parts, and handle safety considerations around chemicals and UV light.
Several practical factors make resin printing distinct. A resin machine typically produces parts with layer lines that are far less visible than those from filament printing, and it can reproduce textures, thin walls, and micro-details that would be challenging with an extruded nozzle. The trade-off is that resin workflows include more post-processing: parts are usually rinsed in solvent (often isopropyl alcohol or dedicated wash solutions), then post-cured under UV to reach full mechanical performance. The resins themselves also vary widely in behavior—standard resins for display models, tough resins for functional prototypes, flexible resins, castable resins for jewelry, dental biocompatible materials, and high-temperature formulations. The best way to think about an sla 3d printer is as a precision tool that rewards careful process control. When settings, resin handling, and post-cure are dialed in, the results can rival injection-molded aesthetics for short runs and prototypes, while enabling complex geometries that traditional manufacturing would struggle to create.
How SLA Printing Works: Core Components and the Layer-by-Layer Process
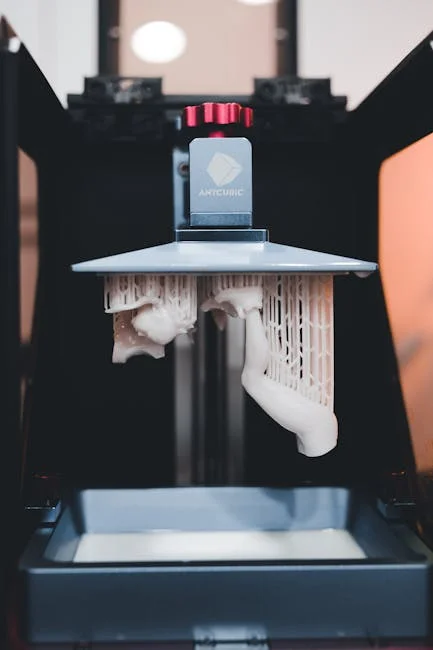
The essential idea behind an sla 3d printer is photopolymerization: a liquid resin becomes solid when exposed to light at specific wavelengths. Inside the machine, a build platform moves relative to a resin vat. Each layer is formed when light selectively cures the resin in the shape of that layer’s cross-section. In classic laser-based systems, galvanometers steer a laser beam to “draw” each layer on the resin surface. In DLP systems, a projector flashes an entire layer at once. In MSLA systems, an LCD panel masks UV light, curing a whole layer simultaneously. While these methods differ in optics, they share common process variables: exposure time, layer thickness, lift speed, and rest times that allow resin to flow and reduce suction forces.
Understanding the mechanics helps explain common print outcomes. When a layer cures, it adheres either to the build platform or to a release film at the bottom of the vat, depending on the machine’s orientation. Most consumer resin printers are “bottom-up,” meaning layers cure against a transparent window and release film, and the platform lifts to peel each layer away. That peeling step creates forces that can cause failures if supports are insufficient or if lift settings are too aggressive. Professional top-down systems avoid peeling but are less common for desktop use. Layer thickness impacts both speed and detail; thinner layers preserve fine Z-axis features but take longer. Exposure affects dimensional accuracy and strength; overexposure can “bloom” details and close small holes, while underexposure leads to weak layers and delamination. Temperature also matters because resin viscosity and reaction kinetics change with ambient conditions. A well-tuned sla 3d printer setup is a balancing act between reliable adhesion, minimal distortion, and the desired surface finish, which is why calibration prints and resin-specific profiles are routine in high-quality resin workflows.
SLA vs. Other 3D Printing Technologies: Where Resin Printing Excels
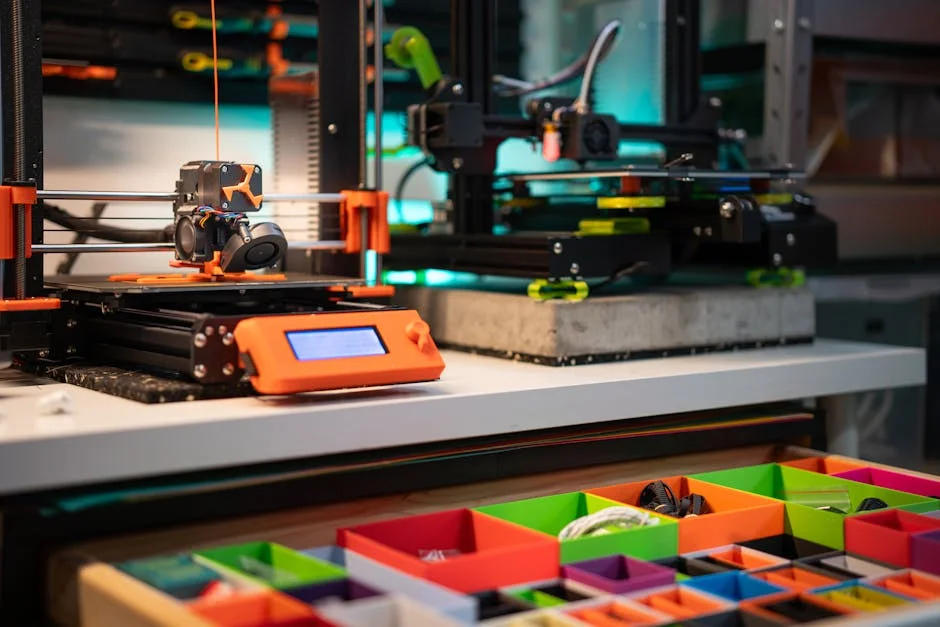
Comparing an sla 3d printer to filament-based FDM printers highlights the strengths of resin. FDM machines are often favored for large, rugged parts, low-cost materials, and simpler post-processing. However, the nozzle diameter and extrusion process limit how fine the details can be, and layer lines are typically more visible. Resin printing, by contrast, can produce smooth curves, sharp text, and intricate lattices with a level of refinement that makes it ideal for miniatures, figurines, dental models, hearing-aid shells, and jewelry masters. The ability to reproduce tiny embossed or engraved features is one of the biggest reasons resin printing is associated with professional prototyping and high-end modeling.
Against powder-based processes like SLS, resin offers superior surface smoothness at a lower entry price, but SLS can produce strong nylon parts without support structures and can be more suitable for functional assemblies and complex internal channels. Resin parts can be brittle depending on the material; even “tough” resins may not match nylon’s impact resistance. Compared with PolyJet, which can print multi-material and full color with extremely fine layers, resin printing is usually more affordable and accessible, though less versatile in multi-material output. The practical takeaway is that an sla 3d printer is often the best choice when visual quality, fine resolution, and small-feature accuracy matter more than raw toughness or large build volume. Many workshops keep both an FDM machine and a resin unit because each fills a different role: FDM for jigs, fixtures, and larger structural pieces, and resin for high-detail prototypes and parts that must look close to final production quality.
Resolution, Accuracy, and Surface Finish: What to Expect from an SLA 3D Printer
When people shop for an sla 3d printer, they often focus on “resolution,” but it helps to separate marketing terms from real-world outcomes. Resin printers have two main resolution dimensions: XY pixel size (or laser spot size) and Z layer height. In MSLA, the LCD pixel pitch determines the smallest addressable feature in the XY plane; in DLP, projected pixel size plays that role; in laser SLA, the beam spot and scanning precision matter. Smaller XY pixel sizes can capture finer detail, but it doesn’t automatically guarantee perfect accuracy because resin curing can spread beyond the intended boundary, especially with overexposure. Z layer height affects how smooth sloped surfaces appear; thinner layers reduce visible stepping but increase print time. Many users find that moderate layer heights deliver an excellent balance because resin already hides layer lines better than filament prints.
Dimensional accuracy depends on calibration, resin type, and geometry. Holes often print smaller than designed due to light bleed and resin shrinkage; thin walls may warp if not supported; large flat faces can “cup” or suction during peeling, causing distortions. Compensation features in slicers—such as shrinkage scaling, hole compensation, and anti-aliasing—can improve results, but they need to be tested with the specific resin and machine. Surface finish is where an sla 3d printer shines: after proper washing and curing, parts can look nearly injection molded, especially if supports are placed strategically to hide contact marks. Orientation matters too; printing a cosmetic face at an angle can reduce support scarring and minimize visible layer transitions. If a part needs a premium finish, sanding and priming are often easier with resin because the baseline surface is smoother. The realistic expectation is that resin printing can achieve outstanding detail, but it rewards careful exposure tuning, temperature control, and thoughtful part orientation to avoid warping and preserve sharp edges.
Materials and Resin Types: Choosing the Right Photopolymer for the Job
The resin you choose determines much of what an sla 3d printer can deliver. Standard resins are popular for visual prototypes, figurines, and display models because they print easily and capture detail well. They can be somewhat brittle, especially in thin features, but they’re cost-effective and available in many colors and translucencies. Tough resins aim to mimic ABS-like behavior, offering better impact resistance and flex before fracture, which makes them more suitable for snap-fit prototypes or housings. Flexible and elastic resins allow bending and compression, though they can be trickier to print because they may require slower lift speeds and careful support strategies. High-temperature resins are used for tooling inserts, mold masters, and parts exposed to heat, but they often need thorough post-curing to reach their rated performance.
Specialty resins expand the value of a resin workflow. Castable resins burn out cleanly for investment casting, a standard approach for jewelry patterns and small metal parts. Dental resins include materials for study models, surgical guides, splints, and temporary restorations, but they come with strict handling and curing requirements and often require validated workflows to meet regulatory expectations. Engineering resins can offer higher stiffness, better fatigue behavior, or improved chemical resistance, but they may be more sensitive to moisture and storage conditions. Pigmented resins can hide layer transitions, while clear resins can produce transparent parts if polished correctly, though achieving optical clarity requires meticulous washing, controlled curing, and finishing. With an sla 3d printer, resin freshness and storage matter: exposure to ambient light can degrade material, and temperature swings can change viscosity and print behavior. Selecting resin should start with the functional requirements—impact resistance, heat, flexibility, detail level, and appearance—then proceed to validating exposure settings and post-curing procedures that match the manufacturer’s recommendations.
Workflow and Post-Processing: Washing, Curing, and Finishing for Best Results
A reliable resin workflow is what separates occasional success from consistent production on an sla 3d printer. After printing, the part is coated in uncured resin and needs to be cleaned. Many users wash in isopropyl alcohol, but dedicated wash solutions can reduce odor and improve cleaning efficiency. Agitation—either with a wash station or gentle manual movement—helps remove resin from crevices. Over-washing can sometimes soften delicate details or cause certain resins to swell, so timing matters. Once washed, parts should dry completely before curing, because residual solvent can create a cloudy surface or interfere with the final polymerization. Support removal is typically easier before full curing because the resin is slightly softer, but removing supports too early can deform thin features. A balanced approach is to wash, partially dry, remove supports with flush cutters, then finish drying before the final cure.
Post-curing under UV light completes the chemical reaction and brings the part closer to its intended mechanical properties. Without proper curing, a resin print may remain tacky, weaker, or more prone to deformation over time. Cure time depends on resin type, part thickness, UV intensity, and temperature. Over-curing can make some resins more brittle or cause discoloration, especially in clear materials. Finishing steps vary by application: sanding support marks, filling small imperfections, priming, and painting are common for display models; for functional parts, you may focus on dimensional cleanup, tapping threads, or adding inserts. Some users apply a clear coat to improve appearance or protect surfaces. The key is repeatability: documenting wash times, cure times, and environmental conditions builds a stable process. An sla 3d printer is not just the machine; it’s the entire chain of steps that transforms a digital model into a durable, clean, and visually pleasing part. When that chain is controlled, resin printing becomes a dependable manufacturing method rather than an occasional experiment.
Supports, Orientation, and Design Considerations for Resin Printing
Supports are central to success with an sla 3d printer because resin parts are formed in a vat and often experience peeling forces. Orientation determines where supports are needed, how visible layer transitions will be, and whether suction effects will distort the print. Angling parts is a common strategy because it reduces the cross-sectional area per layer, lowering peel forces and improving reliability. It also helps distribute layer transitions across a surface, making them less noticeable. However, angling can increase the number of supports and the total height, which can increase print time. For cosmetic surfaces, placing supports on hidden faces or edges reduces post-processing work. Support tip size matters: small tips leave smaller marks but may fail on heavy parts; larger tips hold better but require more sanding. Many slicers offer light, medium, and heavy support presets, but the best results often come from customizing supports based on geometry.
Design choices can dramatically improve outcomes. Hollowing large parts saves resin and reduces print time, but it introduces the need for drain holes so uncured resin can escape. Without proper venting, pressure differentials and suction can cause layer separation or “blowouts.” Drain holes should be positioned to allow resin to flow out during printing and washing, and internal cavities should be cleaned thoroughly to prevent trapped resin from curing unpredictably later. Wall thickness should be sufficient to resist peel forces; extremely thin walls may warp or tear during the lift cycle. Sharp internal corners can concentrate stress, so small fillets can improve durability. Tolerances for assemblies often need adjustment because resin parts can shrink slightly and hole diameters can close. For press fits or snap features, testing is essential because different resins behave differently after curing. With an sla 3d printer, the best approach is to treat design, orientation, and support strategy as one integrated decision, iterating with small test prints until the workflow is stable and the parts meet both aesthetic and mechanical goals.
Common Print Failures and Troubleshooting Methods
Even a well-regarded sla 3d printer can produce failures if settings, resin condition, or environmental factors drift. A frequent issue is poor bed adhesion, where the first layers fail to stick to the build platform. This can result from insufficient bottom exposure, a dirty or improperly leveled platform, resin that is too cold and viscous, or a worn release film that increases peel forces. Another common failure is partial prints where supports form but the model is missing sections, often caused by underexposure, inadequate supports, or excessive lift speed. Layer separation or “delamination” can occur when exposure is too low or when the peel force exceeds the layer’s strength. Suction-related failures show up on hollow or large flat surfaces, where pressure changes during lifting can distort the part or rip it from supports.
| Feature | SLA 3D Printer | FDM 3D Printer | DLP/MSLA 3D Printer |
|---|---|---|---|
| Print quality & detail | Very high detail, smooth surfaces; excellent for miniatures, jewelry, dental models | Moderate detail; visible layer lines; best for functional prototypes and larger parts | Very high detail; often faster than SLA; crisp features for small/precise parts |
| Materials & durability | Photopolymer resins (standard, tough, flexible, castable); can be brittle depending on resin | Thermoplastics (PLA, PETG, ABS, nylon, composites); generally tougher and more heat-resistant options | Photopolymer resins similar to SLA; properties depend heavily on resin formulation |
| Workflow, cost & maintenance | Requires post-processing (wash & UV cure), resin handling/PPE; higher consumables and upkeep | Minimal post-processing; lowest ongoing costs; simpler operation and maintenance | Also needs wash & cure; LCD screens/films are wear items; resin mess similar to SLA |
Expert Insight
Dial in exposure with a simple calibration print before starting any critical job: run a small exposure test, then adjust normal exposure in small increments until fine text and sharp edges appear without swollen details. Keep resin temperature consistent (around 20–25°C) to reduce failed layers and improve dimensional accuracy. If you’re looking for sla 3d printer, this is your best choice.
Improve reliability and surface finish by optimizing supports and post-processing: use lighter supports on visible faces and place heavier supports on hidden or load-bearing areas, then angle parts 20–45° to minimize suction forces. After printing, rinse thoroughly, let parts fully dry, and post-cure in short cycles to avoid brittleness and warping. If you’re looking for sla 3d printer, this is your best choice.
Troubleshooting should be systematic. Start with the basics: confirm the resin is well mixed, at a stable temperature, and within its shelf life; check that the vat is clean and the film is intact; verify build platform leveling and surface condition. Next, validate exposure with calibration prints designed for resin machines, and record results for each resin. If fine details are bloated or holes close, reduce exposure slightly or adjust compensation features; if supports fail, increase support density or use stronger contact points on load-bearing areas. If prints stick to the vat film, increase bottom exposure or number of bottom layers, slow lift speeds, or replace the release film if it’s cloudy or scratched. Also consider ambient light: leaving resin exposed to sunlight can pre-cure it and cause unpredictable behavior. The most effective operators treat an sla 3d printer like a controlled process: they change one variable at a time, document settings, and keep maintenance routines consistent. That approach reduces wasted resin and time while improving the reliability needed for production work.
Safety, Ventilation, and Handling: Responsible Resin Printing Practices
Operating an sla 3d printer involves chemicals that require respect. Liquid photopolymer resin can irritate skin and eyes and may cause sensitization over time, meaning repeated exposure can trigger stronger reactions. Good practice includes wearing nitrile gloves when handling resin, using safety glasses when pouring or cleaning, and avoiding direct skin contact. Spills should be cleaned promptly with disposable towels, and contaminated waste should be cured before disposal according to local regulations. Resin odors vary by formulation; even “low odor” resins can release volatile compounds. Ventilation is important, especially in small rooms. Many users place resin machines in a dedicated area with extraction, an enclosure, or an air purifier designed for VOCs. It’s also wise to keep food and drink away from the print area and to wash hands thoroughly after working with resin.
Post-processing solvents introduce additional safety considerations. Isopropyl alcohol is flammable and should be stored in sealed containers away from heat sources. Wash stations reduce direct handling but still require careful disposal of dirty solvent. Over time, wash liquid becomes saturated with resin; exposing it to UV light can cure suspended resin particles, allowing filtration and reuse in some workflows, but disposal rules vary. UV curing lights can be harmful to eyes and skin, so curing stations should be enclosed, and users should avoid staring at exposed UV sources. Children and pets should not have access to resin materials or waste. With an sla 3d printer, safety is not an optional add-on; it’s part of the operating cost and the professional standard. A clean, ventilated, well-organized workspace improves not only health outcomes but also print consistency, because contamination and careless handling are common causes of failed prints and degraded resin performance.
Choosing an SLA 3D Printer: Key Specs, Hidden Costs, and Practical Priorities
Selecting an sla 3d printer involves more than comparing advertised resolution numbers. Build volume determines the maximum part size, but it also influences resin consumption and the scale of peel forces during printing. A larger vat can be helpful for batch production, yet it may require more careful tuning to avoid failures on big cross-sections. Light source quality and consistency matter because uneven illumination can cause dimensional variation across the build plate. For MSLA printers, LCD durability is a real consideration; the screen is a consumable component that can wear out over time. For laser systems, galvanometer and optics quality can impact long-term accuracy. Z-axis rigidity, linear rails, and platform stability affect layer consistency and reduce artifacts like banding. Software ecosystem matters too: reliable slicer profiles, support generation tools, and community-tested settings can shorten the learning curve.
Hidden costs can shape the real budget. Resin itself is an ongoing expense, and specialty resins can be significantly more expensive than standard formulations. You may also need a wash station, a curing station, replacement vats or films, gloves, filters, and storage containers for resin and solvent. If you plan to print functional parts, consider whether you need engineering-grade resins and whether your curing setup can meet the resin’s requirements for temperature and UV intensity. For professional environments, documentation and repeatability may matter as much as raw print quality, so machines with better calibration tools and stable firmware can be worth the premium. Another practical priority is service and parts availability; a low-cost sla 3d printer can become expensive if replacement screens, vats, or support are hard to obtain. The best buying decision aligns the machine’s strengths with the intended use case—dental models, jewelry casting, miniature production, or engineering prototypes—while accounting for the full workflow costs that come after the printer arrives.
Applications and Use Cases: Where Resin Printing Delivers Real Value
An sla 3d printer is often chosen for applications where surface quality and detail directly affect the final outcome. Miniatures and figurines benefit from crisp facial features, fine textures, and smooth armor curves that would require heavy sanding on other systems. Product designers use resin printing to create presentation prototypes that look close to manufactured parts, helping stakeholders evaluate form, ergonomics, and visual branding. Jewelry makers rely on castable resins to produce intricate patterns that can be invested and cast in precious metals with high fidelity. In dentistry, resin printing supports workflows for study models, aligner models, surgical guides, and temporary appliances, where accuracy and repeatability are essential. Even in engineering contexts, resin prototypes can validate fit and assembly before committing to tooling, especially when small mechanisms, clips, or detailed housings are involved.
Resin printing also supports low-volume production when the part’s geometry or customization makes traditional manufacturing inefficient. Personalized items—custom grips, nameplates with fine lettering, bespoke enclosures, or tailored medical accessories—can be produced quickly with consistent quality. For mold-making, resin prints can serve as masters for silicone molds, enabling short-run casting of urethanes or other materials. Some resins are formulated for high stiffness or heat resistance, allowing limited functional use such as fixtures, alignment tools, or jigs where precision matters more than impact toughness. The value proposition is strongest when the part benefits from high-resolution surfaces and complex shapes, and when the business can standardize the wash-and-cure workflow to ensure consistent properties. In those conditions, an sla 3d printer becomes a practical production asset rather than a hobby tool, delivering repeatable results that reduce iteration time and improve the perceived quality of prototypes and end-use components.
Maintenance and Long-Term Reliability: Keeping a Resin Printer Performing Well
Regular maintenance is essential to keep an sla 3d printer consistent over months and years. The resin vat and its release film should be inspected frequently for clouding, scratches, or punctures, as these defects can cause adhesion problems and failed layers. After each print, it’s wise to filter resin back into its bottle or a clean container if debris or cured fragments might be present, because tiny bits can block light and create defects in future prints. The build platform should be cleaned and checked for cured resin spots that can prevent proper leveling or cause the next print to start unevenly. Z-axis rails and lead screws may require periodic cleaning and lubrication according to the manufacturer’s guidelines, especially in environments where resin fumes and dust can accumulate. Keeping the printer covered when not in use reduces dust contamination and protects resin from stray UV exposure.
Consumables and calibration are part of long-term ownership. LCD screens in MSLA machines degrade with use; symptoms include inconsistent curing, dead pixels, or uneven exposure zones. Planning for eventual replacement avoids downtime. UV LEDs can also age, though typically more slowly, and optics should be kept clean to maintain uniform light distribution. Firmware and slicer updates can improve exposure control and support generation, but changes should be tested with calibration prints before running critical jobs. Environmental control is another reliability lever: stable temperature reduces viscosity swings and improves repeatability. Many users add a small heater or controlled enclosure to keep resin within an optimal range. A disciplined maintenance routine turns an sla 3d printer into a dependable system: fewer random failures, more predictable dimensional results, and less wasted resin. Over time, that consistency is what enables resin printing to scale from occasional prototypes to steady production runs.
Building a Repeatable Process: Calibration, Profiles, and Production Planning
Repeatability is where an sla 3d printer transitions from experimental to professional. Calibration starts with exposure testing for each resin, because different pigments and chemistries cure differently. Creating a resin profile that includes layer thickness, normal exposure, bottom exposure, lift distances, lift speeds, and rest times establishes a baseline. Many operators keep a logbook that records room temperature, resin batch, and changes to settings, which helps identify why a print succeeded or failed. Once exposure is set, dimensional calibration can refine accuracy using test parts that include holes, pins, text, and thin walls. Adjustments like XY compensation and hole expansion can bring printed parts closer to CAD intent. Anti-aliasing and grayscale settings can improve surface smoothness, but they should be tested because they can also soften sharp edges if overused.
Production planning involves batching, orientation strategy, and post-processing throughput. Resin printing can produce many small parts in one run, but packing the build plate too densely can reduce resin flow and increase the risk of failure if suction forces rise. Grouping parts with similar height and support requirements improves success rates. Post-processing capacity is often the bottleneck: washing and curing multiple plates per day requires enough solvent volume, enough curing space, and a workflow that prevents mix-ups between resins. Labeling vats and tools for specific resin types reduces contamination, especially when switching between standard and engineering materials. Quality control can be as simple as measuring critical dimensions, checking fit with mating parts, and visually inspecting for uncured residue or support scars. When these habits are consistent, an sla 3d printer becomes predictable in cost and timing, enabling reliable delivery dates for prototypes or small production orders. That operational maturity is often the difference between occasional impressive prints and a sustainable resin printing capability.
Final Thoughts on Getting the Most from an SLA 3D Printer
An sla 3d printer can deliver exceptional detail, smooth surfaces, and professional-looking parts when the machine, resin, and workflow are treated as a unified system. The strongest results come from matching the resin to the application, calibrating exposure carefully, orienting parts to minimize suction and visible artifacts, and maintaining disciplined washing and curing routines. Safety and ventilation deserve equal priority, because responsible handling protects both the operator and the consistency of the process. With realistic expectations about consumables and post-processing time, resin printing becomes a powerful tool for prototyping, artistic production, dental and jewelry workflows, and short-run manufacturing where appearance and precision matter.
Watch the demonstration video
In this video, you’ll learn the essentials of SLA 3D printing—how resin printers work, what equipment and materials you need, and how to set up and run a successful print. It also covers key settings, common mistakes to avoid, and the post-processing steps (washing and curing) required for clean, accurate results. If you’re looking for sla 3d printer, this is your best choice.
Summary
In summary, “sla 3d printer” is a crucial topic that deserves thoughtful consideration. We hope this article has provided you with a comprehensive understanding to help you make better decisions.
Frequently Asked Questions
What is an SLA 3D printer?
An SLA (stereolithography) 3D printer uses a UV light source (laser or LCD) to cure liquid photopolymer resin layer by layer into a solid part.
What are the main advantages of SLA printing?
SLA printing is known for producing exceptionally fine details, a smooth surface finish, and impressive accuracy—so an **sla 3d printer** is a great choice for miniatures, dental models, jewelry masters, and high-fidelity prototypes.
What are the downsides of SLA printers?
Working with resin on an **sla 3d printer** can get a bit messy: prints typically need support structures, and you’ll still have to wash and UV-cure them afterward. Many resins also tend to be more brittle than other materials, so it’s important to handle both the liquid and finished parts carefully—with good ventilation and proper PPE.
What post-processing is required for SLA prints?
After a print comes off an **sla 3d printer**, the usual workflow is to drain off excess resin, wash the part in IPA or a resin-safe cleaner, remove the supports, let it dry thoroughly, and then UV-cure it to fully harden. If you’re aiming for a flawless surface, a bit of sanding and priming can take the finish to the next level.
How do I choose the right resin for an SLA printer?
Choose a resin that fits your project—whether you need standard, tough, flexible, high-temperature, castable, or dental material—then make sure it’s compatible with your **sla 3d printer** by checking the required light wavelength (most commonly 405 nm). Finally, factor in practical details like color, odor, and how much the resin may shrink during curing.
How do I maintain an SLA printer and improve reliability?
Keep the vat and build plate clean, filter resin after failures, avoid scratching the FEP/PFA film, level the build plate, control temperature, and replace consumables (film, screen, resin) as needed. If you’re looking for sla 3d printer, this is your best choice.
📢 Looking for more info about sla 3d printer? Follow Our Site for updates and tips!

Trusted External Sources
- Buying my first SLA printer – vet my shopping list please? – Reddit
Feb 9, 2026 … I’m looking to get a SLA printer, I currently have an Ender 3 FDM printer and the lack of detail and the ‘faff’ time with it means I don’t print as much as I … If you’re looking for sla 3d printer, this is your best choice.
- Guide to Stereolithography (SLA) 3D Printing – Formlabs
SLA 3D printing creates detailed 3D objects by using a focused light source to cure liquid resin layer by layer. In an **sla 3d printer**, a vat of resin is selectively exposed to light, causing the material to harden precisely where needed until the full part is formed.
- Are SLA printers worth it? : r/3Dprinting – Reddit
Jul 18, 2026 … The form v2 was my first 3D printer. I got really tired of the hassle really quick. It’s been sitting for a couple years now and I’ve been using … If you’re looking for sla 3d printer, this is your best choice.
- FDM vs SLA – 3D Printing Process Breakdown – Markforged
SLA resins generally cost more and produce fewer finished parts per bottle than the filament you’d use in FDM printing. With an **sla 3d printer**, you’ll also typically work with a smaller build volume, so while the detail and surface finish can be outstanding, the tradeoff is higher material cost and less output per run compared with many filament-based machines.
- FDM vs. SLA vs. SLS: 3D Printing Technology Comparison – Formlabs
SLA 3D printers produce parts with smoother surface finishes, tighter tolerances, and higher dimensional accuracy than other 3D printing technologies. These …